
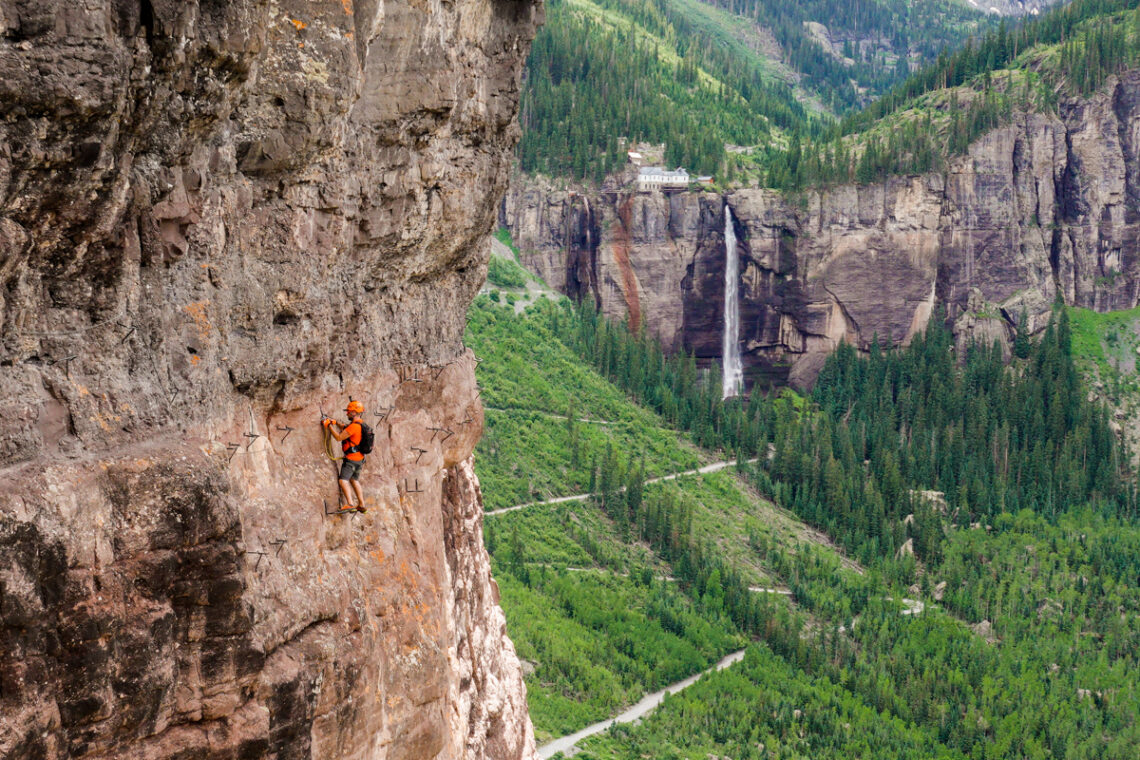
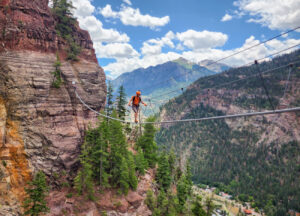
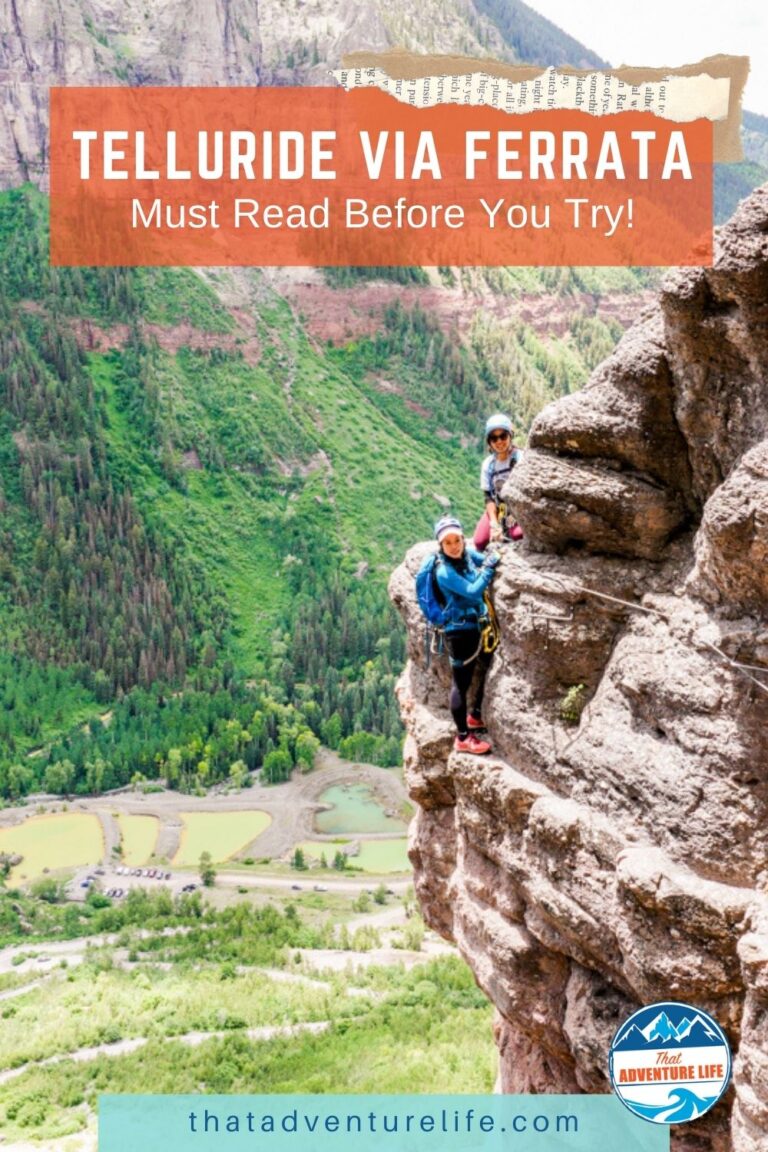
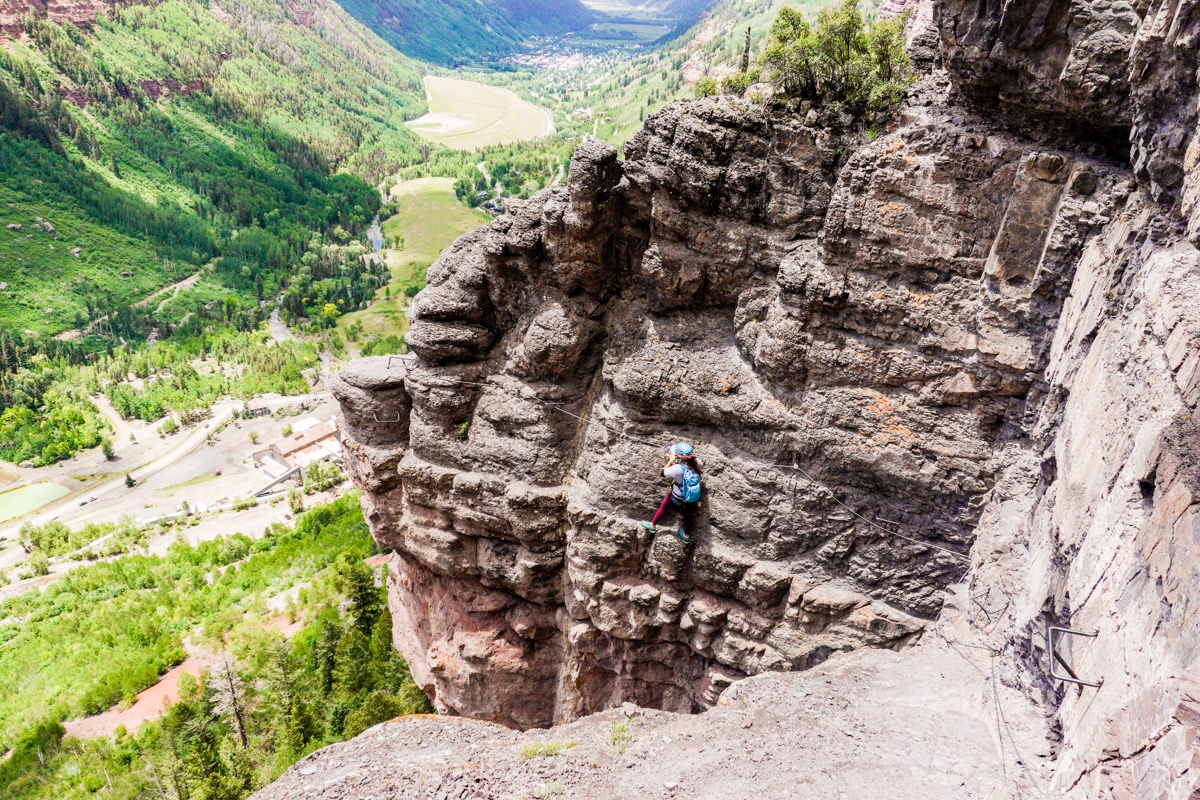
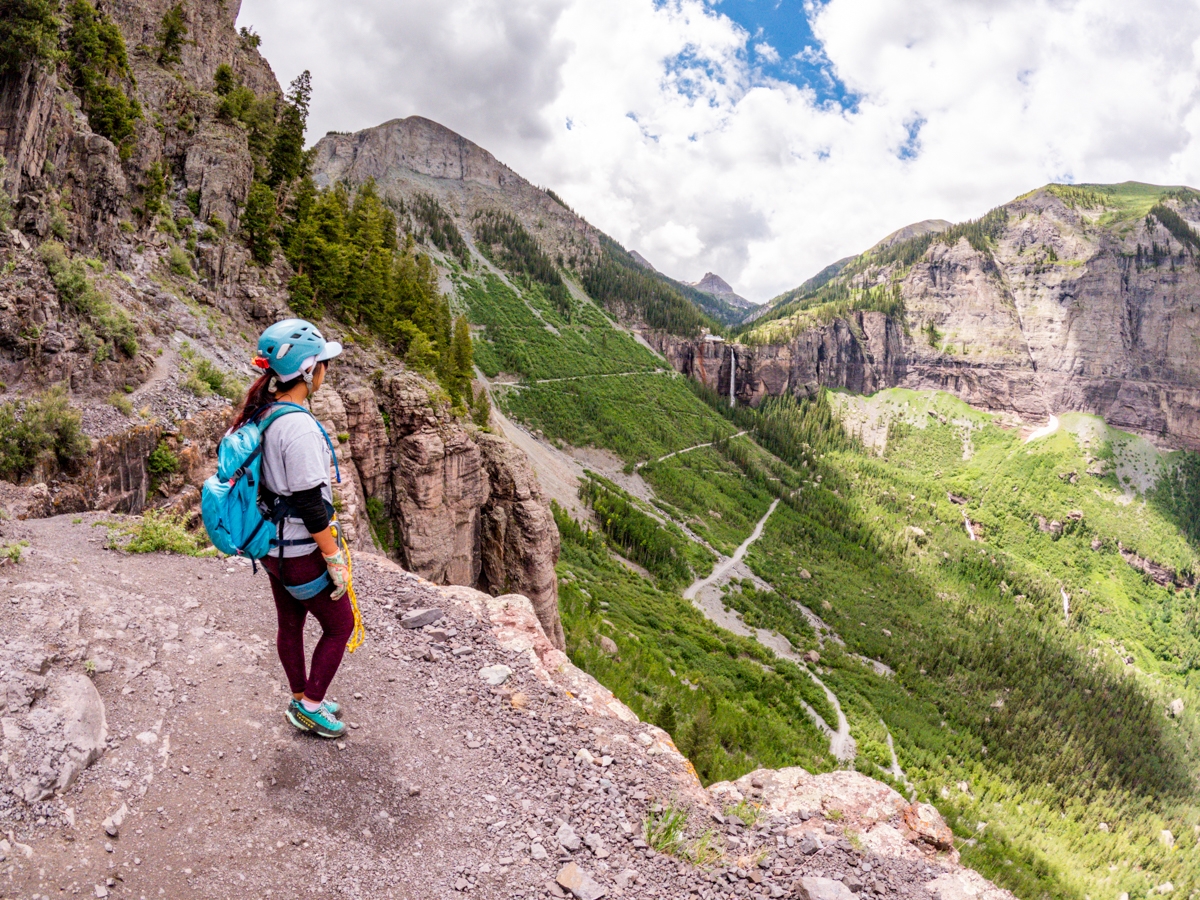
Telluride Via Ferrata in Colorado has been on our bucket list for quite some time. So when our cousin Anh asked if we want to make a trip there, of course, we said yes. Telluride Via Ferrata has to be one of the most exciting and unforgettable adventures. It combines mountain hiking with the traditional Via Ferrata cable system and breathtaking scenery. There is nothing more thrilling than traversing across a sheer cliff, 600ft above ground, with only safety tethers, a steel cable, and metal rungs to support you. Besides the spectacular views, this amazing adventure also challenges your physical and mental fortitude while giving you an incomparable sense of accomplishment.
Warning: Via Ferrata is a dangerous activity. It’s easy to slip and fall if you are not being careful. A slip or fall can cause serious injury or worse. Even though we tried to give you as much info as possible to help you make your decision wisely and keep you safe, we are not responsible for your safety. By getting on Via Ferrata, you are doing so at your own risk.
Stats
Where
Main Parking (Parking at Bridal Veil Trailhead)
Forest Service Rd 648, Telluride, CO 81435
37.928739, -107.776557
The Start of Via Ferrata (Kroger Via Ferrata)
37.923913, -107.767015
Upper Lot Parking (only fit 3 cars)
37.922483, -107.766884
Parking
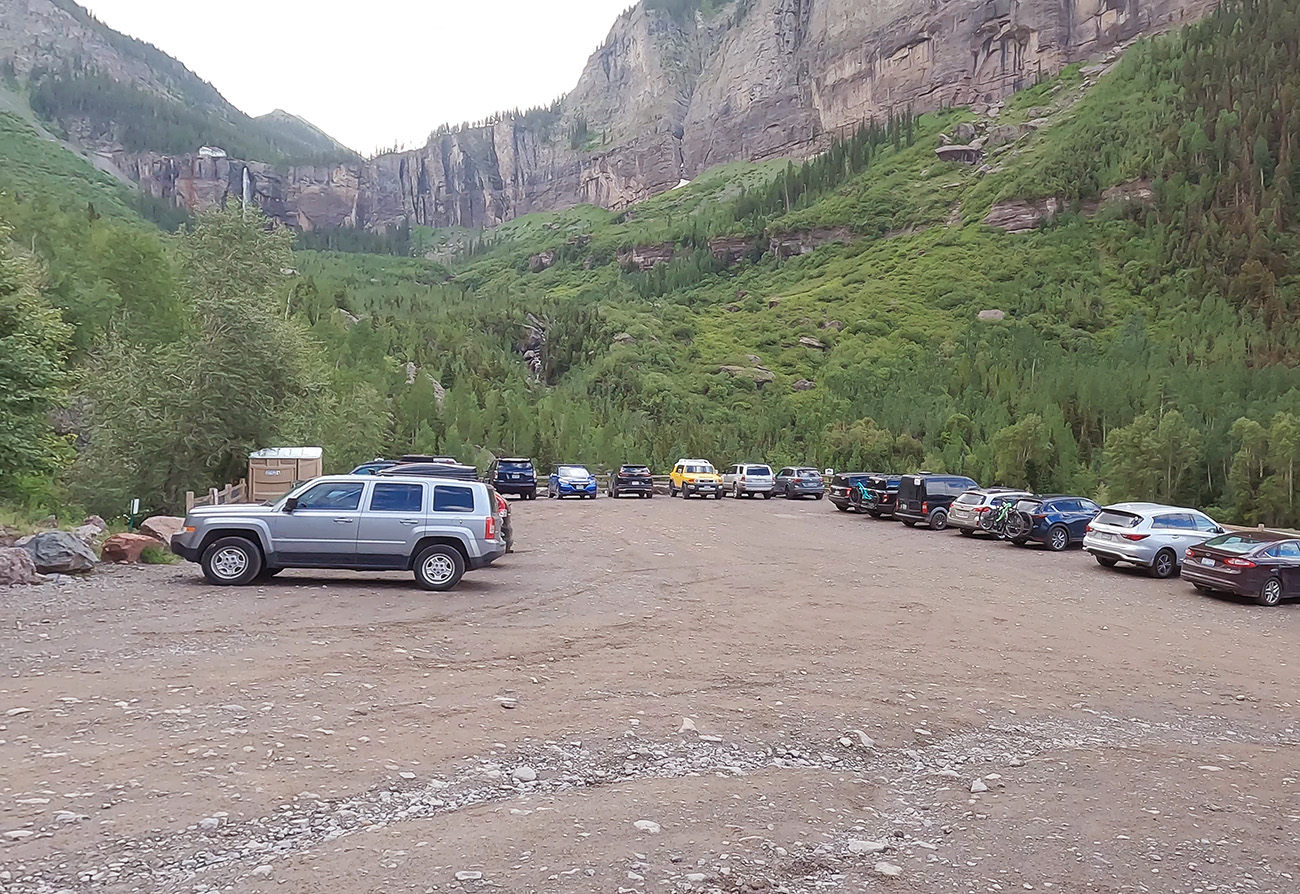
There is a small dirt lot at the beginning of the Bridal Veil Trail. This trail will take you to the start of Telluride Via Ferrata.
Restroom
There are porta-potties at the trailhead parking lot.
Fee
Free if you have all your gear.
Distance
3 miles, 4.5 miles with road walking (round trip).
Elevation Gain
1,243 ft plus about 200 ft additional by starting at the parking lot.
Level
Difficult. You’ll need technical gear.
Time:
3 + hours (depending the size and abilities of your group)
Pet-friendly
Not at all. Please DO NOT bring your pets.
Ideal Time
Spring, Summer, and Fall
Weather
Video
What Is Via Ferrata?
Via Ferrata originated in the Italian mountain range of the Dolomites, which means “Iron Path.” It was created to make difficult-to-climb mountains more accessible. A typical Via Ferrata route is a mix between hiking and climbing and will require technical gear to safely complete the route. On the technical sections, you will need to clip into a series of metal cables that are bolted into the rock, while traversing along the exposed trail using metal rungs, ladders, suspension bridges, and occasionally a natural rock hold. For some trails, you will have to clip in for the entire trail such as Ouray Via Ferrata or Lake Tahoe Via Ferrata. Other Via Ferrata such as Telluride Via Ferrata, you’ll only clip in at the technical sections.
History of Telluride Via Ferrata
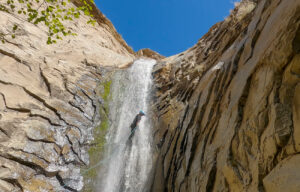
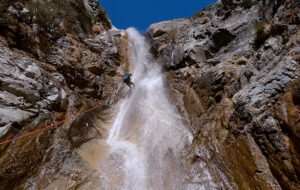
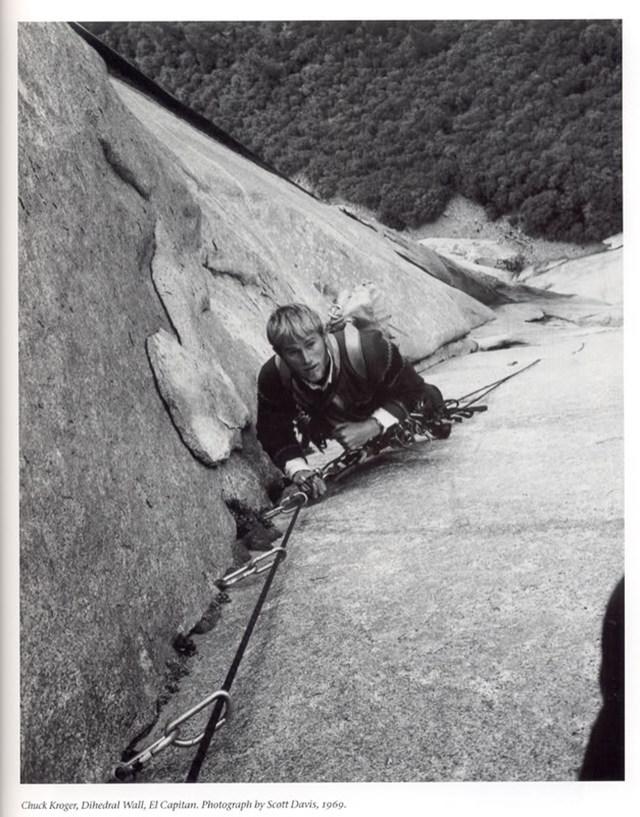
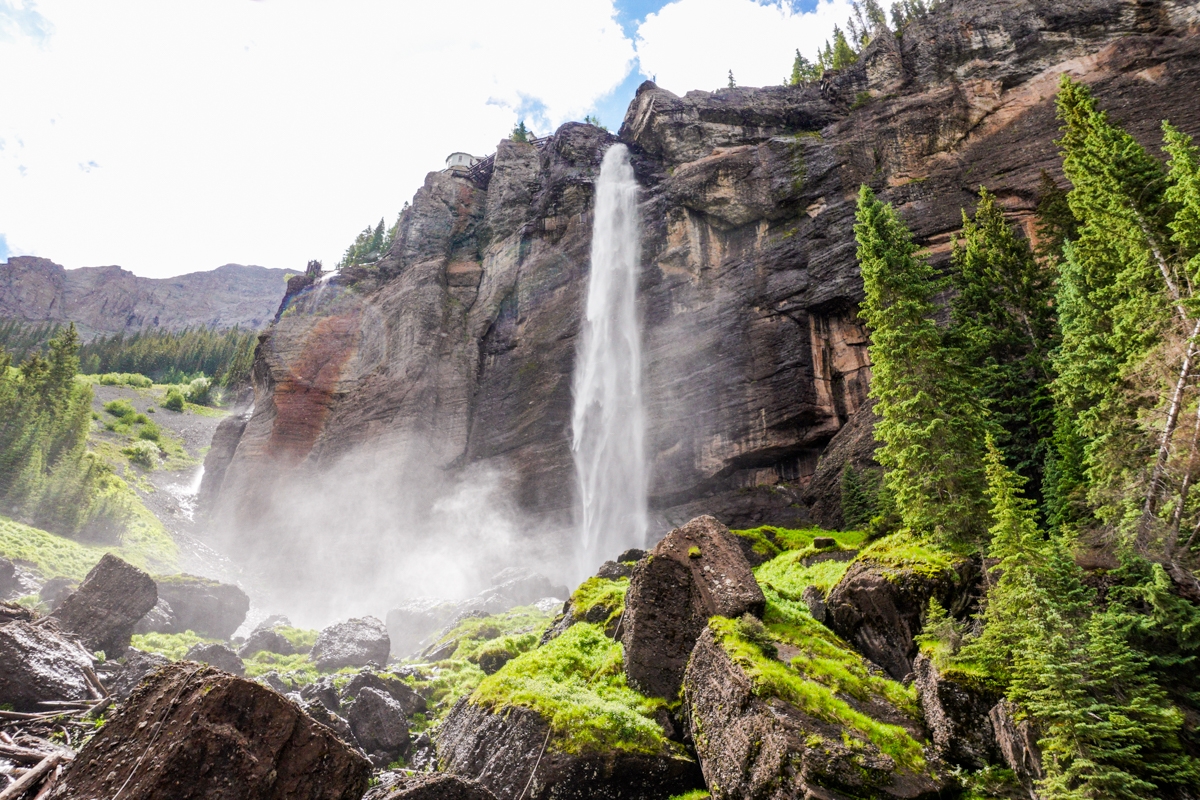
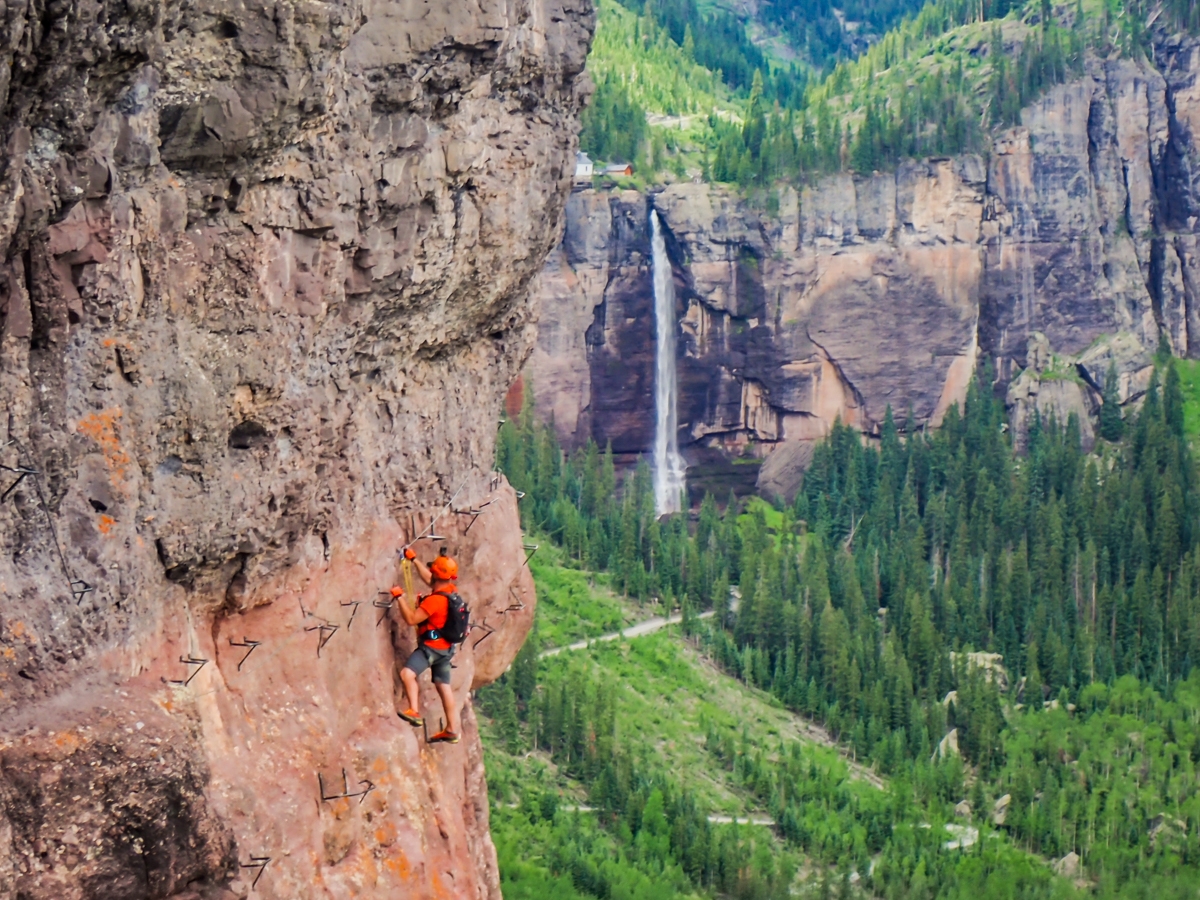
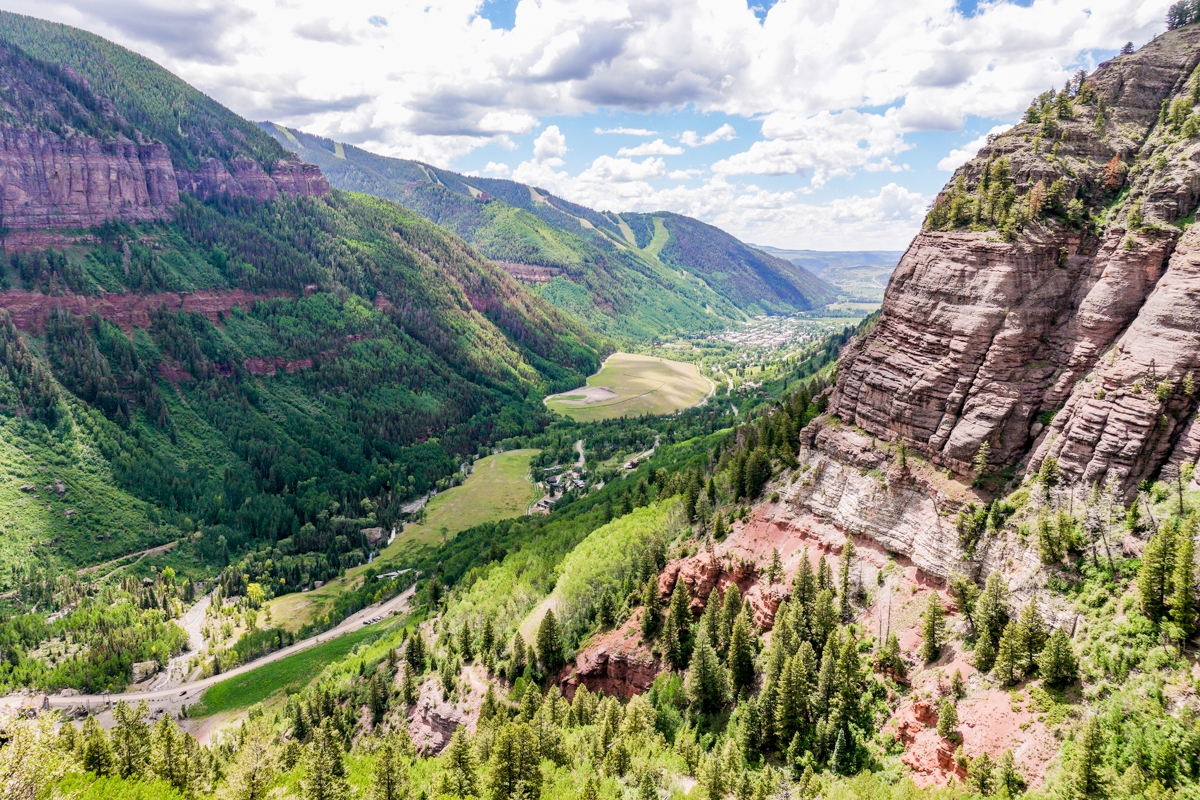
Telluride Via Ferrata’s official name is “Krogeratta.” It is named after its builder, Chuck Kroger. In the 1970s, Chuck Kroger was known as the local climbing legend. He started the building of Telluride’s Via Ferrata in 2006. Unfortunately, he passed away from cancer before he could complete it. However, others took on this awesome project after his death and named Via Ferrata after him. Telluride Via Ferrate sits 500ft above the ground. It gives adventurers wonderful views of the Bridal Veil Falls, the peaks of San Juan Mountain as well as the entire town of Telluride below.
What Do I Need To Know Before Attempting Telluride Via Ferrata?
How Difficult is Telluride Via Ferrata?
Based on the Fletcher/Smith Italian Via Ferrata Rating Scale, Telluride Via Ferrata is rated a 2B. The number rates the technical difficulty from 1 (easiest) to 5 (most difficult). The letter indicates the overall commitment of the undertaking, ranging from A (least commitment), B to C (greatest commitment). For comparison, Ouray Via Ferrata has a 4B rating.
That being said, we felt like Telluride Via Ferrata was more challenging mentally, while Ouray Via Ferrata is more physically demanding. The route can be very difficult for both beginners and experienced climbers. Not only do you have to be physically fit, but you’ll also have to be comfortable on steep, exposed terrain and not afraid of heights. It was especially challenging to take that first step on the Main Event. I’m not gonna lie, when I looked around the corner and realized that we had to traverse on crooked metal rungs, 600ft above ground, along a vertical cliff, I had a bit of a panic attack. So, it’s okay to be scared, however, you’ll need to be able to overcome your fear of heights and not freeze up on the route.
Note: After a certain point, you cannot turn around. There should be signs at this point so warn you. So, make your decision carefully before continuing.
What Kind of Experience Do I Need?
Well, this depends. If you’re attempting Telluride Via Ferrata on your own, you’ll need to be an experienced climber and adventurer. It is best if you have some solid rock climbing experience. For our group, most of us are canyoneers and rock climbers so we were comfortable going without a guide. If you want to go on your own, you need to at least:
- Have many scrambling experiences and dealt with exposure or steep drops right next to you before.
- Understand fall factors and know how to mitigate them
- Understand the concept of redundancy
- Have proper safety gear
- Know how to handle pressure and not freeze up on a challenging route.
Do I Need a Guide for Telluride Via Ferrata?
As we stated above, if you have experience in rock climbing, or canyoneering, or going with someone who knows what they’re doing, you won’t need a guide. However, if you are not comfortable with any of the above lists, then you should think about hiring a guide for Telluride Via Ferrata. With a guide, not only you can learn how to do things properly, but you can attempt this wonderful adventure safely. There are many tour companies such as Mountain Trip, San Juan Mountain Guides, and San Juan Outdoor Adventures. Since we went on our own, we didn’t use any of these companies, however, we heard good things about them.
That being said, Telluride Via Ferrata is considered a beginner Via Ferrata since it traverses horizontally and without much fall factor risk, except for a few main spots. Therefore, it’s doable if you know what you’re doing and understand how your movement could affect the danger of a fall.
How Much Does Telluride Via Ferrata Cost?
It is completely free to do the Telluride Via Ferrata if you have all your gear and choose to do it on your own. If you prefer to hire a guide or need to either rent or purchase your equipment, the cost varies depending on what you need, what tour company you go with and how many people are in your group. Now, if you want to help with the maintenance of the route, you can donate to the Telluride’s Via Ferrata Sustainability Fund.
When Is the Best Time to Go?
Spring, Summer, and Fall are the best time of the year to do Telluride Via Ferrata. Before you go, always make sure to check the weather forecast for rain, thunderstorms, snow, or other nasty weather. This is because there are no escape options once you are on the route. In the summer, Telluride usually has rain in the afternoon from early July through mid-August. In the spring, if there’s still snow above the route, make sure to keep an eye out for avalanches and their danger.
What Gear Do I Need?
Specialized Gear
To do Telluride Via Ferrata safely, there are a few pieces of specialized gear that are a must:
- Climbing specific helmet – we use Black Diamond Half Dome helmet. You can get them at either Amazon or REI.
- Climbing harness – You can get them at REI depending on your size and preference. Dustin has the Black Diamond’s Momentum Rock Harness. Vy uses Petzl Luna Harness.
- Via Ferrata specific lanyard with shock absorbing such as the CAMP Kinetic. However, you can also make your own. Because it is mostly horizontal, Telluride Via Ferrata is one of only a few Via Ferratas in the world where you can get away without a Via Ferrata-specific tether.
- (If you make your own, you must use dynamic or stretchy thick rope that’s rated for climbing. You will need two tethers, each long enough to reach at least 6ft from the ground, and a locking HMS carabiner on each end. Please only attempt to make this only if you know how to tie proper knots.)
- 3 locking carabiners, HMS, and auto-locking preferred.
Other Gear
- Hiking shoes or approach shoes with great traction. We don’t recommend boots since they are a little clunky for climbing. We love our La Sportiva TX3 approach shoes!
- Water and Snacks
- First aid kit
- Sunscreen and Hat –
- Gloves – You can use garden or utility gloves for this.
- Headlamp – Just in case you got caught in the dark
- Rain Gear – The weather can change abruptly.
- Small hiking bag – you’ll want something that can carry your gear, yet is small enough that it doesn’t become an obstacle when you’re climbing or maneuvering.
If you don’t have proper gear or climbing experience, we recommend hiring a guide. The guide will provide all the proper equipment and keep you safe on your adventures.
Best Practices
Before you start your adventure, there are a few safety tips and best practices that you should know:
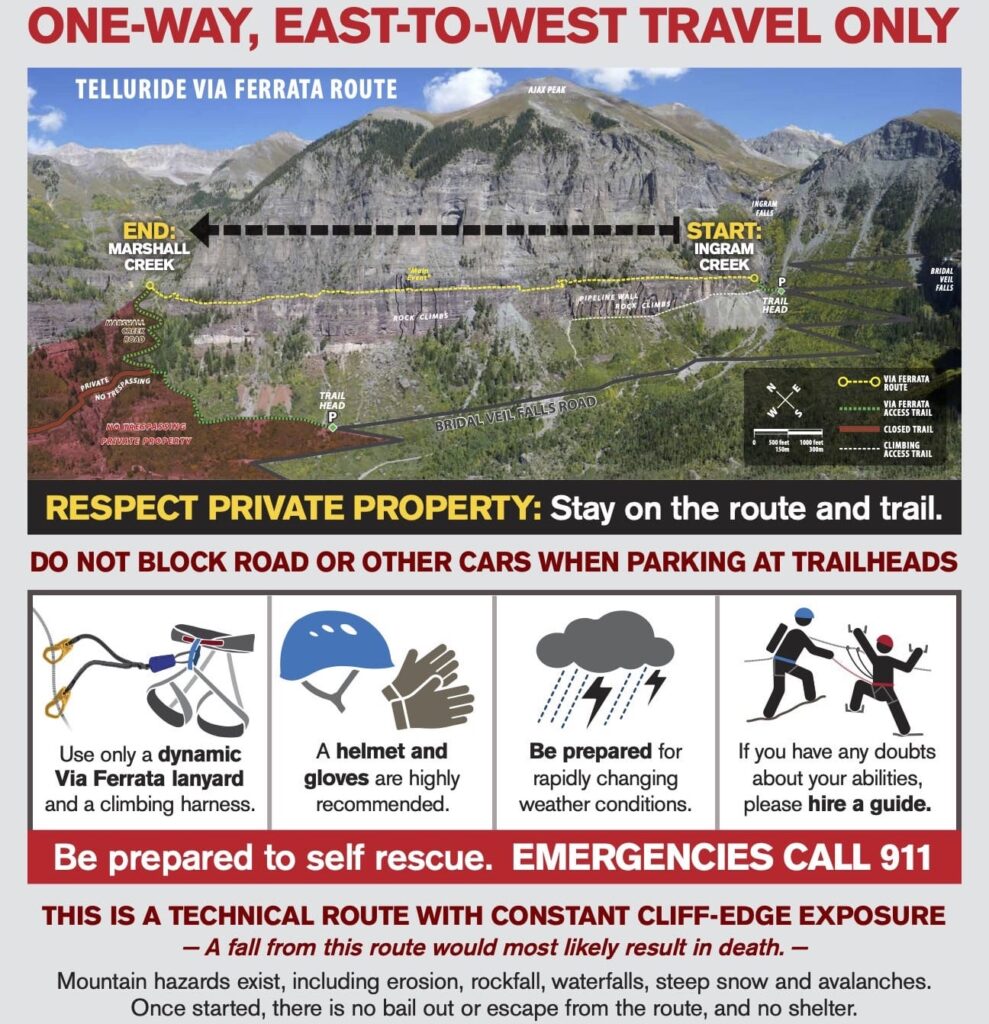
- It is preferable that you start your Telluride Via Ferrata route east to west. This means hiking up the Bridal Veil Trail and Bridal Veil Road. This will keep adventurers going in one direction, making it easy for everyone so that you don’t have to pass one another on the dangerous section.
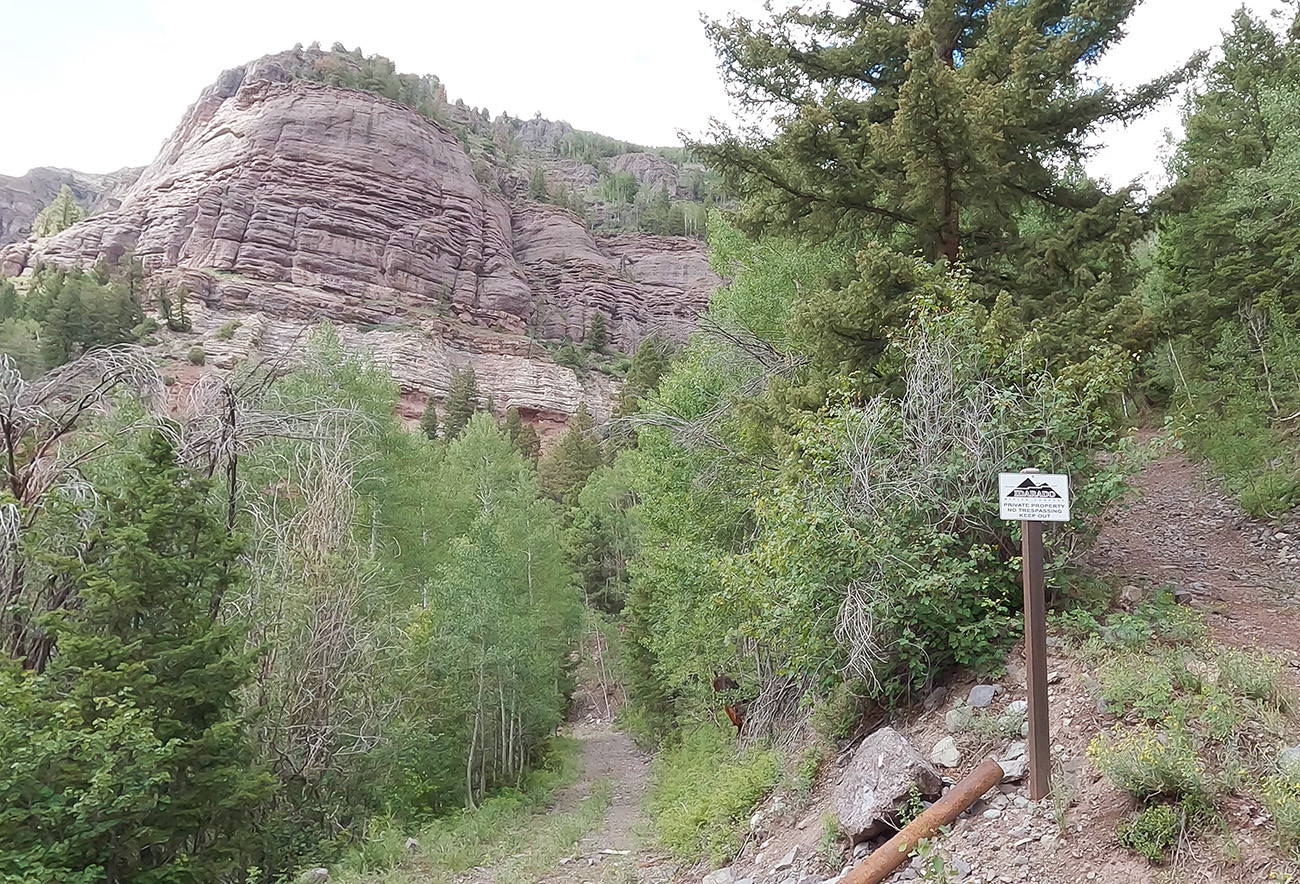
- Please make sure to respect private property on the west end of the Via Ferrata.
- If you encounter another group on your route, let the group with the fewest people go through first. Once you reach the main event, make sure to look around the edges before starting. This is to ensure that there aren’t any other groups going in the opposite direction to yours. If there are, you might need to wait to let them pass.
- Try not to knock rocks off the trail. Since the route is directly above popular rock climbing routes below, you don’t want to hurt someone. If you inadvertently kick some loose rock, make sure to yell “Rock!” to warn climbers below.
- Always wear a helmet!
- Go with someone experienced or hire a guide.
- Watch the weather before going. Since there are no escape options on this route, you won’t want to get caught in a thunderstorm, rain, snow, or hail.
- Make sure to let someone you trust know where you’re going and when you plan to return.
Safety Tips and How-to For Via Ferrata Beginners
- Always clip into the cable when it is available – This is very important. The cable is bolted at intervals. When you reach a bolt, you unclip one carabiner first to place it on the next wire. After the first carabiner is securely clipped in, then undo the second carabiner and move it next to the first one. If you don’t use auto-locking carabiners, make sure to lock them. You always need to have at least one lanyard (or tether) clip into the cable at all times.
- Clip in as far forward as you can – This is especially important for vertical traverse. The bolts are there to stop you from sliding all the way back down the cable if you fall off. Therefore, it is best practice to clip in as far forward as you can, even above the next bolt if you can reach it. This will help you break your fall early. If you slip near the top of a wire, you will fall the length of the wire before your Via Ferrata safety lanyard works. This could be a very big fall factor.
- Don’t make big lunges, always take small but steady steps.
- Use your legs! Use your legs to do all the heavy pushing and use your arms and hands only for balance.
The Adventure
Where Do I Park?
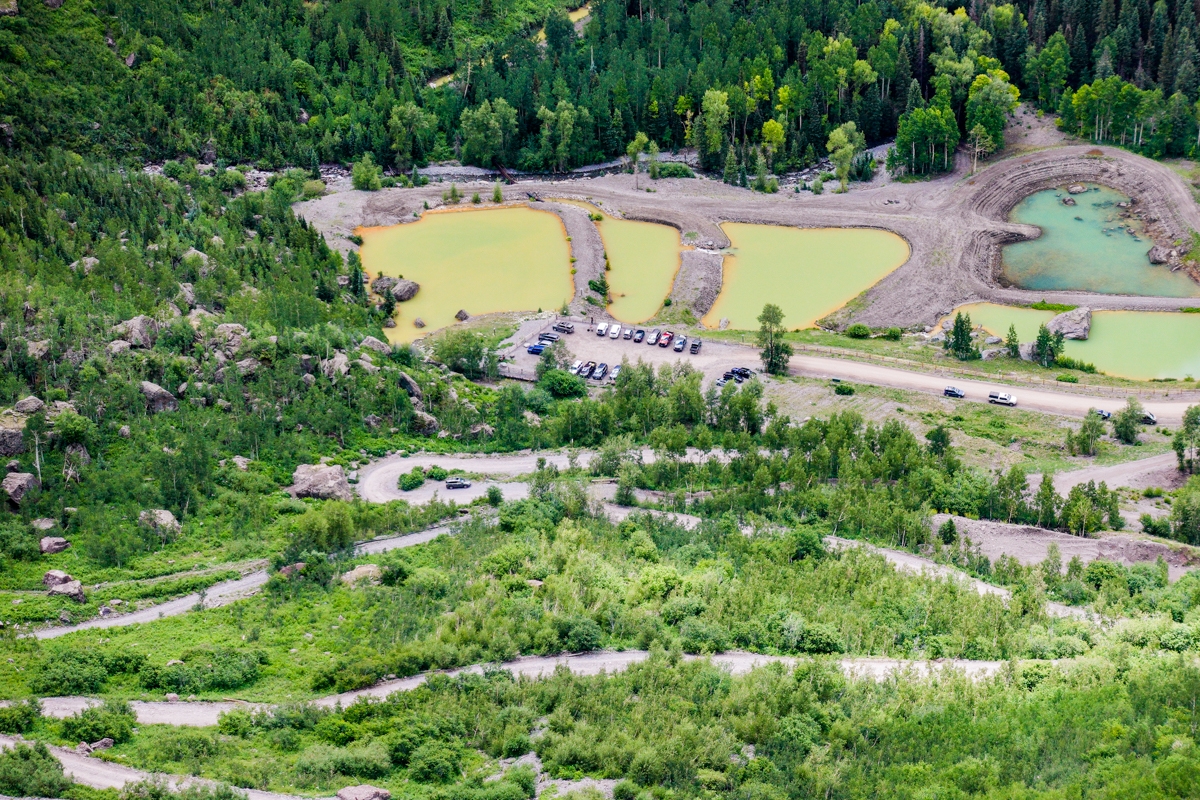
The main parking lot for Telluride Via Ferrata is at the Bridal Veil Falls trailhead. This dirt lot is not that big so it can get very busy, especially during the summer. Therefore, get there early to get your spot. You can also continue up the dirt road at the end of the lot (Black Bear Pass) to park right at the bottom of the start of the Via Ferrata. Keep in mind, the road can be rough for a sedan and there are only about 3 parking spots. Also, unless you have 2 cars to shuttle, you’ll still have to hike up to get back to your car since this is a loop.
Getting to the Telluride Via Ferrata Trailhead
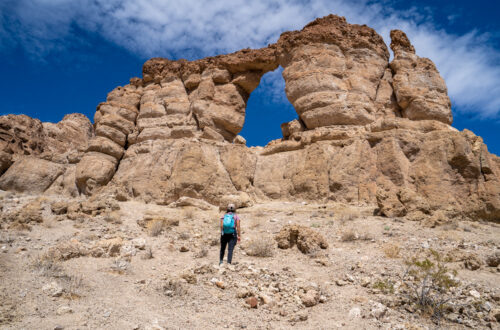
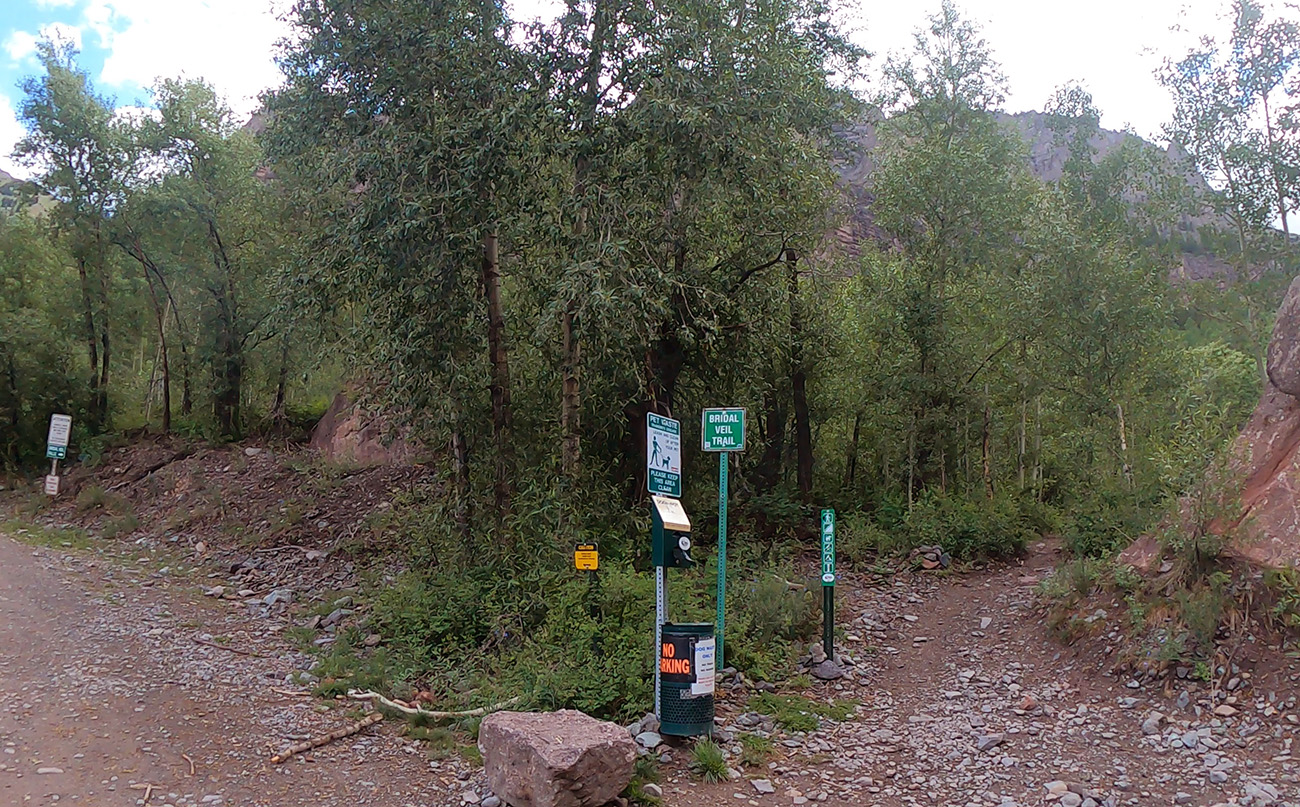
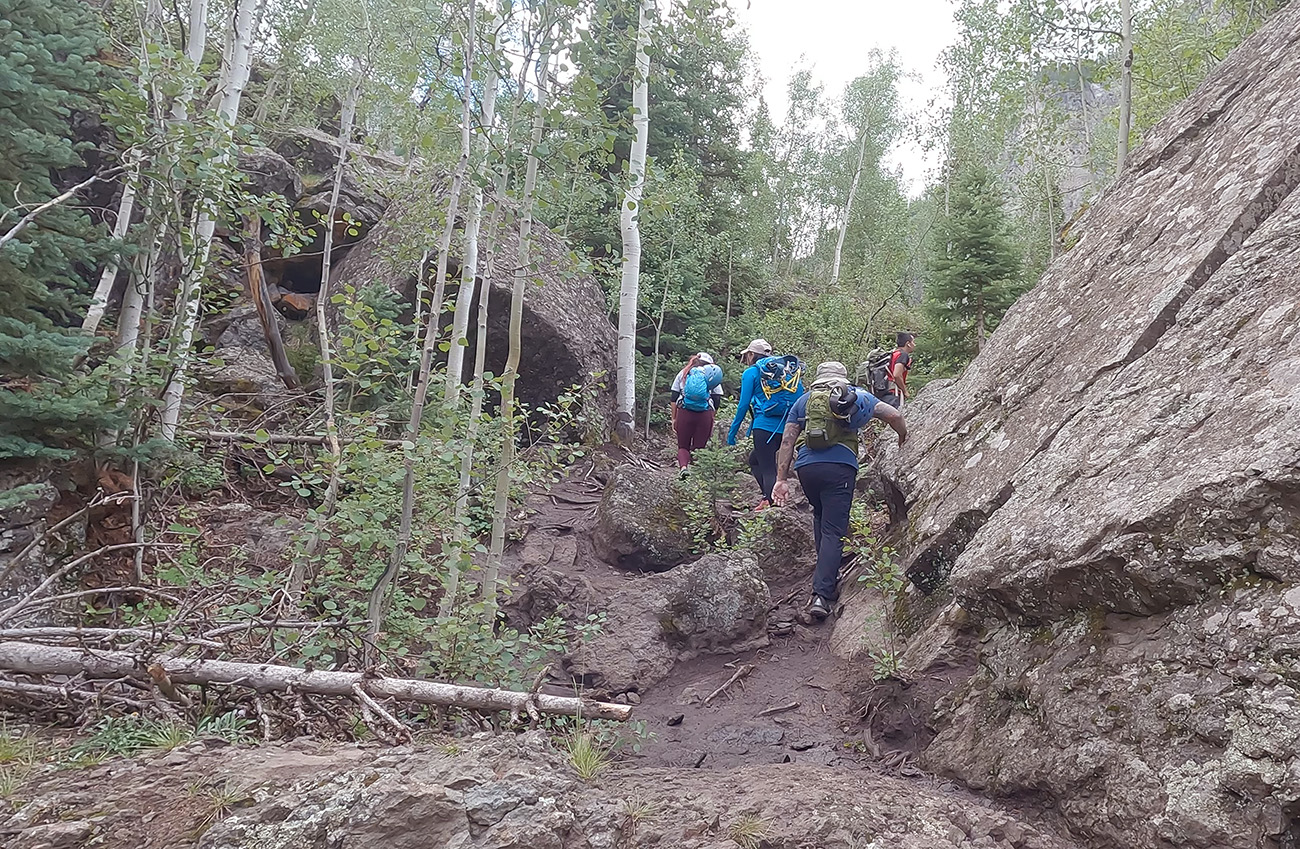
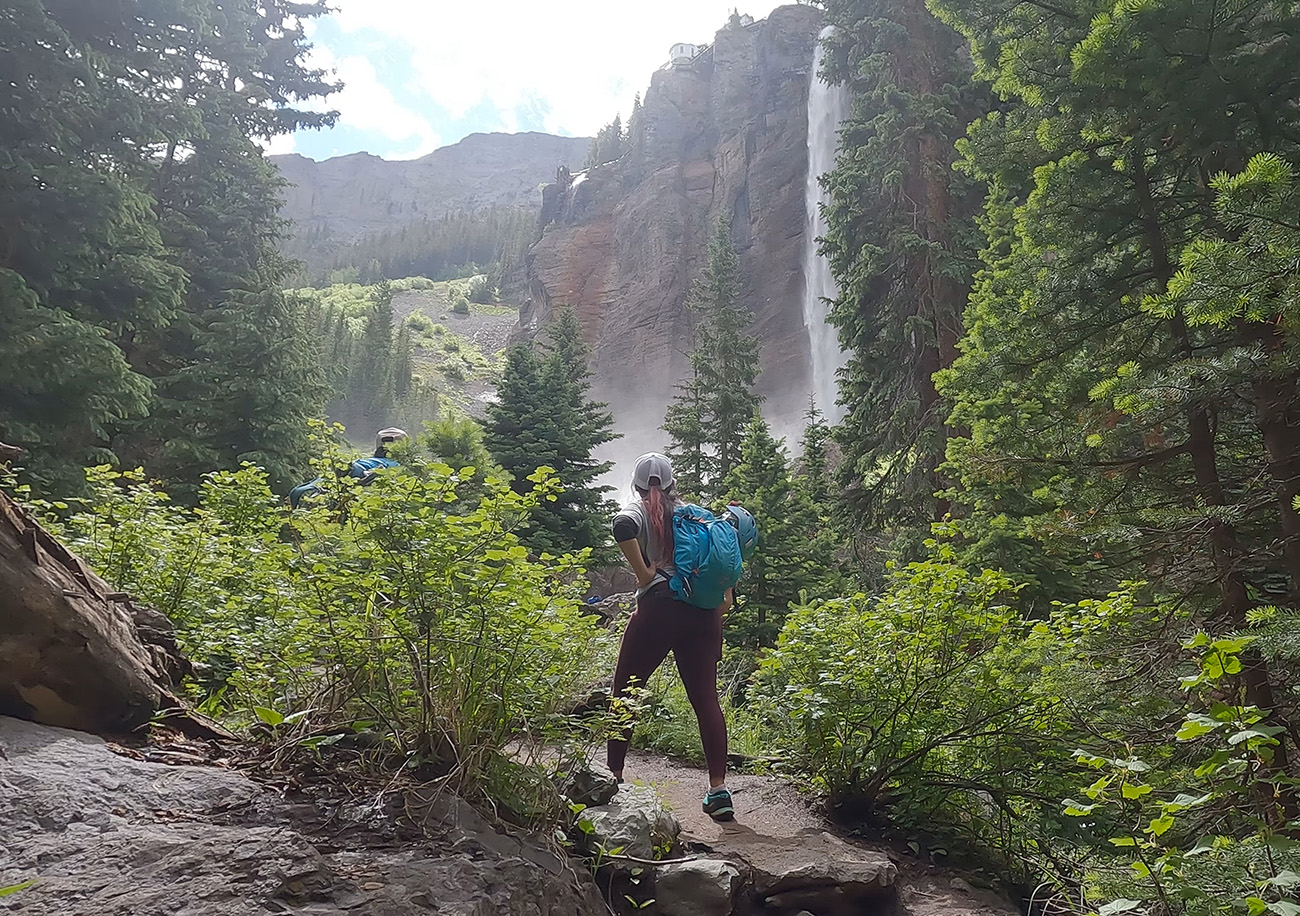
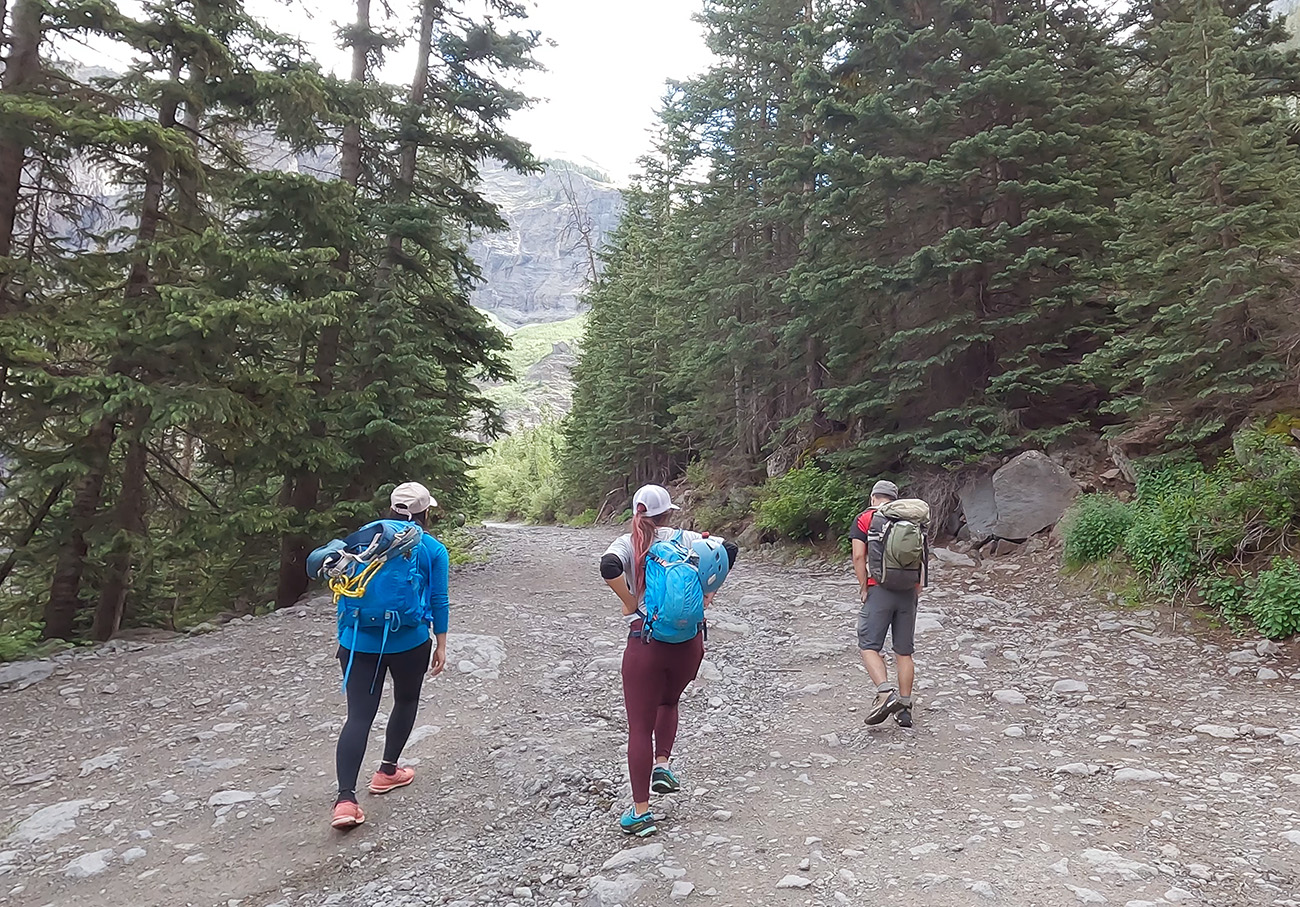
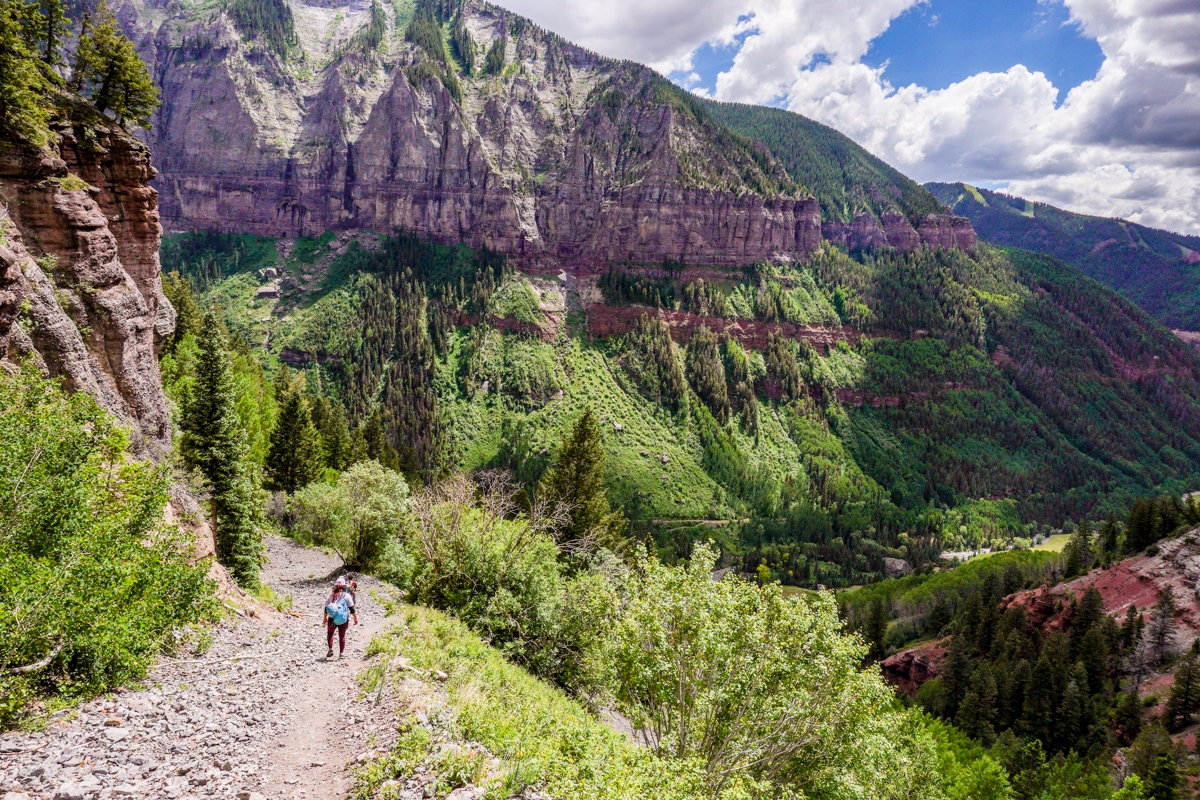
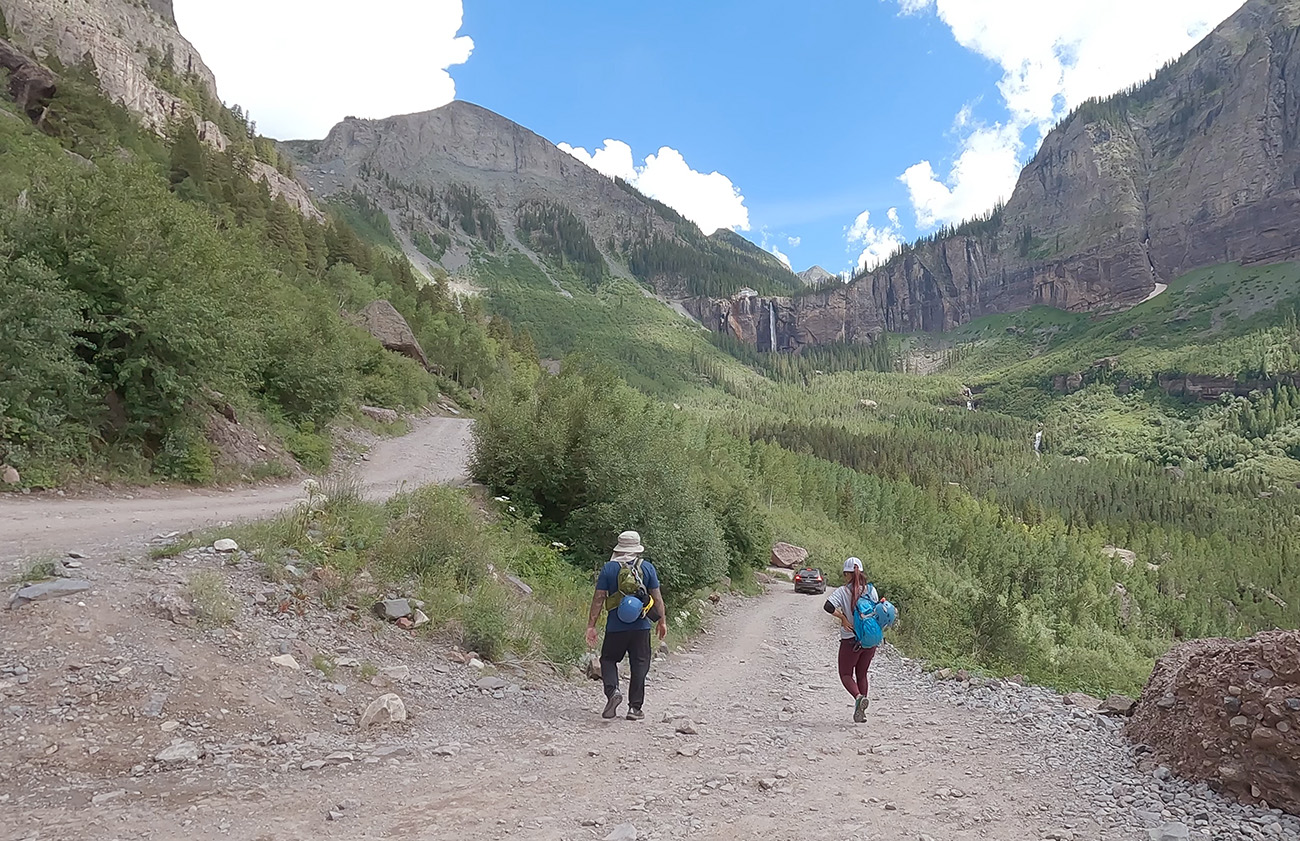
Our group got to the parking lot at the Bridal Veil Falls trailhead quite early enough to snag a spot, but we could see how quickly the parking lot fill up. After parking, we decided to do the scenic route and use the Bridal Veil Trail to get to the start of the Via Ferrata. The Bridal Veil Trail route is about 1.75 miles before getting to the Via Ferrata. It is rocky and can be slippery. If you prefer an easier route, you can walk the dirt road instead. Either way, once you get to the obvious waterfall basin, you’ll want to go left and continue up the road until the next switchback.
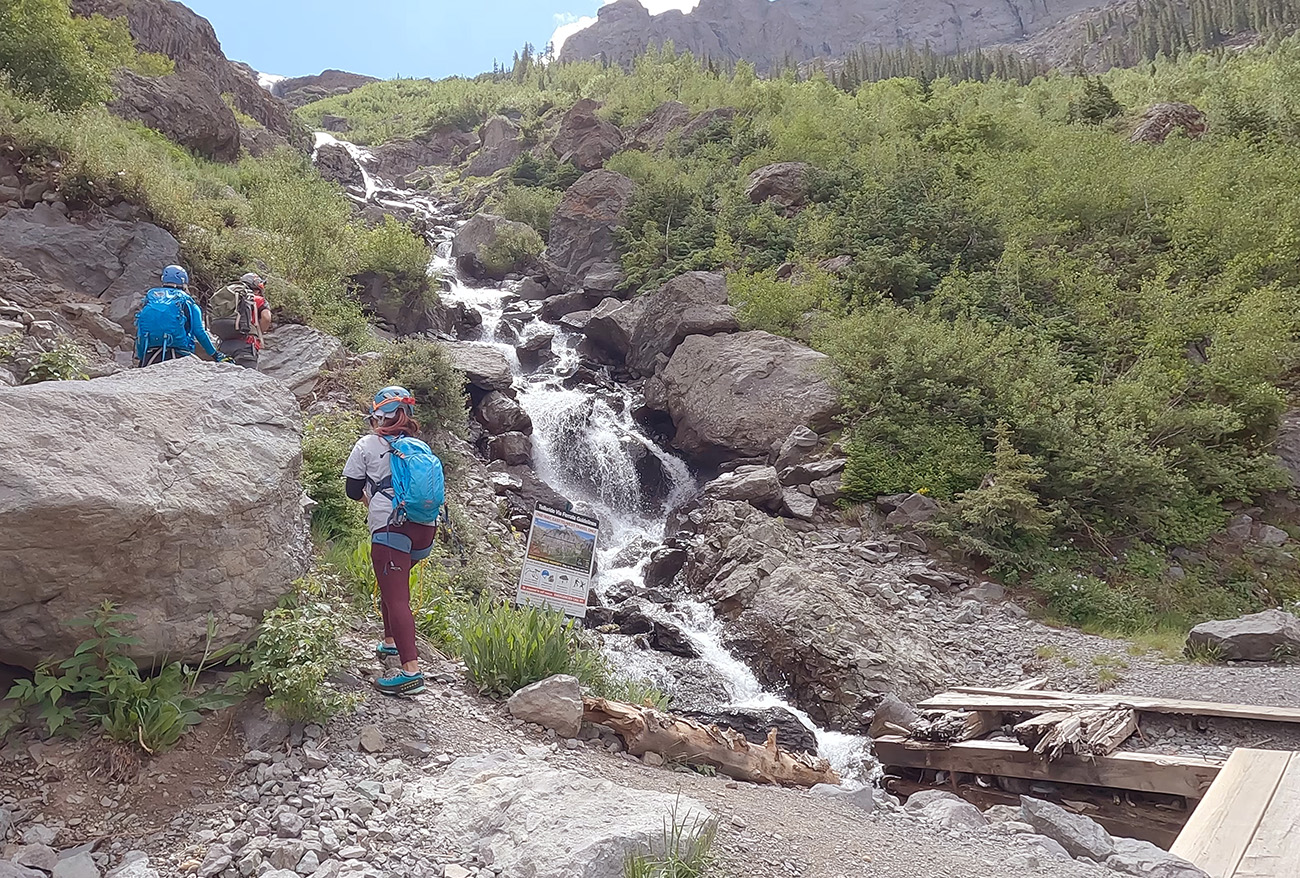
At this point, you’ll want to go toward the mountain and follow a used trail to climb over a small rocky hill to a wooden makeshift bridge that crosses over a flowing creek. As soon as you cross the bridge, there will be a sign for the start of Telluride Via Ferrata. This is also where you’ll want to put your gear on.
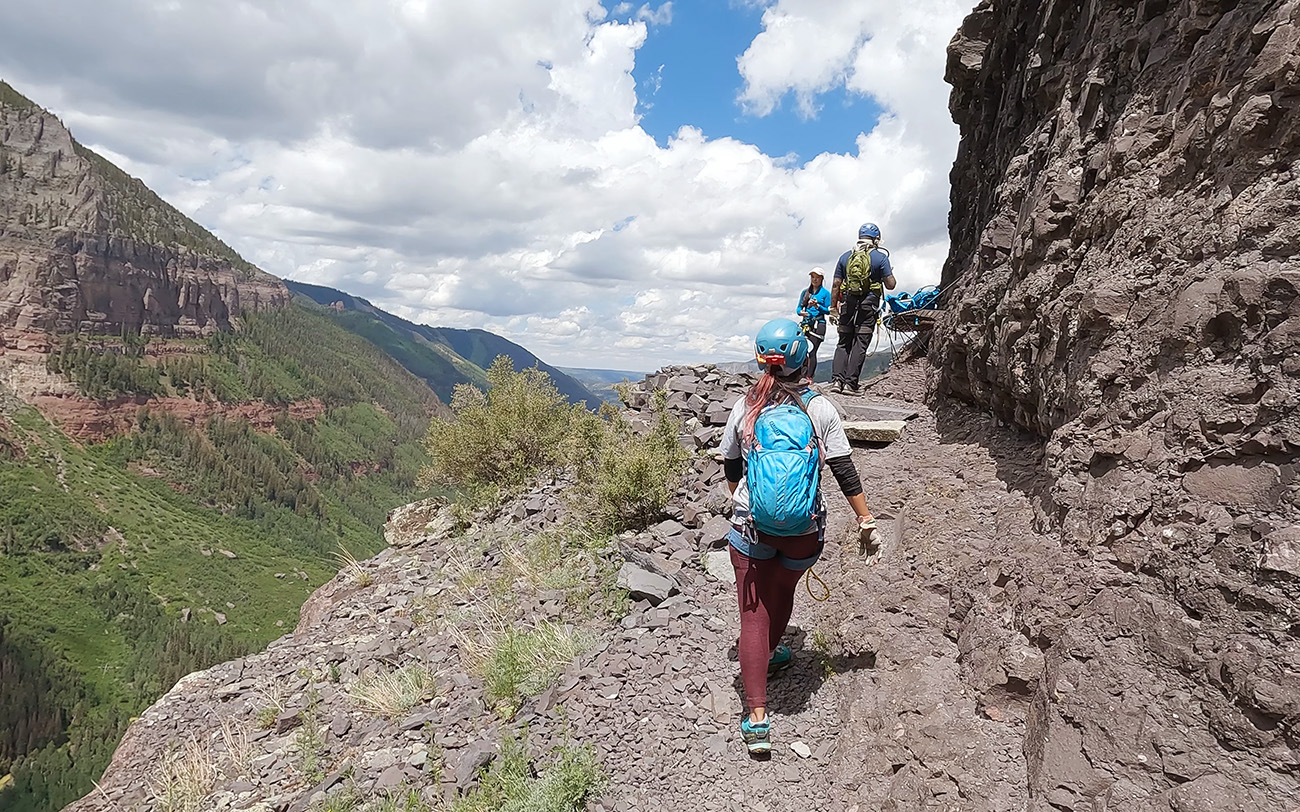
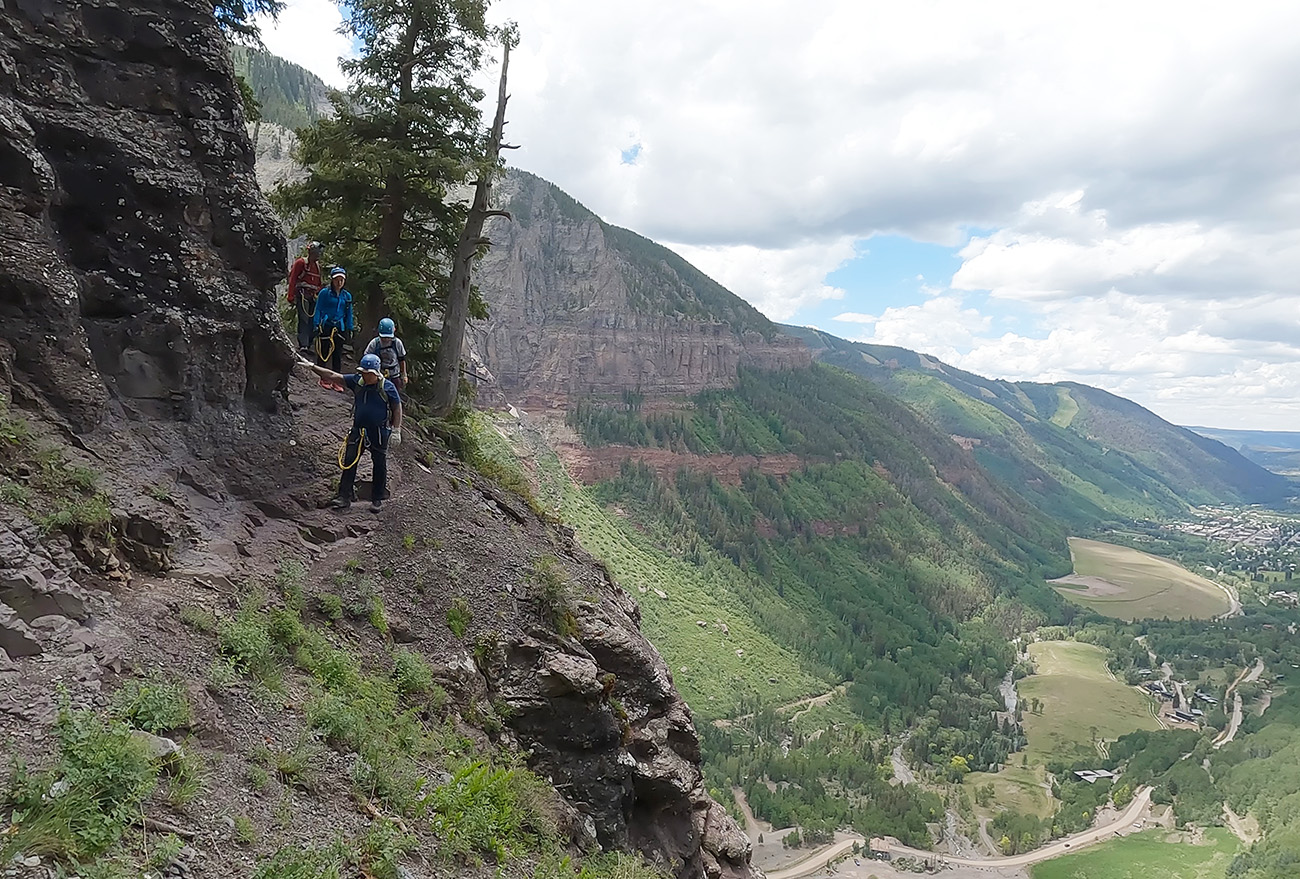
The Start of Telluride Via Ferrata
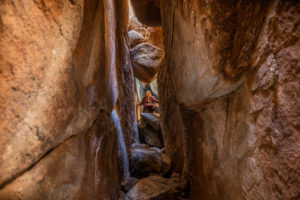
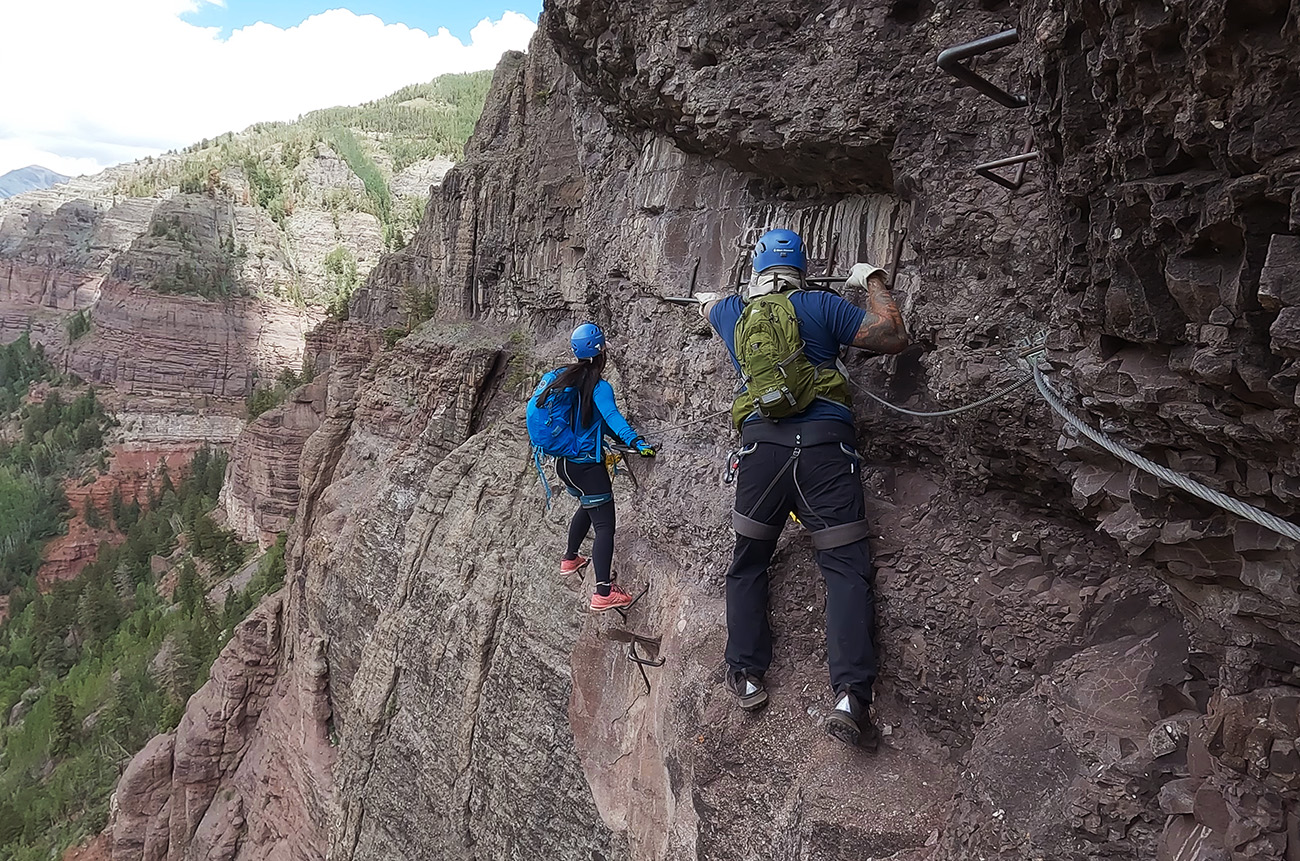
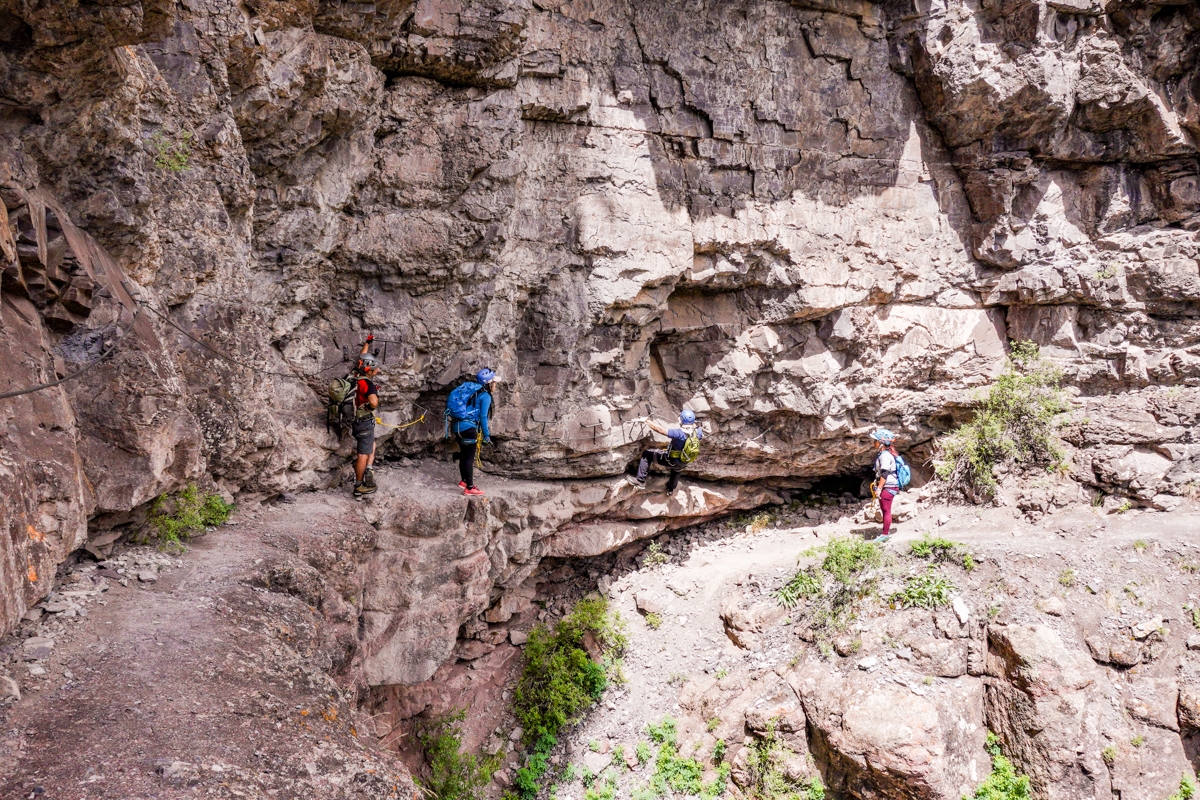
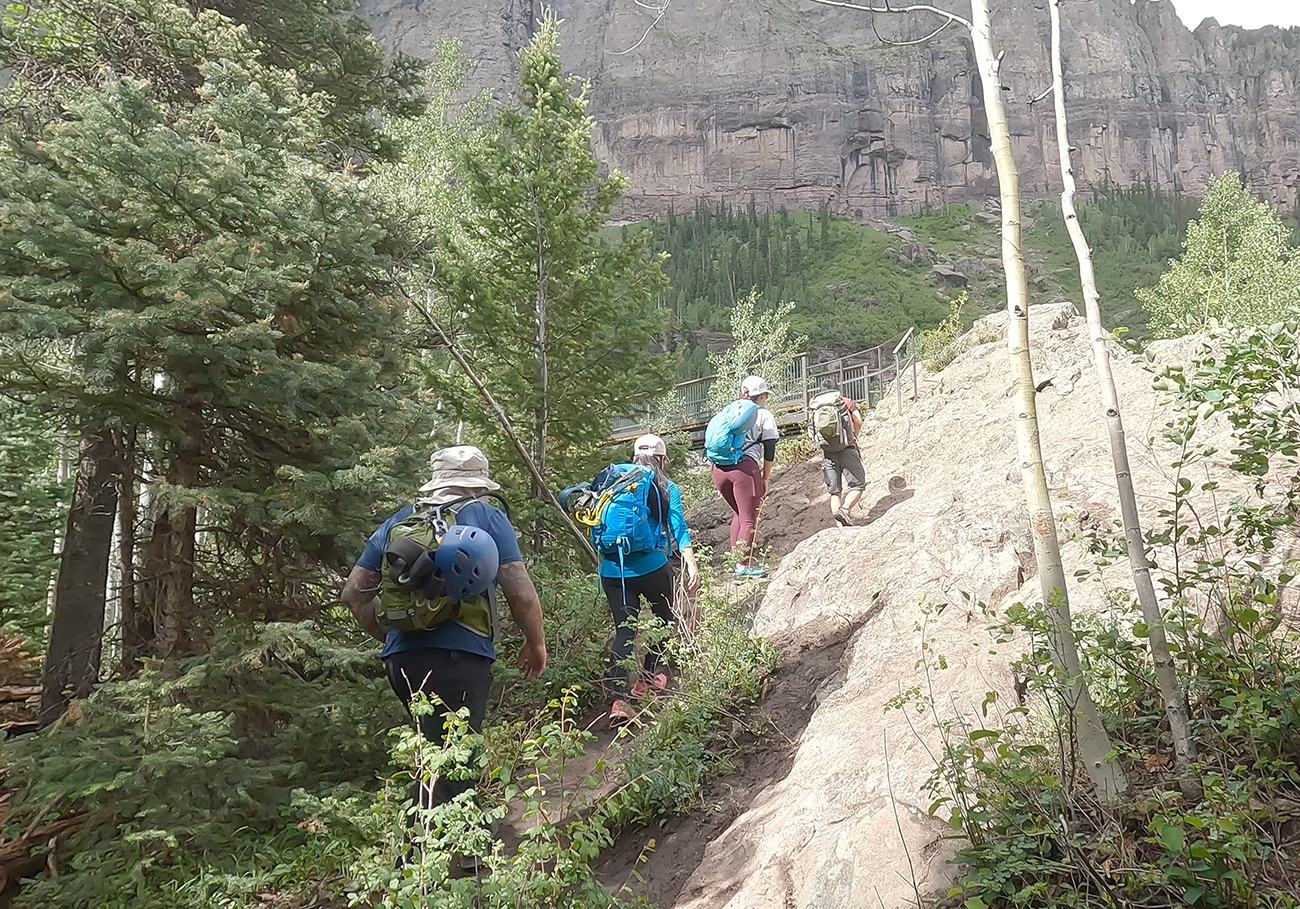
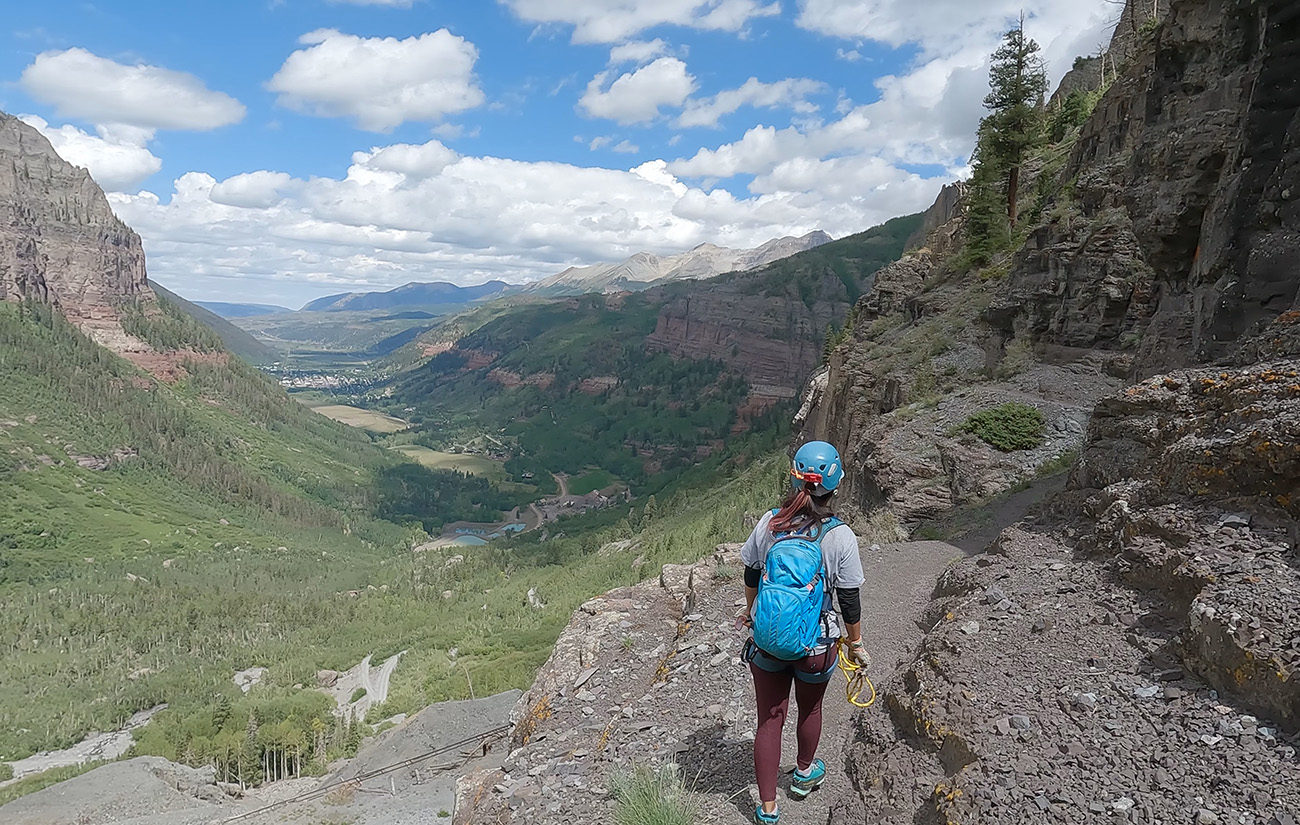
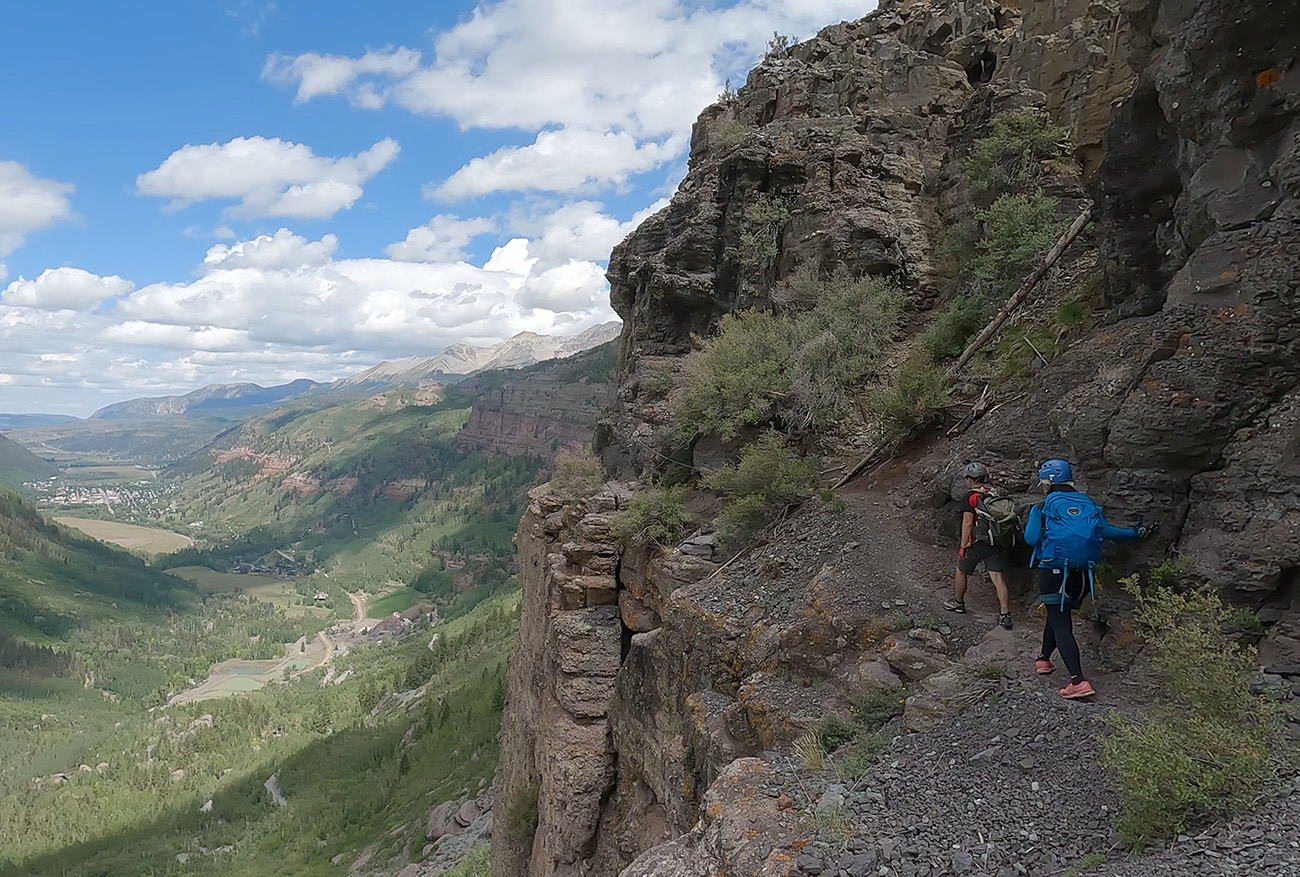
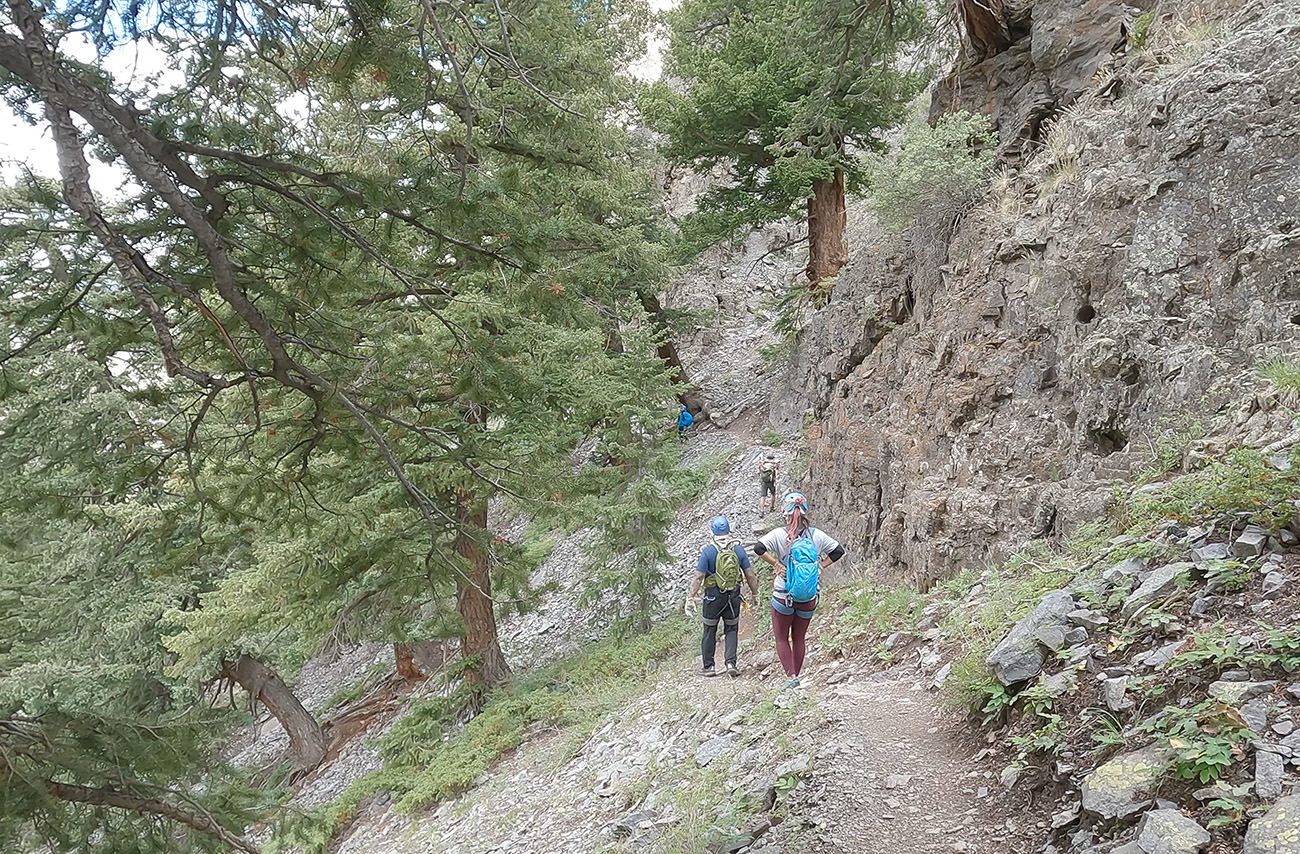
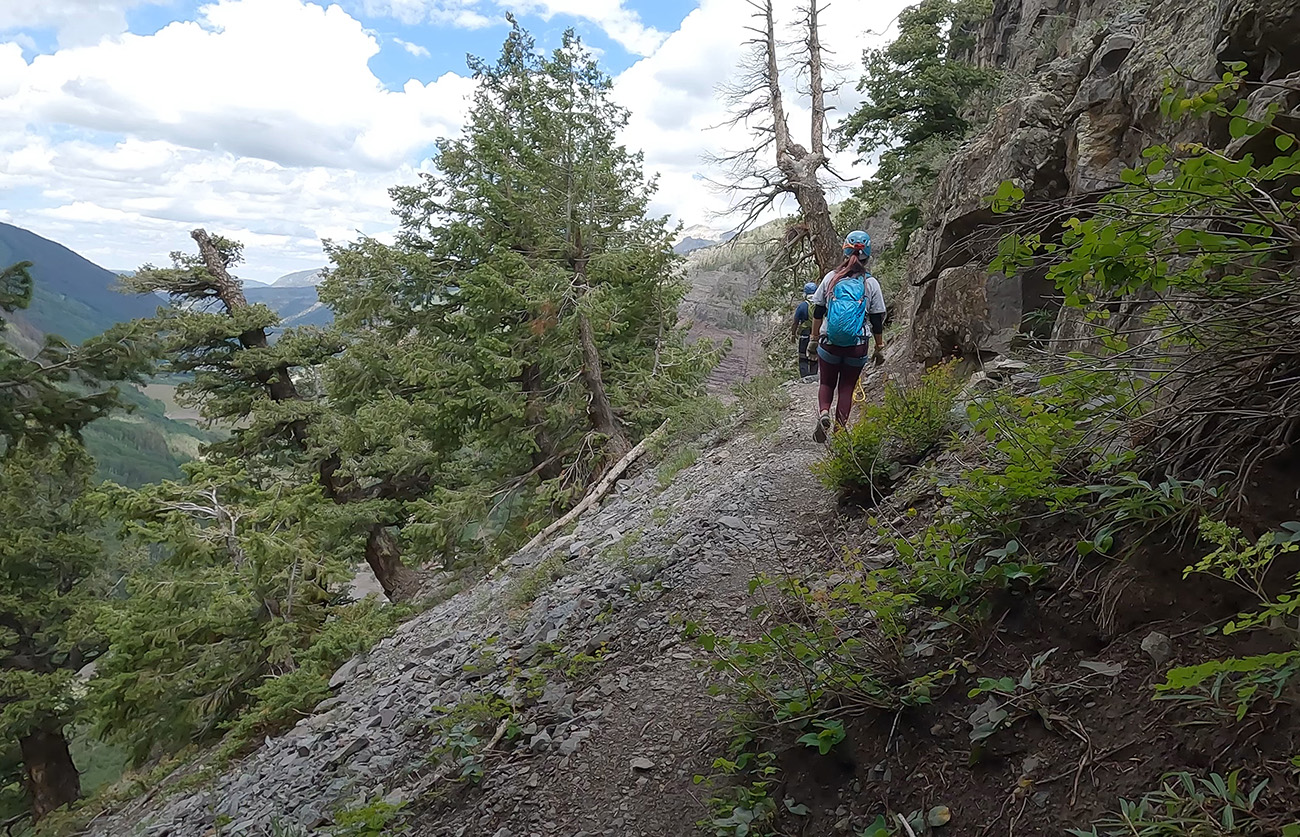
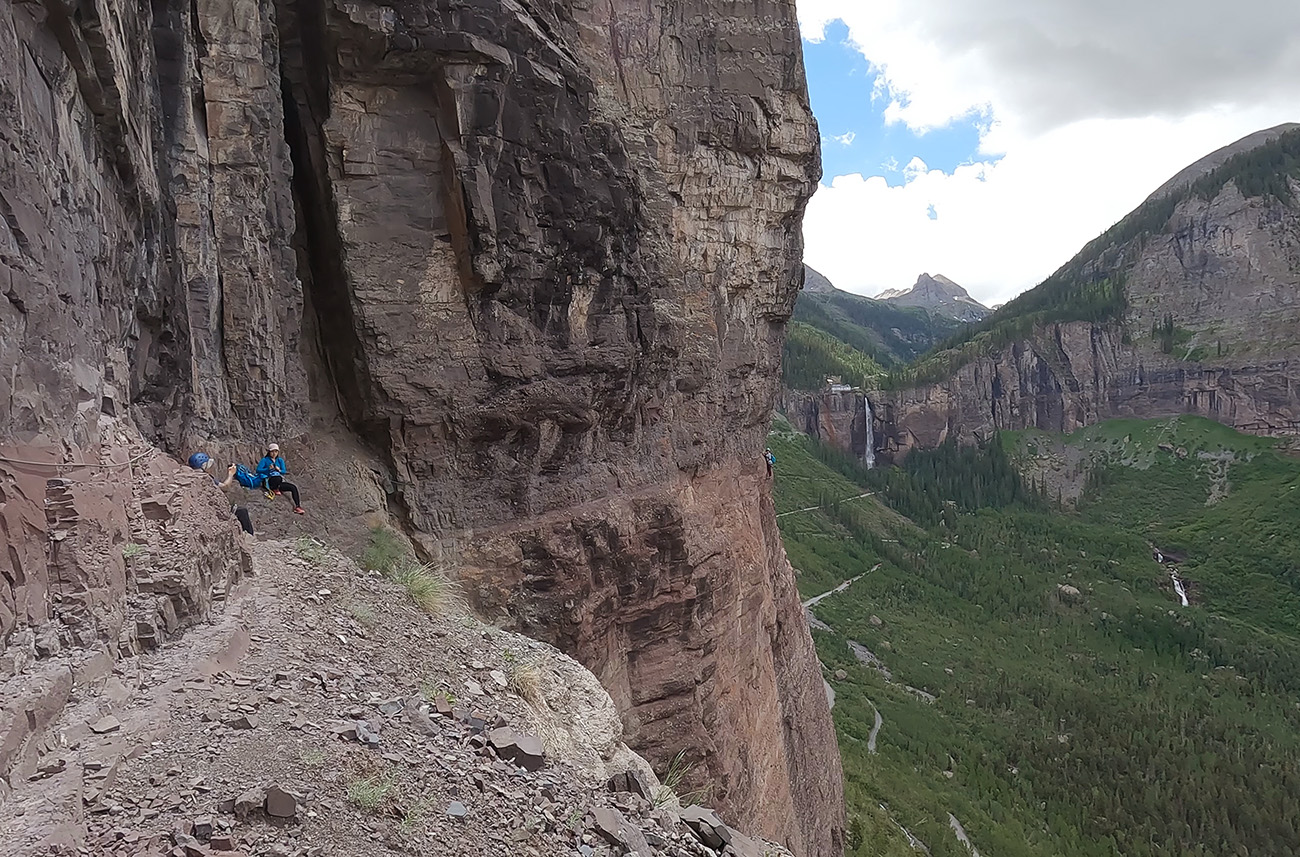
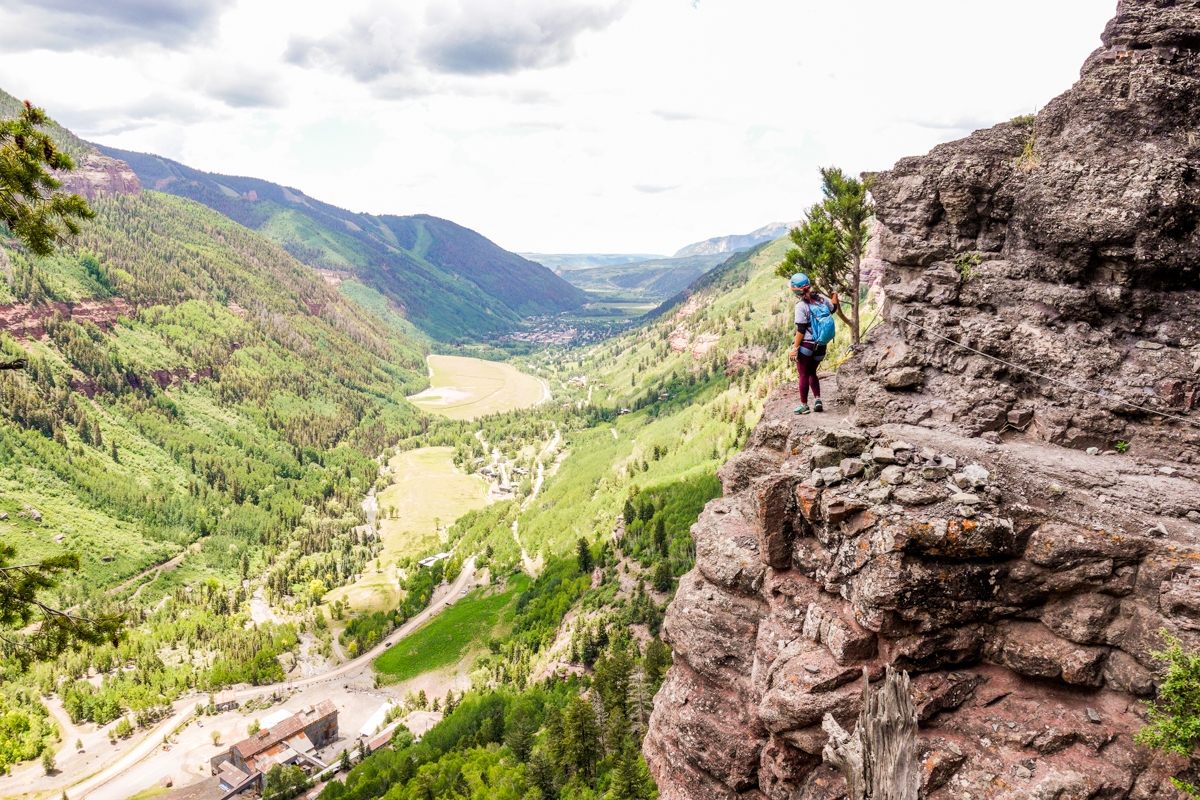
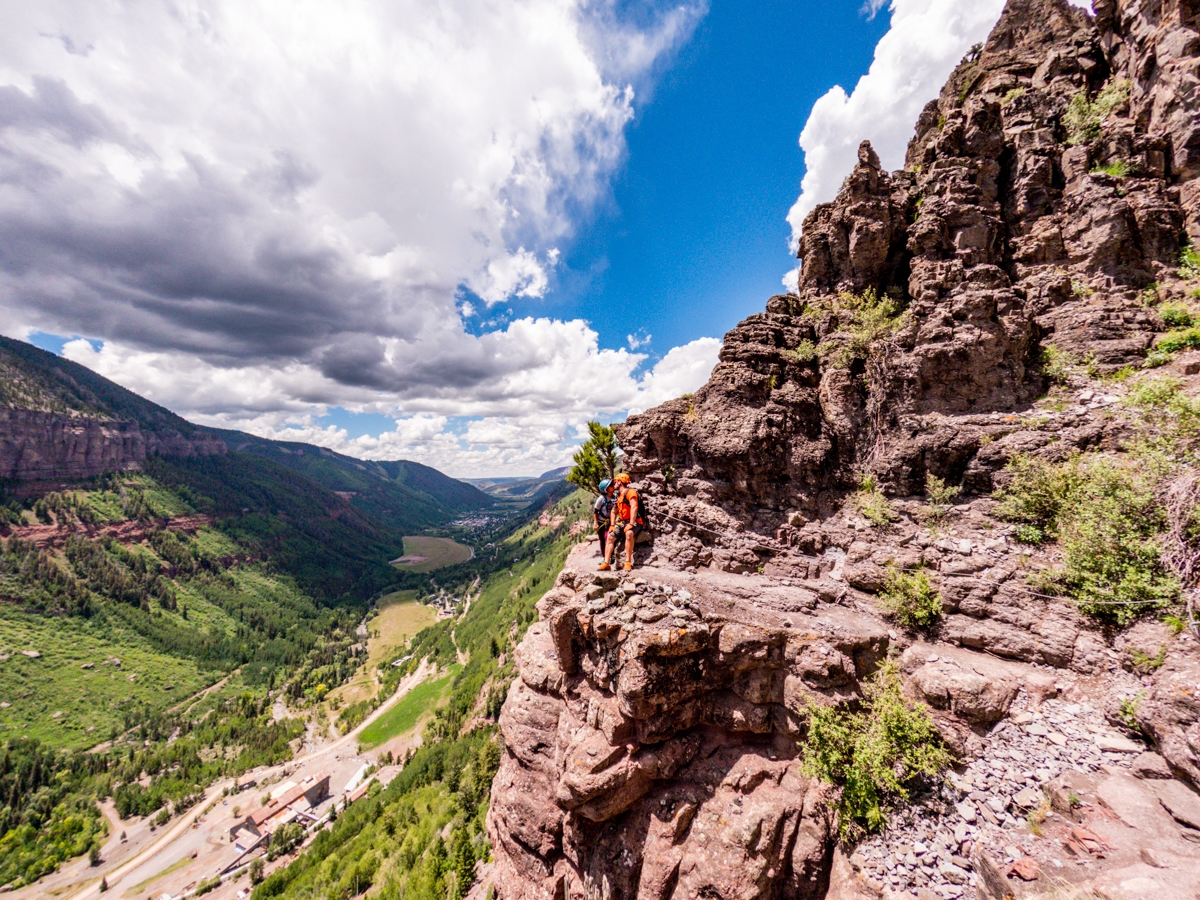
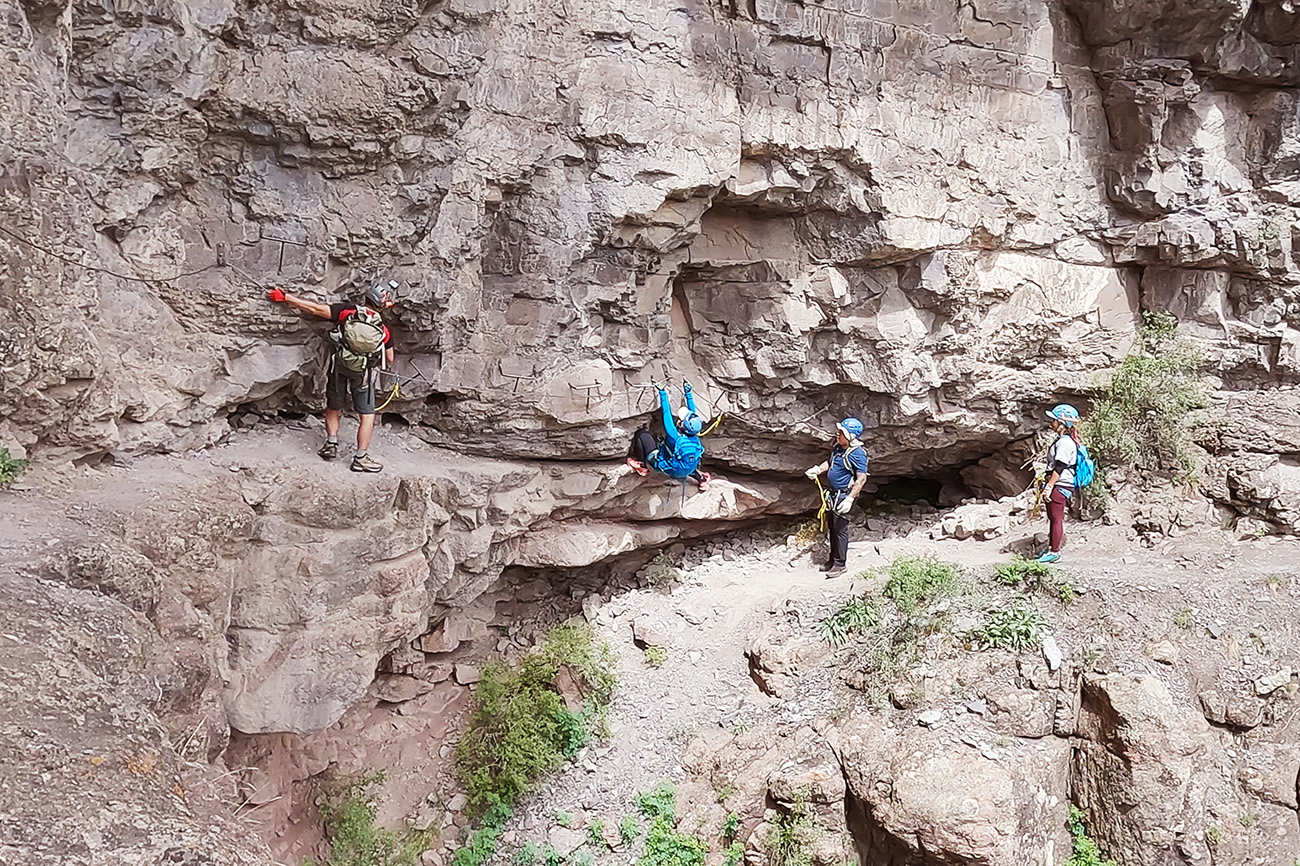
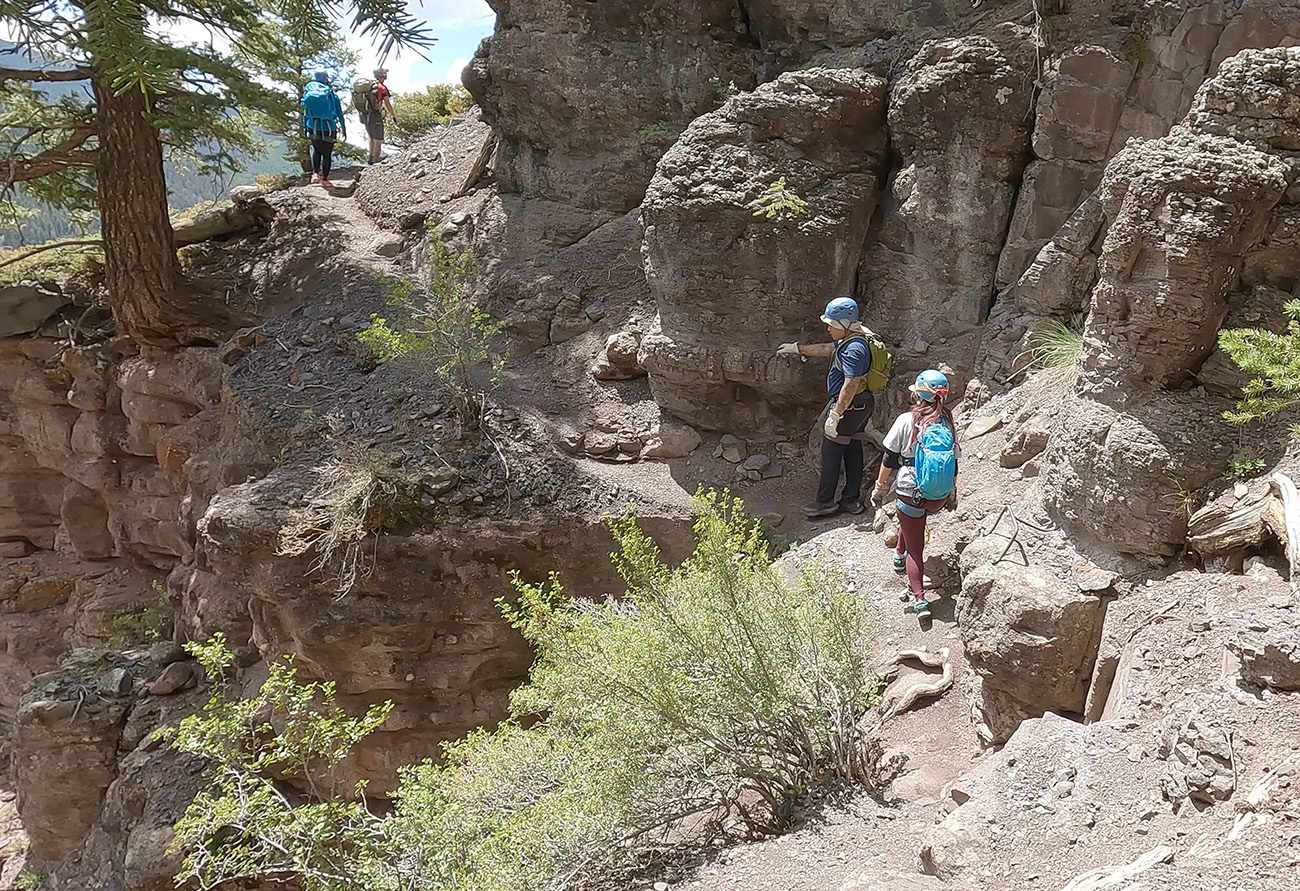
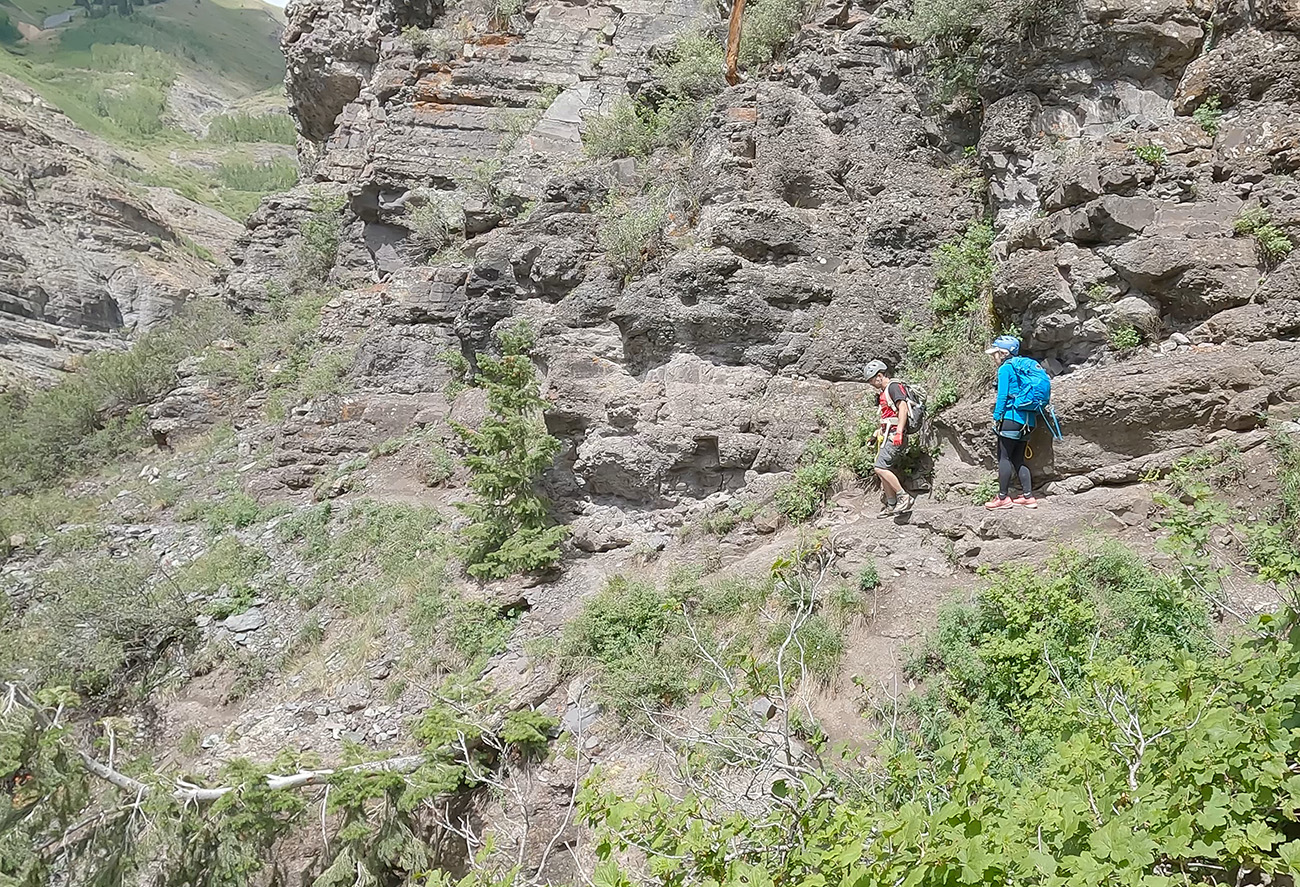
After putting our gear on, we started ascending a rocky, steep trail. Once we reached the small, narrow ledge, the trail evened out. Please keep in mind that from this point onward, you will be traversing through a narrow, rocky trail with steep drop-offs on the side. So make sure to be careful and watch your steps.
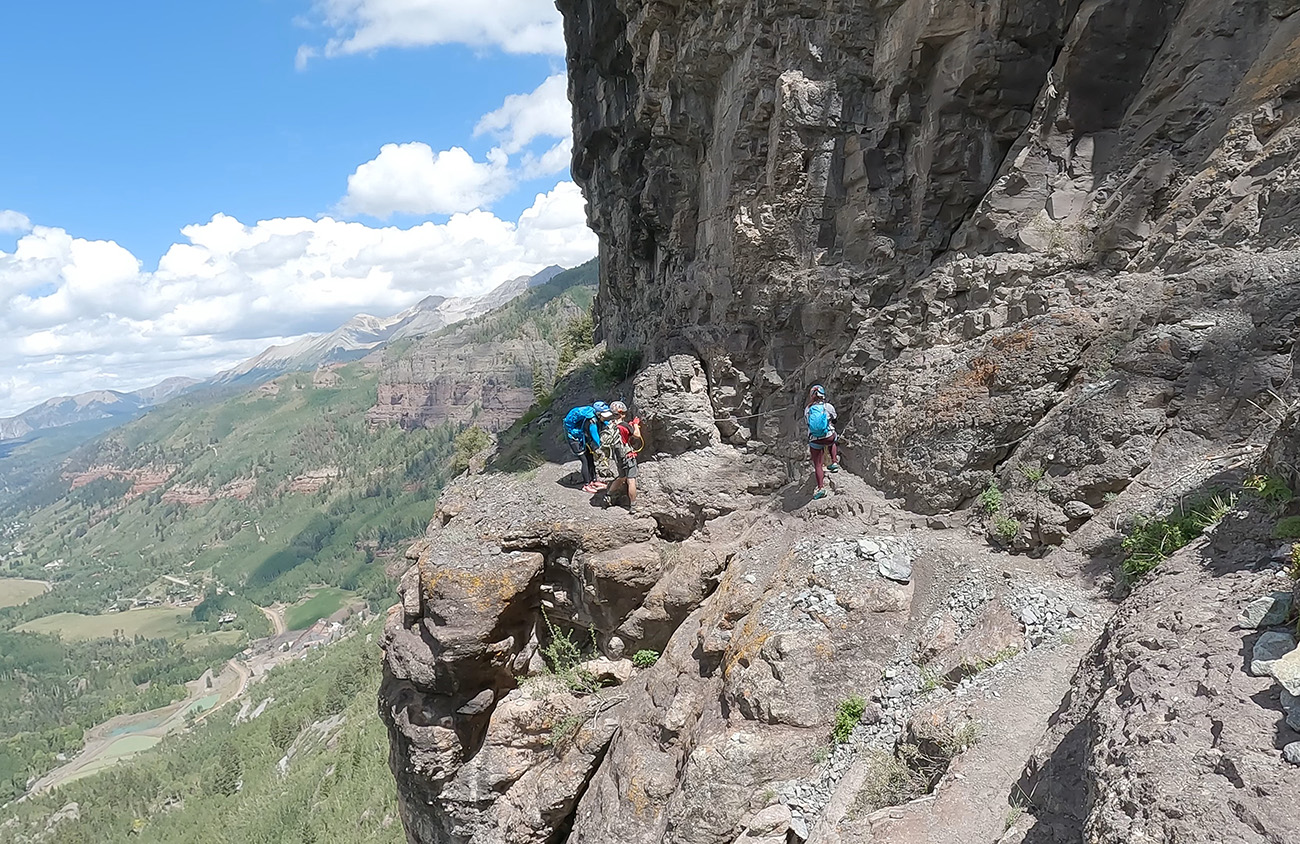
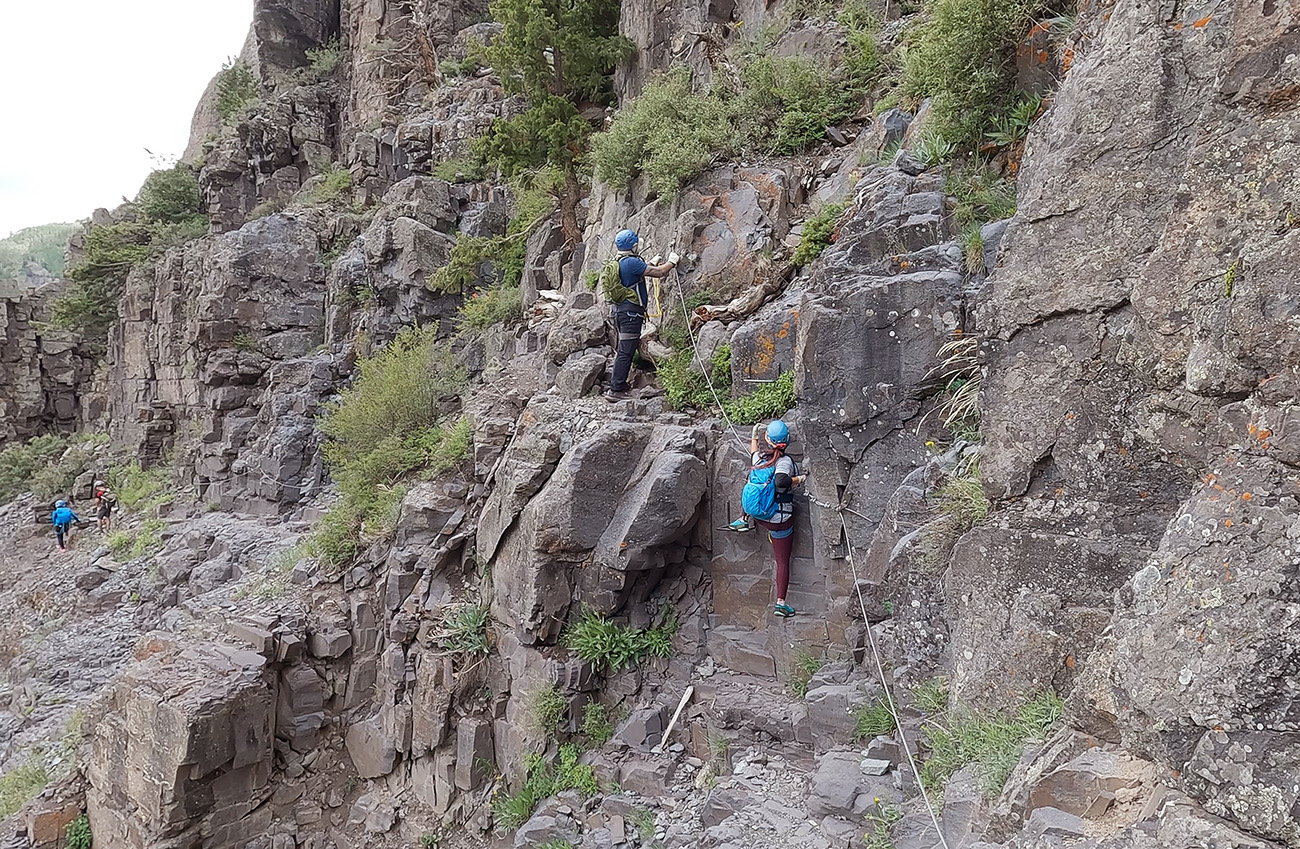
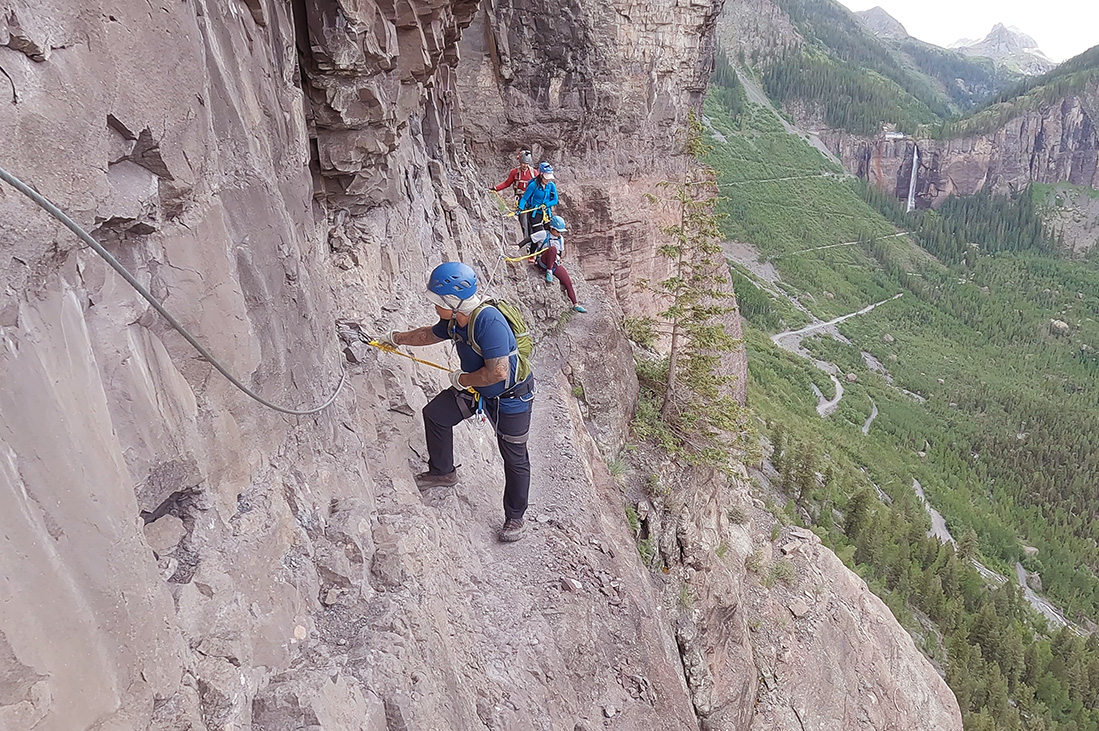
We followed this narrow trail to wind our way along the cliff until we reached the first cable section. The first cable section is quite short, but it’ll give you a taste of the obstacle that you will encounter. Unlike Ouray Via Ferrata, you won’t be clipped in the cable the whole time. In fact, a big part of the route is actually off-cable. You’ll only be clipped in for the technical sections. These technical sections vary in length, with the longest being what everyone called “The Main Event.” Also, on many of these technical sections, you will need to use natural hand holds and foot holds instead of metal rungs. Don’t forget to look back to admire the views behind you sometimes.
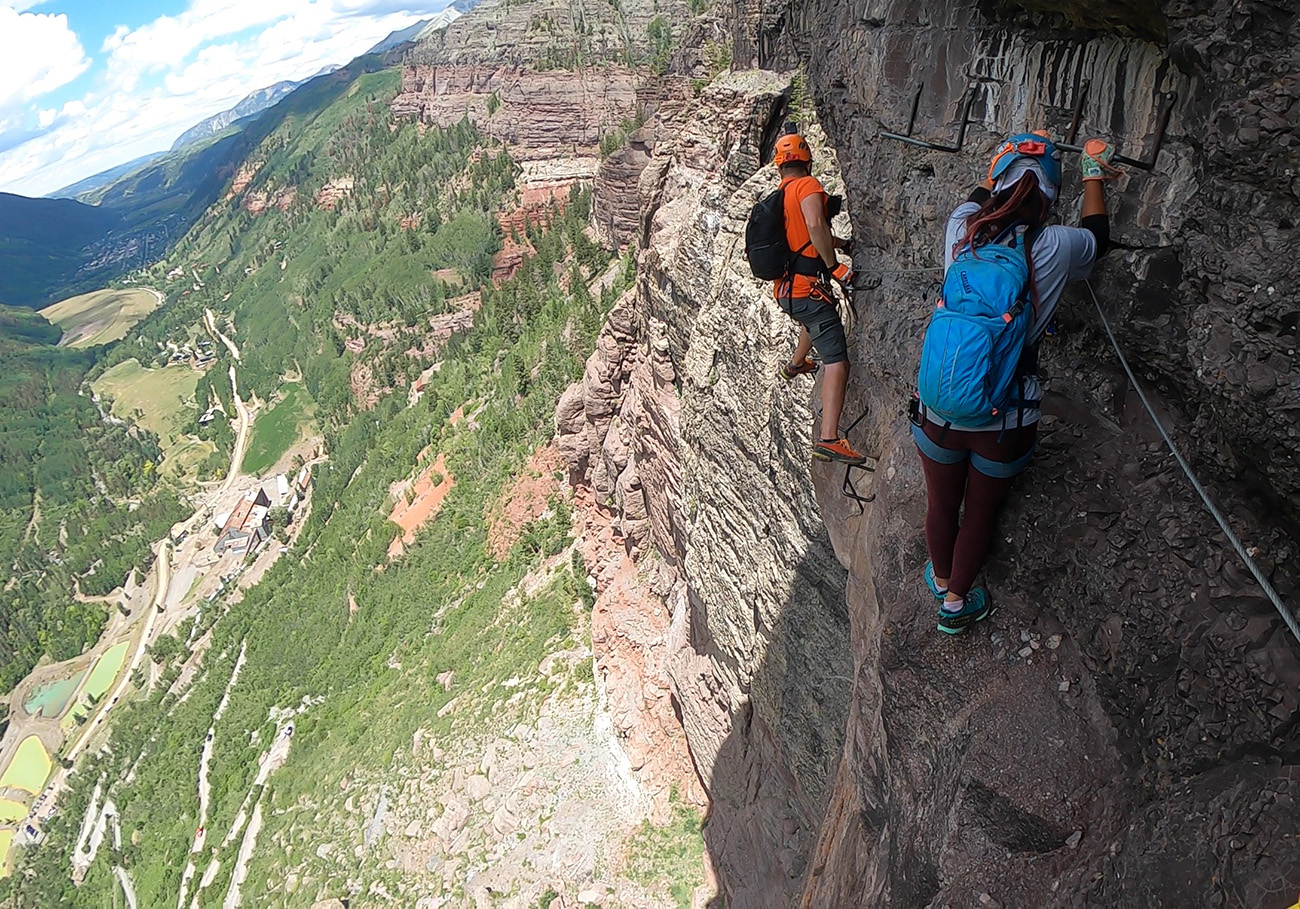
The Start of the Main Event
After many technical sections, we reach what looks like the end of the trail. There is a small metal bench bolted to the side of the mountain. This is the start of the Main Event! If you’re uncomfortable with what you’ve been through so far, this is the last spot where you can go back. After this, you’ll have to be committed. There is no turning back once you get onto the Main Event.
Except for Anh, none of us have done Telluride Via Ferrata before. We had no idea what was in store for us. All we saw was Anh, giggling like a mischievous little nymph, telling us to clip in and go. He then has his camera out to watch our expressions. We knew it was nothing good. Sure enough, as soon as we rounded the corner and see the route, many explosive words were used.
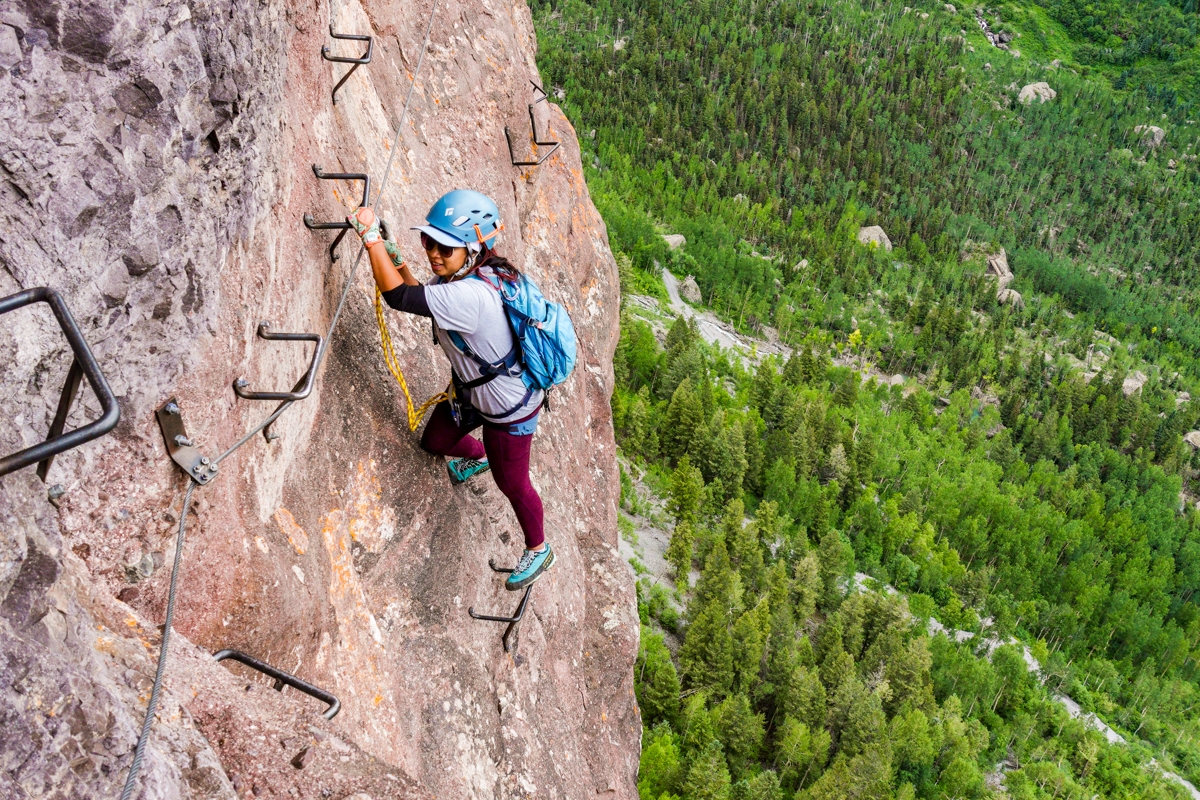
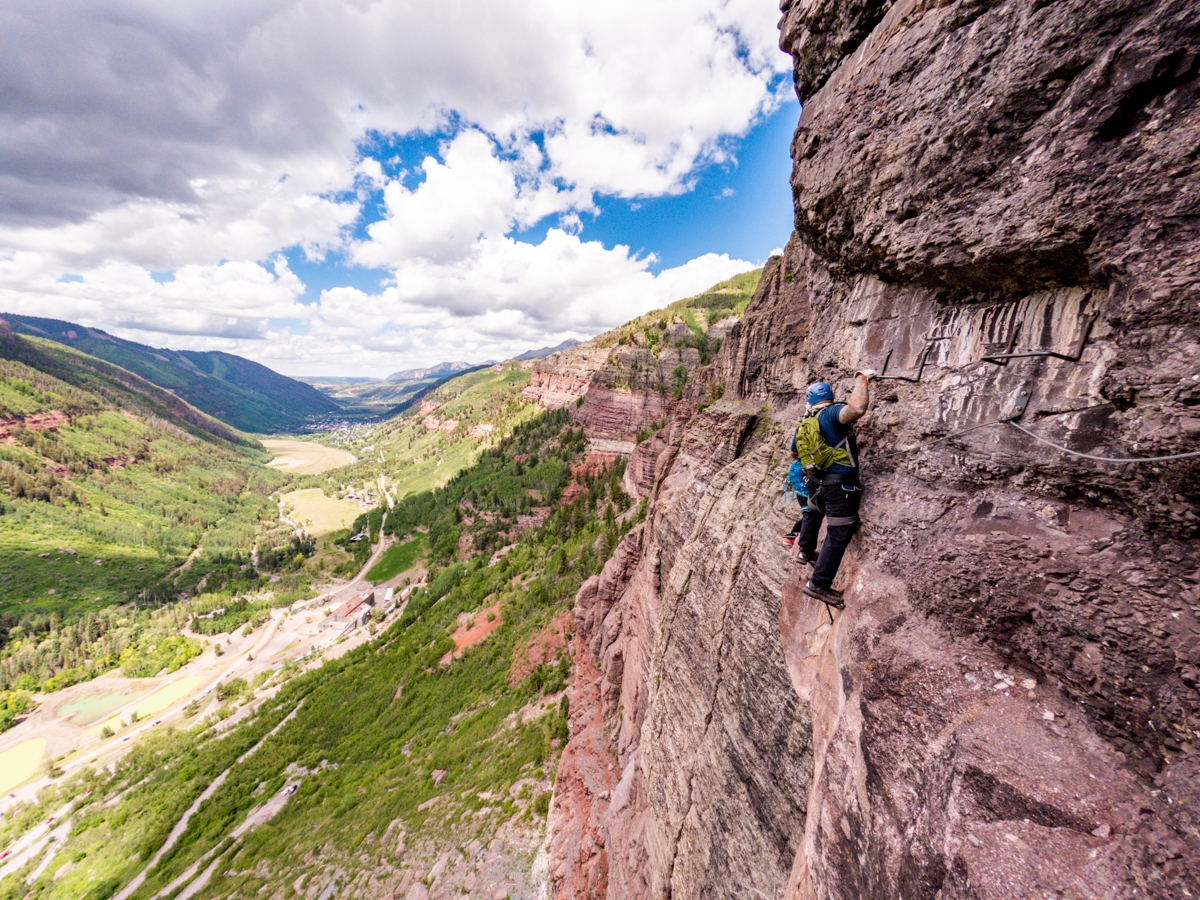
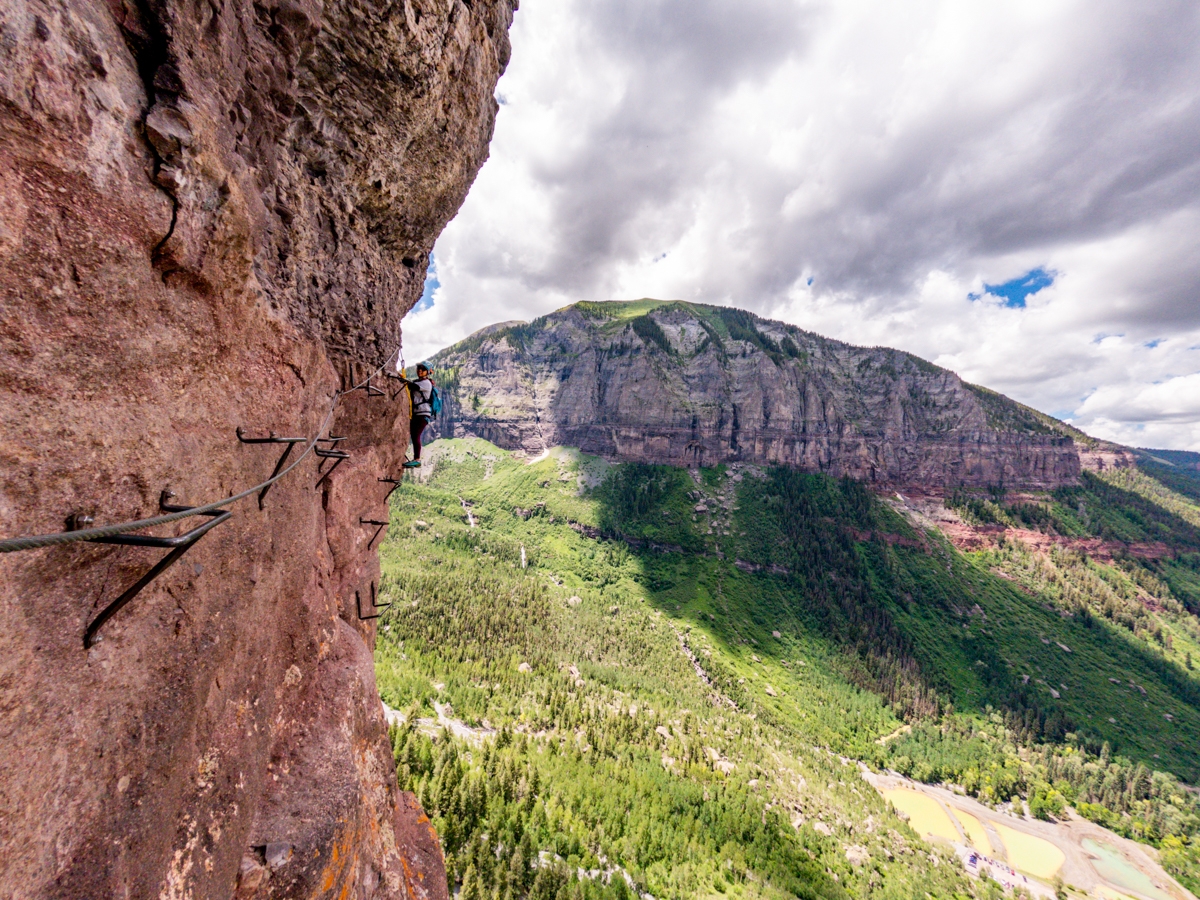
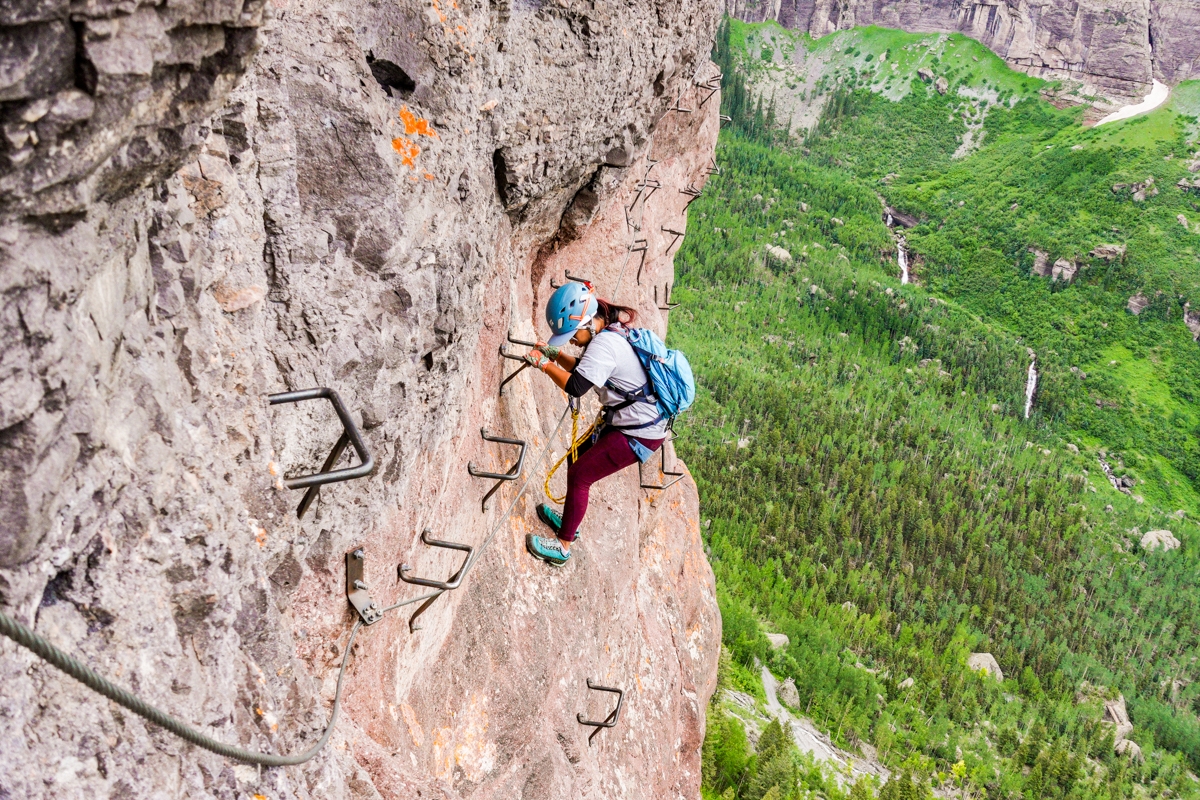
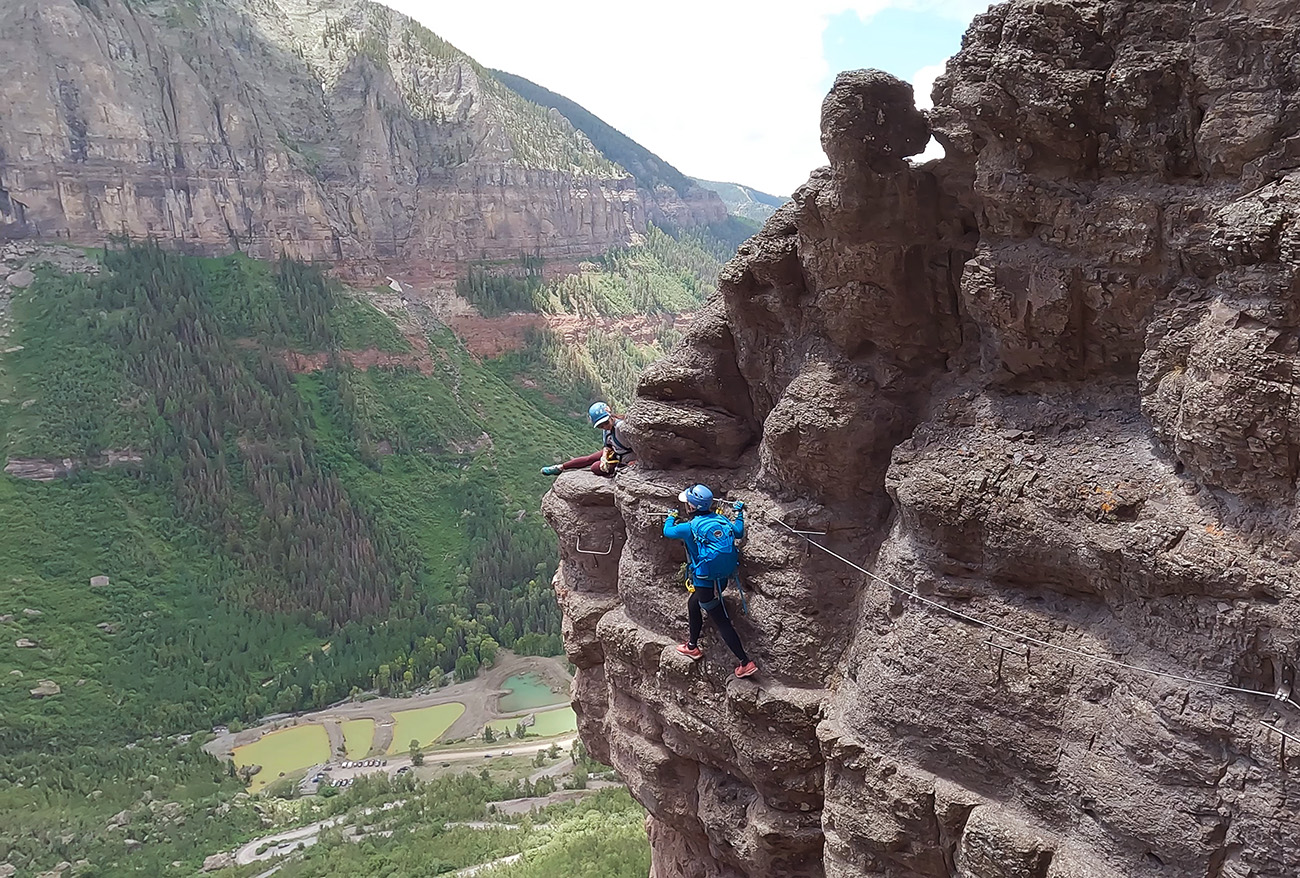
The Main Event
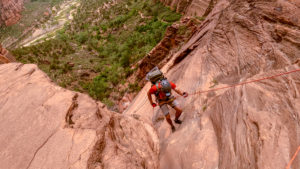
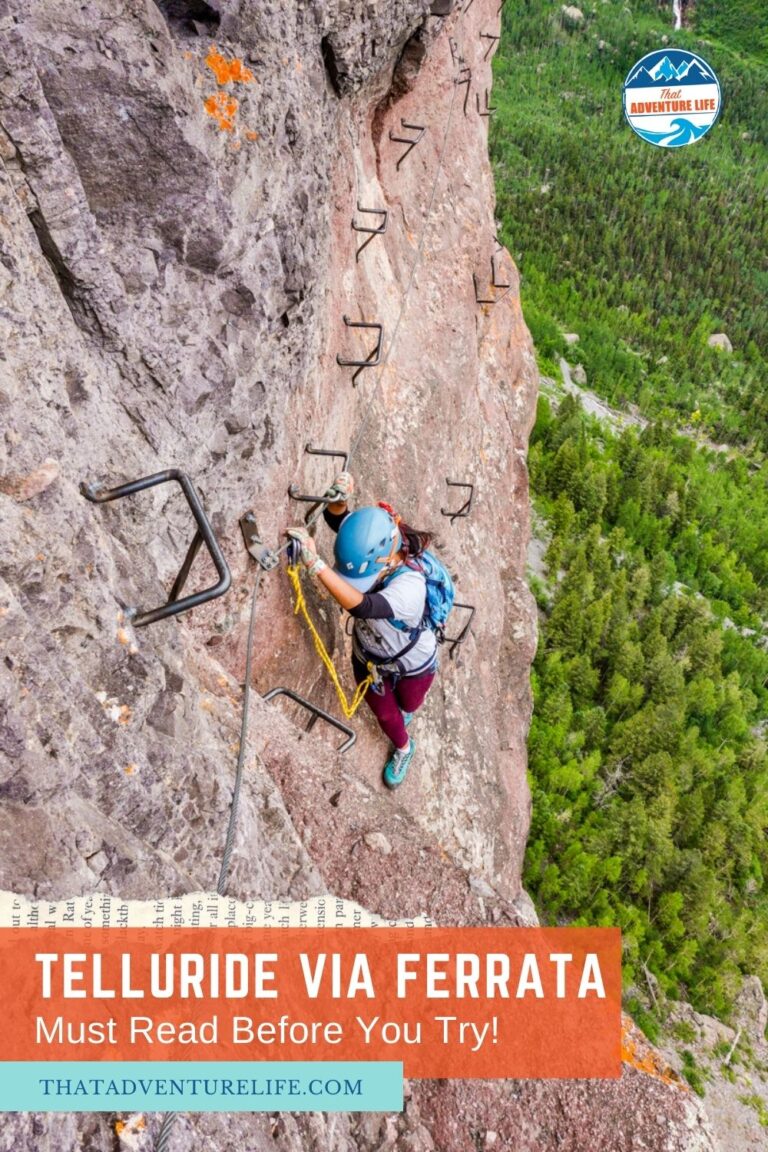
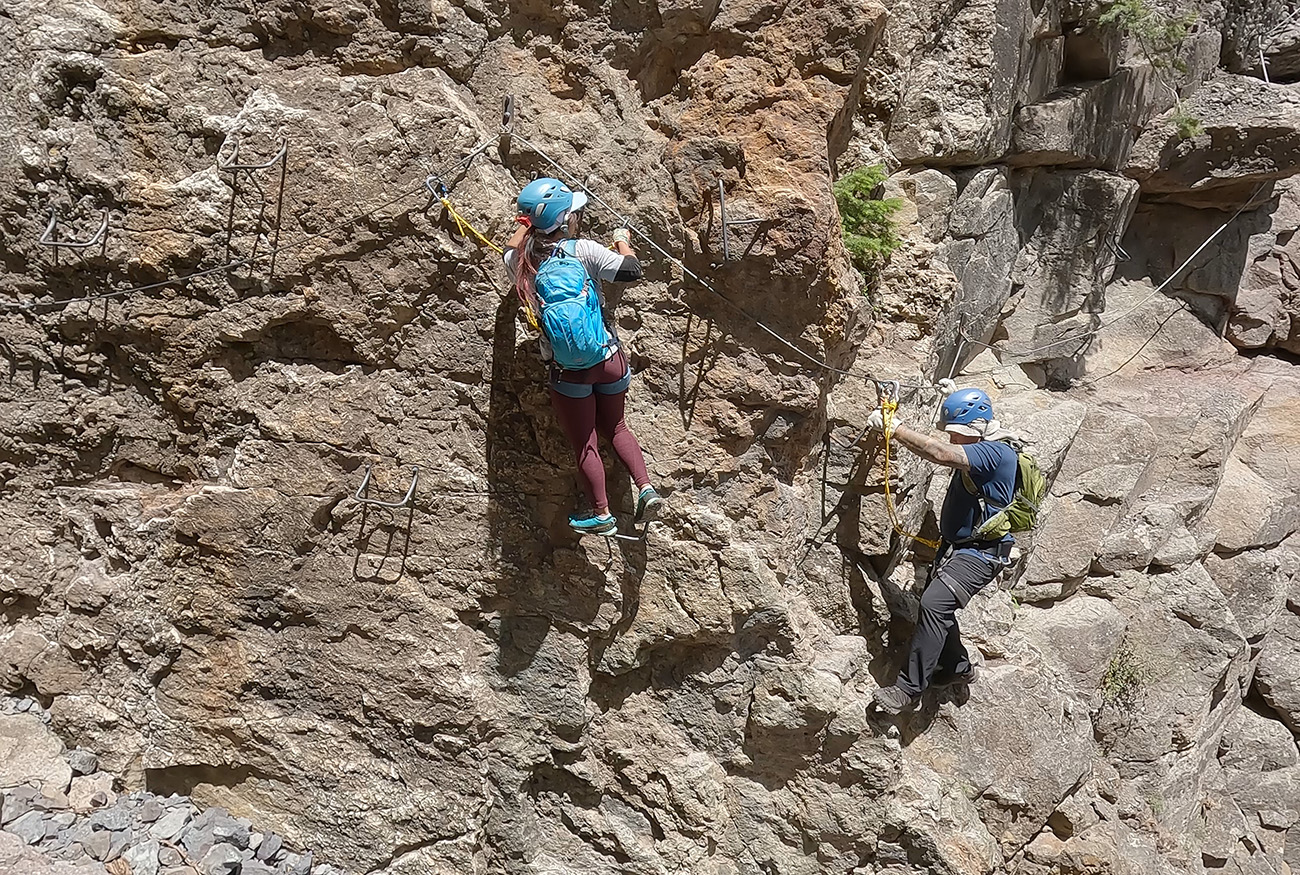
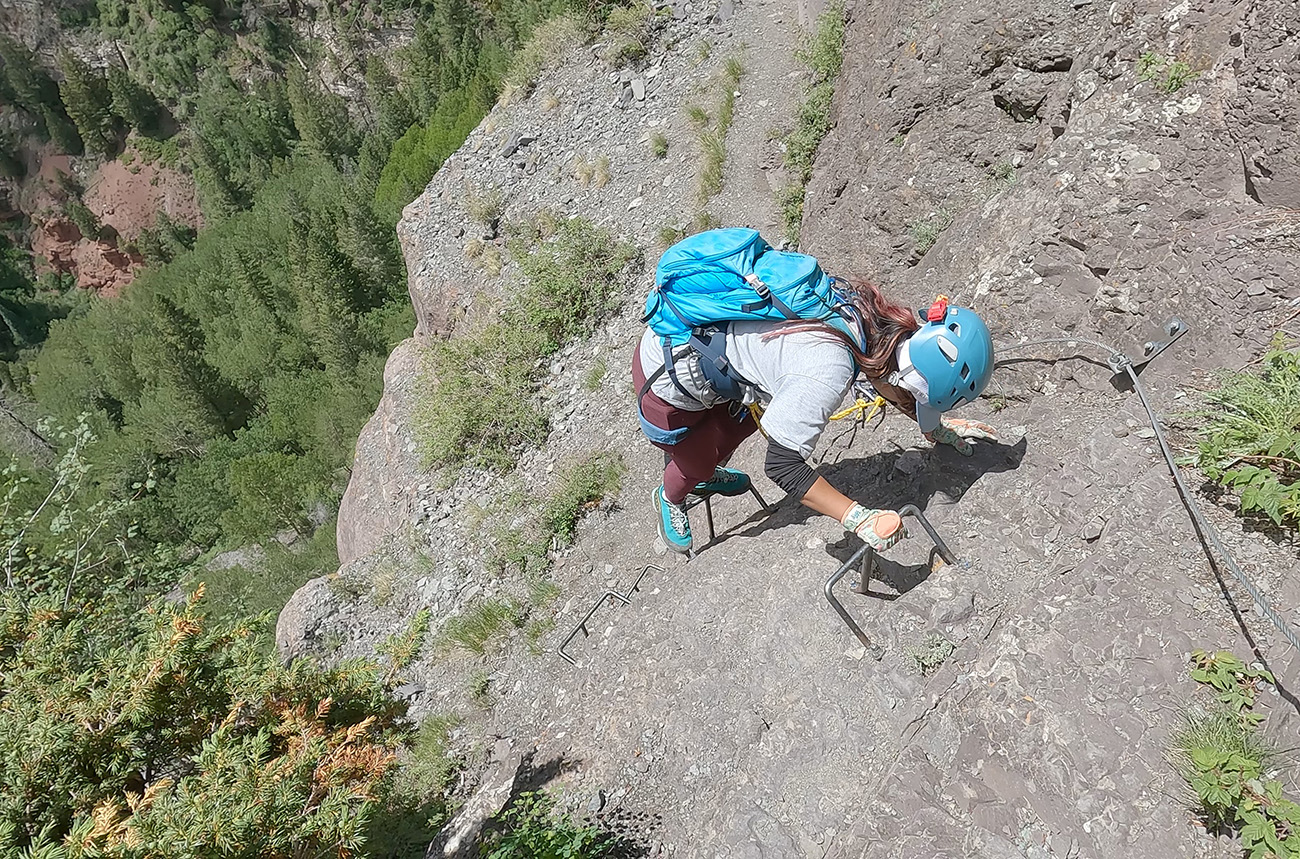
Most of us are climbers and canyoneers, so we are used to exposed cliffs and steep terrain. That being said, it was definitely a little intimidating when you have to step out onto small metal rungs, bolted into a sheer cliff, 500ft above ground with nothing below you. It’s just you, the metal rungs, the steel cable, and nothing else. It’ll take a lot for you to mentally push yourself past this part. The metal rungs are not even. They are staggering, some drop-down lower, and some go up higher. If you have shorter beginners in your group, you might want to have an experienced or taller person going in front of them to help them clip on to the next cable interval. In some sections toward the end, the cable can be hard to reach. And it’s okay to take your time. Remember, small but steady steps.
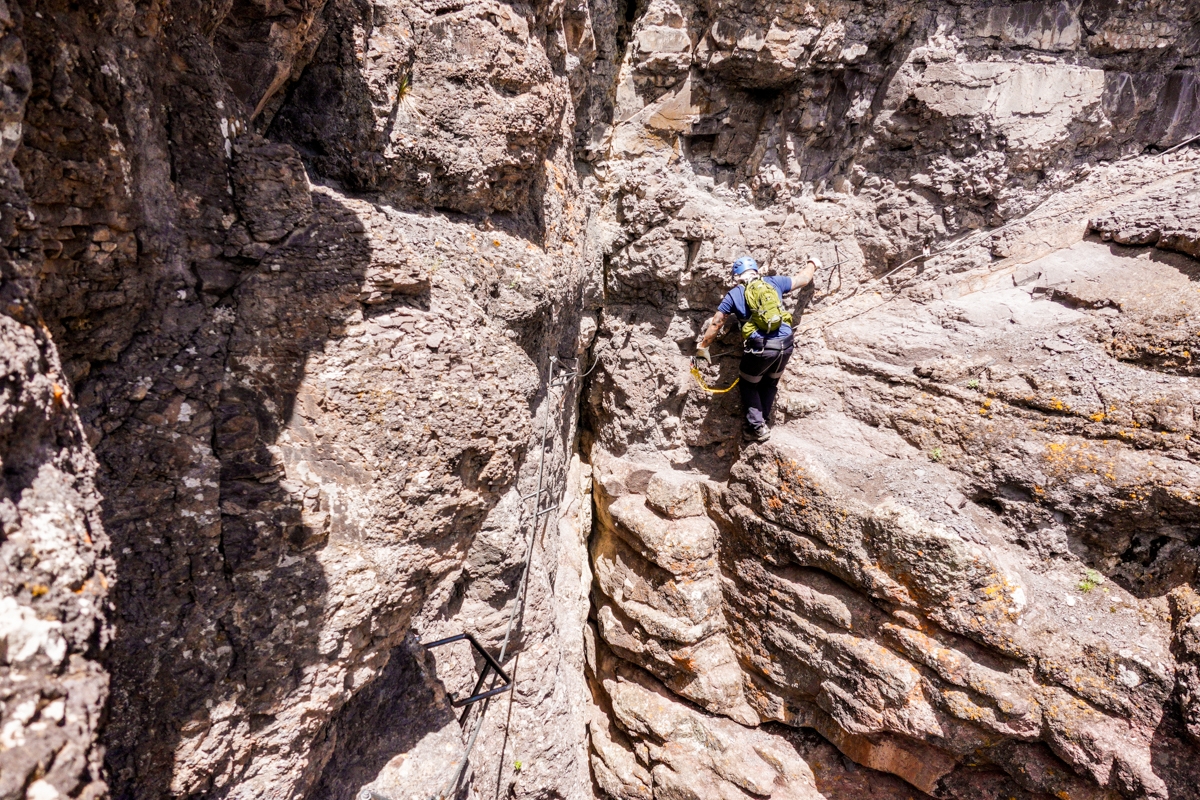
The Second Part of Telluride Via Ferrata
Once you finish the Main Event, don’t worry, this remaining section of Telluride Via Ferrata has a lot more fun obstacles. From here on, the trail is more difficult and exposed. You’ll be clipped in on the cable a lot more as well. Along the route, there are two highly technical, exposed sections for you to look forward to. One of which, you will need some upper body strength as you’ll pull yourself along and up a small overhang.
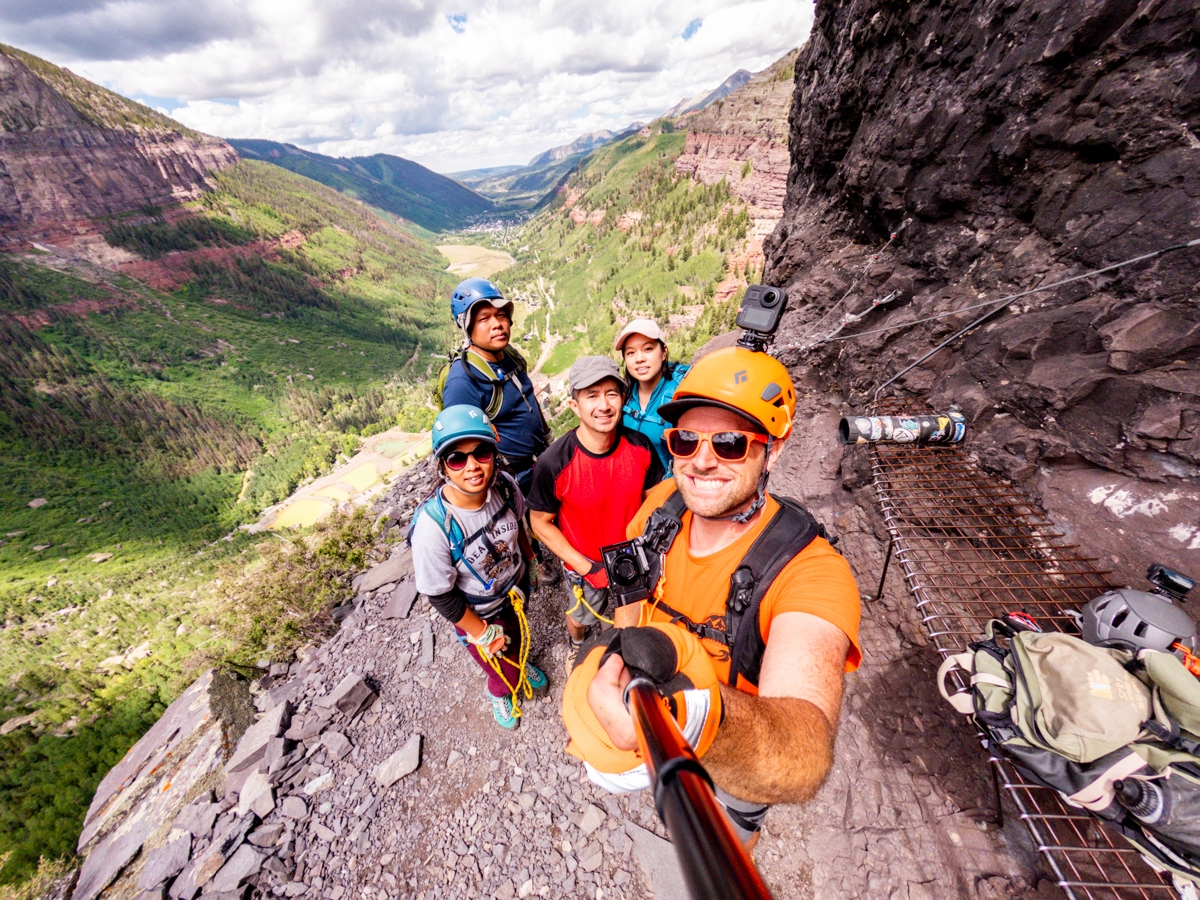
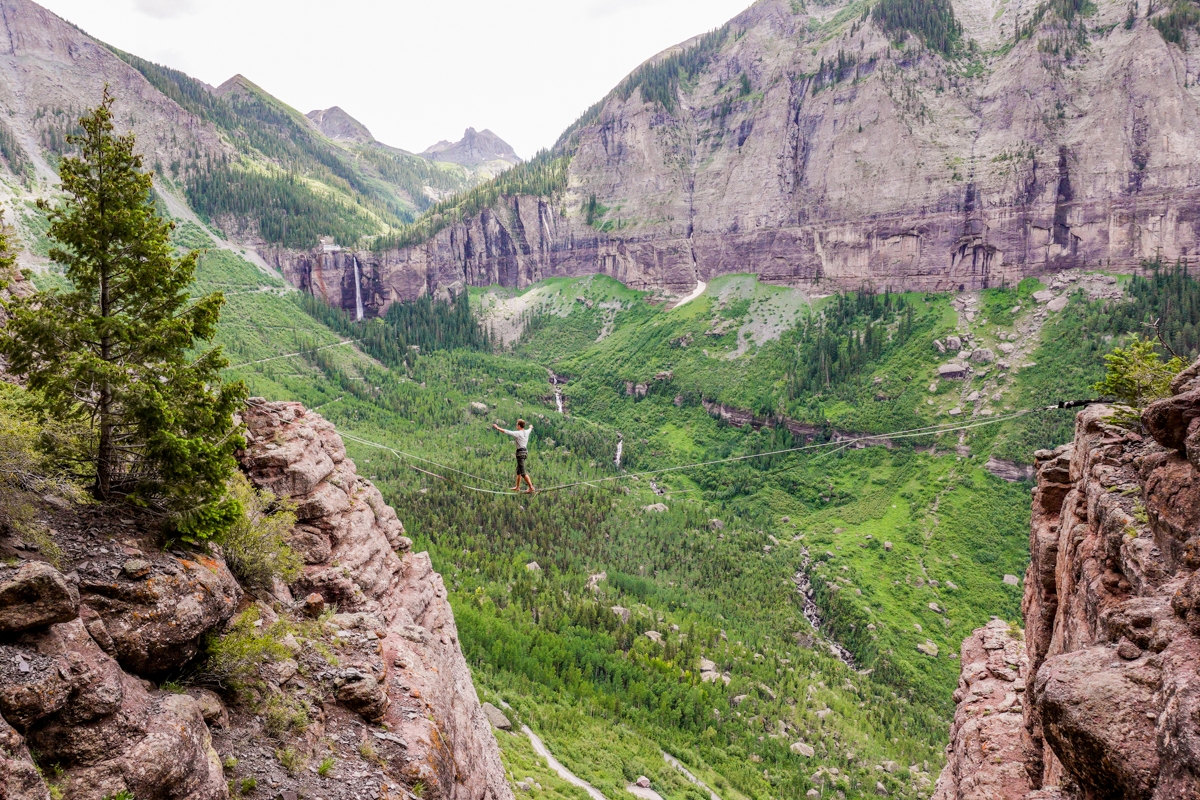
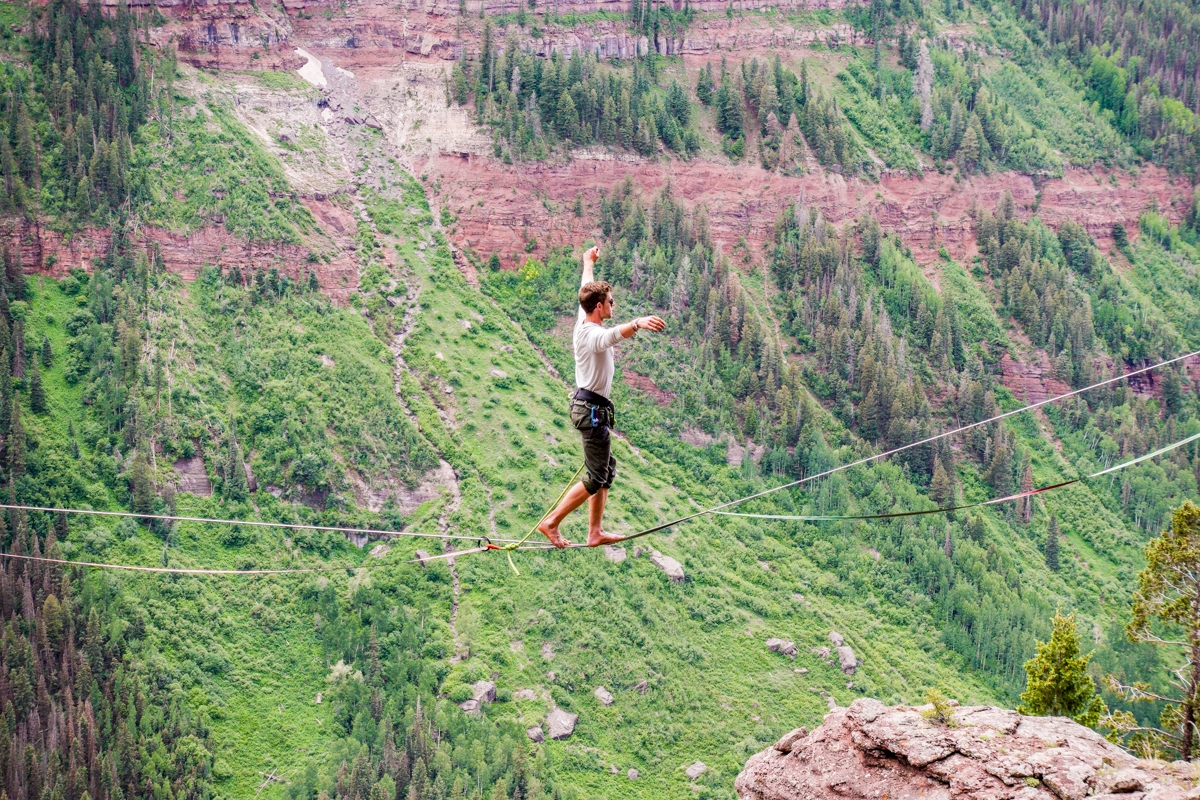
The Slackliners
If you’re lucky like we were, you might run into some slackliners, showing off their skills. We ran into Caleb and his girlfriend setting up a slackline above a beautiful valley. They were kind enough to let us watch. It was amazing to see them walking on a thin rope, 600ft up empty air. It definitely made our day.
The Rest of The Way
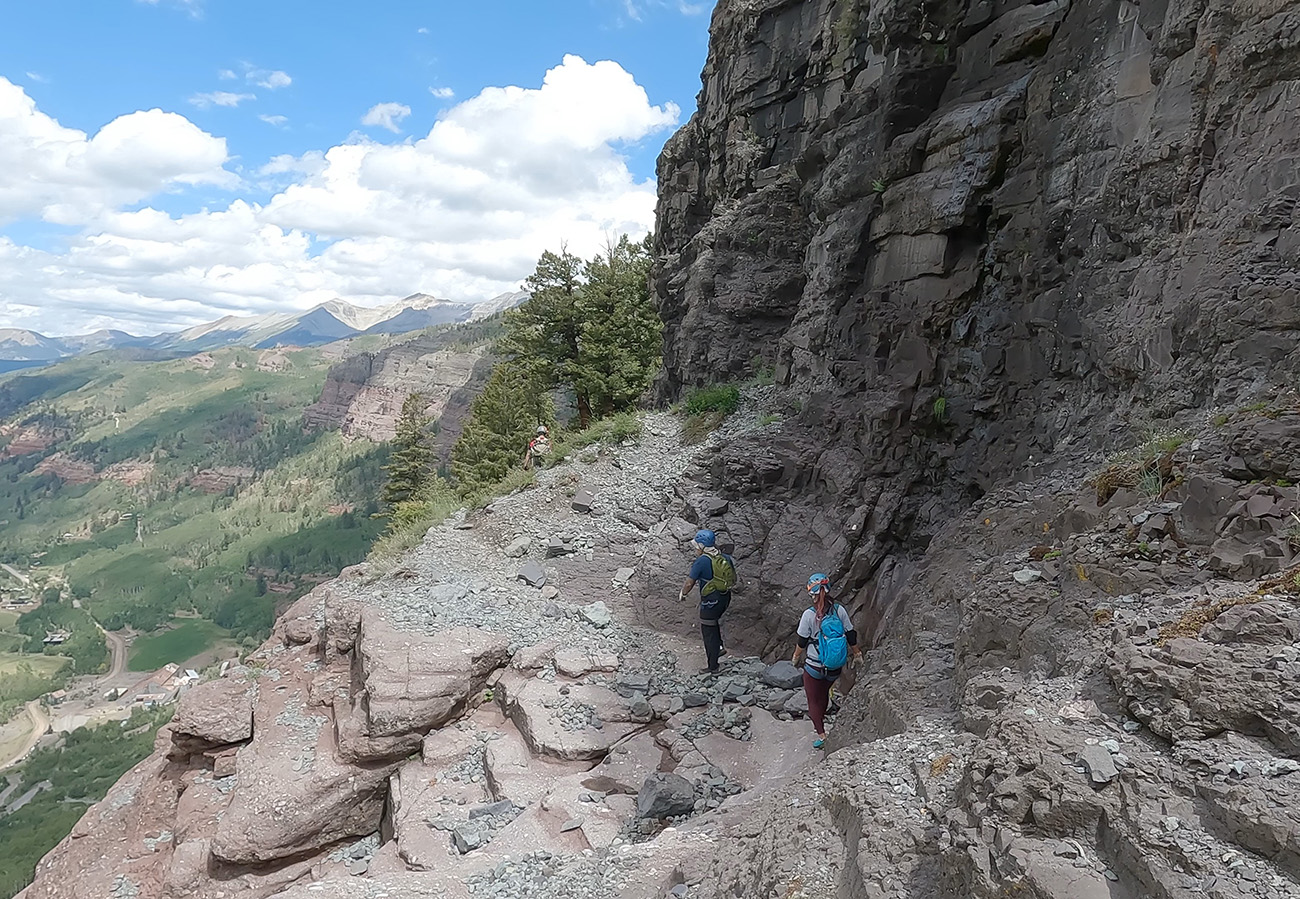
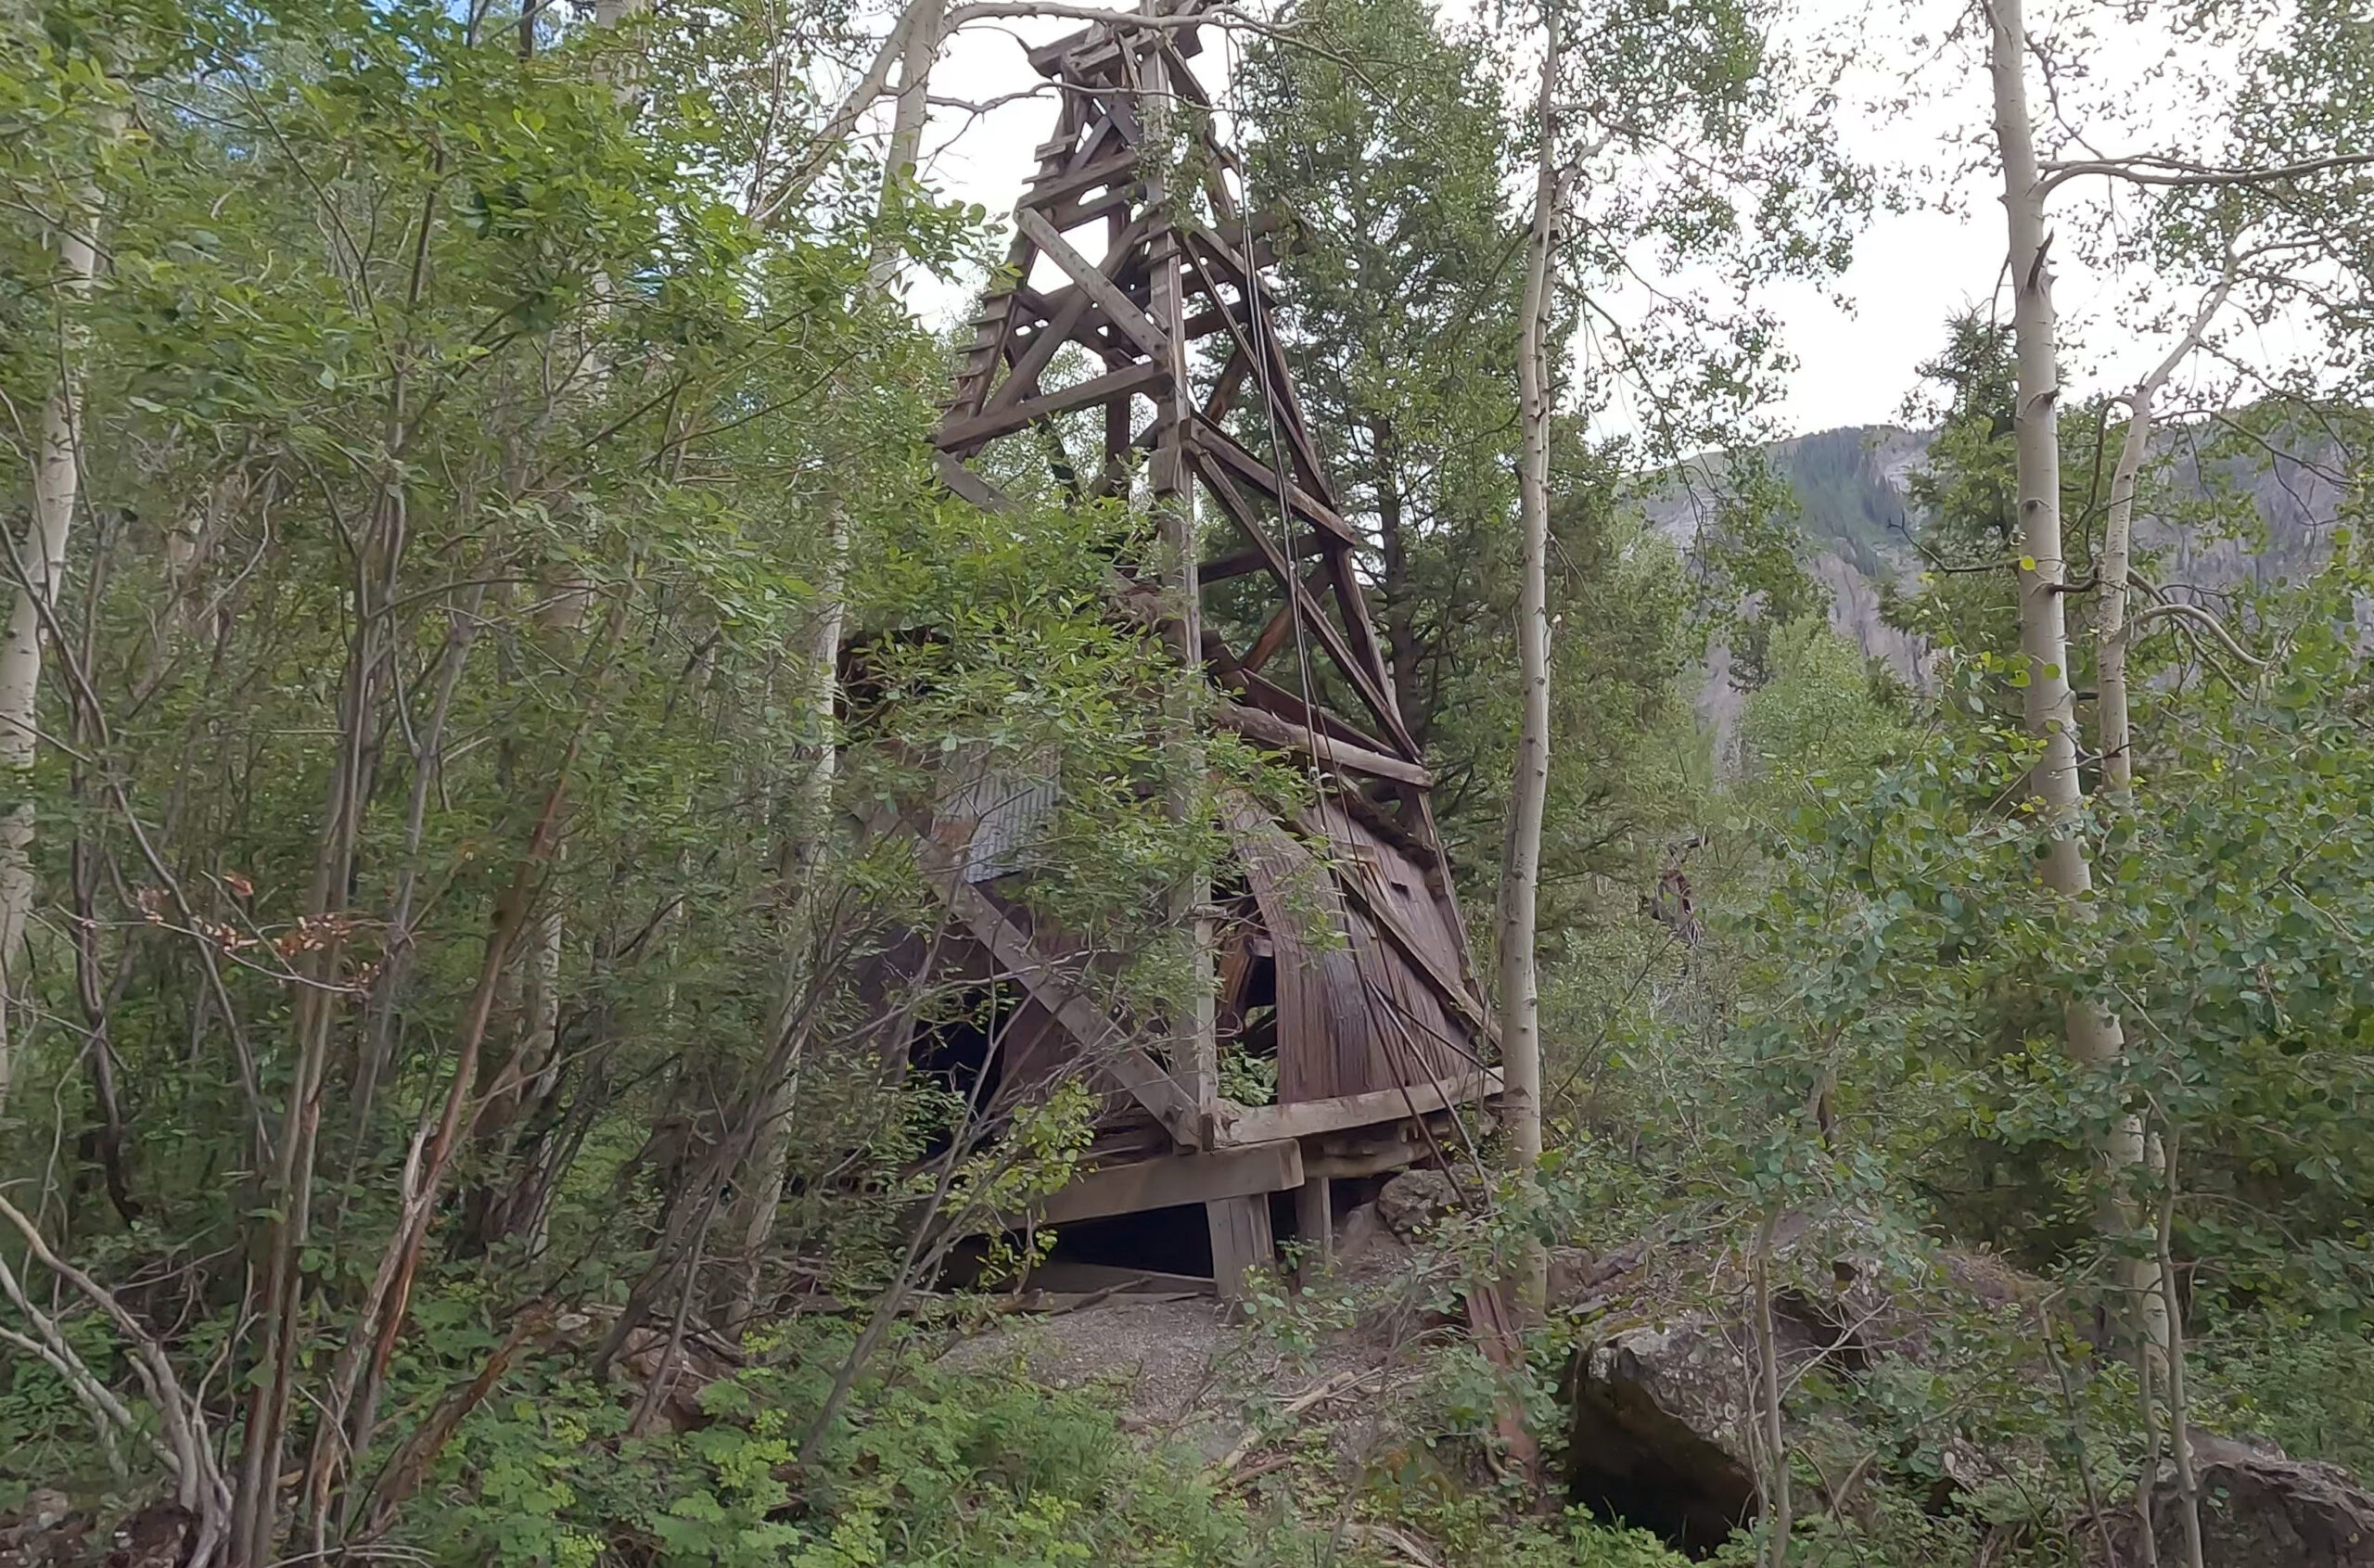
After we said bye to our new friends, we made it through the highly technical obstacle, which is the overhang climb. After that, the route eventually mellows out. We then followed the trail to descend a gully. There were mine remnants along the trail. After a steep descent, we made it to the road, then follow the road back to the parking lot.
I have to say, Telluride Via Ferrata was one heck of an experience. It was physically, and mentally challenging, yet very thrilling, and gave you an amazing sense of accomplishment. We can’t wait to go back and do this again!
Recommended Gear
These are the gear that we personally use and find them helpful for this particular adventure. Don’t forget to check out our Recommended Gear section as well.
adventure gear
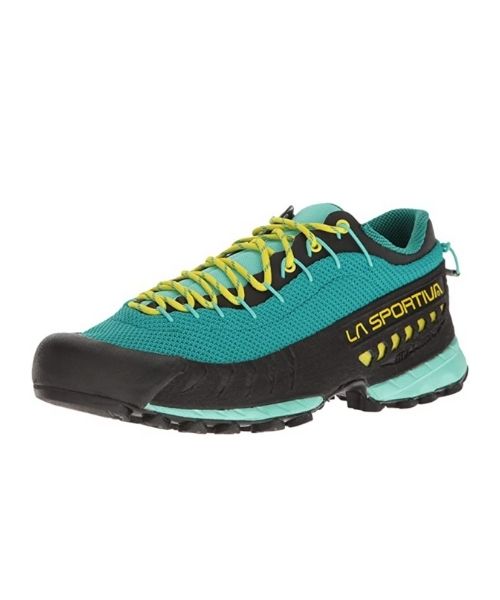
This is our favourite hiking shoes. We use them for canyoneering as well. Lots of traction. Vy’s version.

Dustin’s version for La Sportiva shoes

Make sure to use lots of sunscreens! We use eco-friendly, reef-safe sunscreen, Stream2Sea SPF 30.

Face sunscreen is also important. We love these tinted, organic All Good Organic Sunscreen Butter.

You should always bring plenty of water. Vy loves the Camelback L.U.X.E.
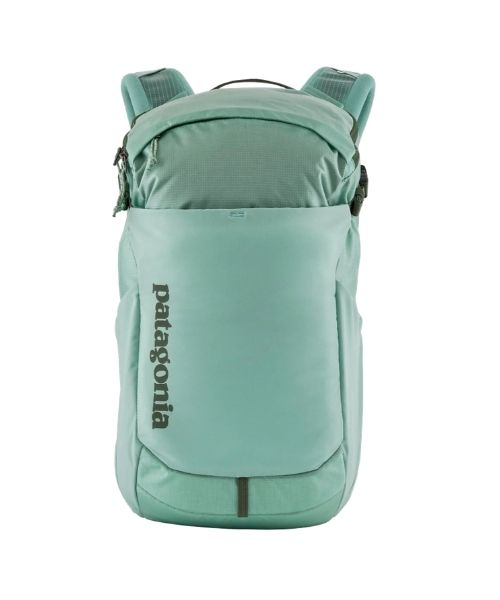
For shorter hikes, the Patagonia Women’s Nine Trails Pack 18L is perfect to hold water and your essentials.
If you want something lighter, we love the packable Patagonia Women’s Houdini® Jacket and Patagonia Men’s Houdini® Jacket
other things to bring
Always good to bring some snacks with you. For healthy and easy snacks, check out some of our recipes.
camera gear


Related Posts
Save your pins:


