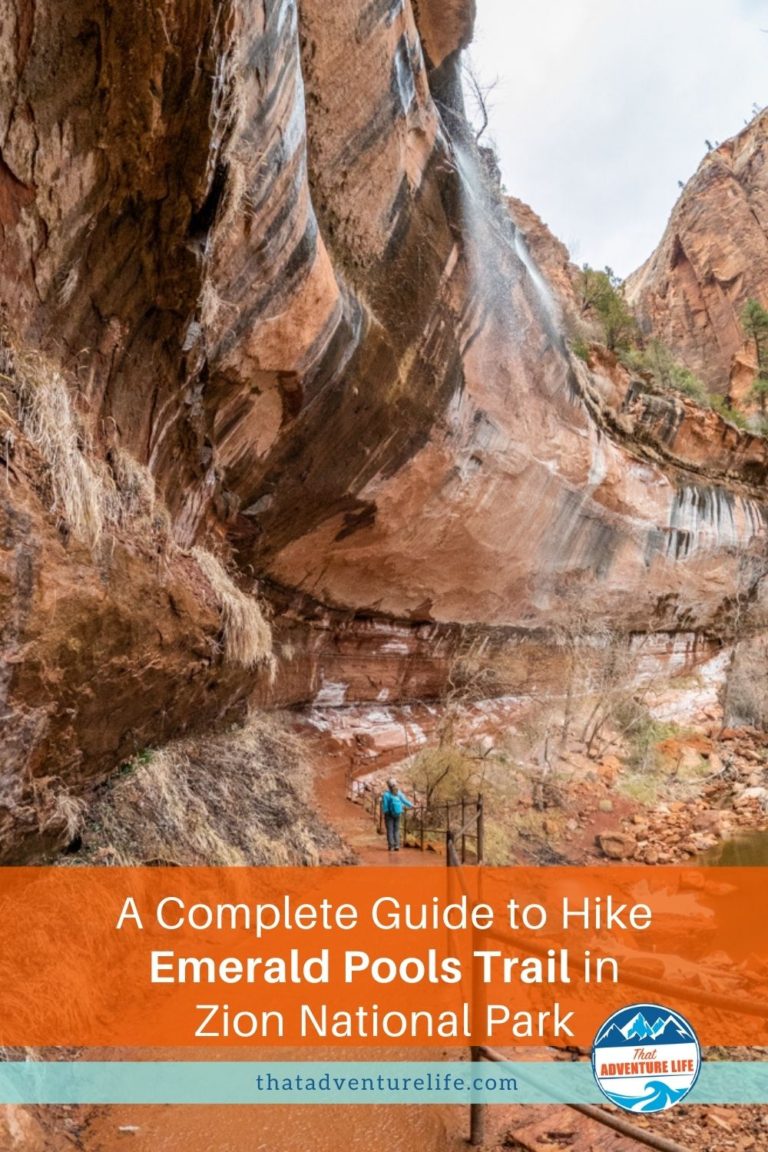
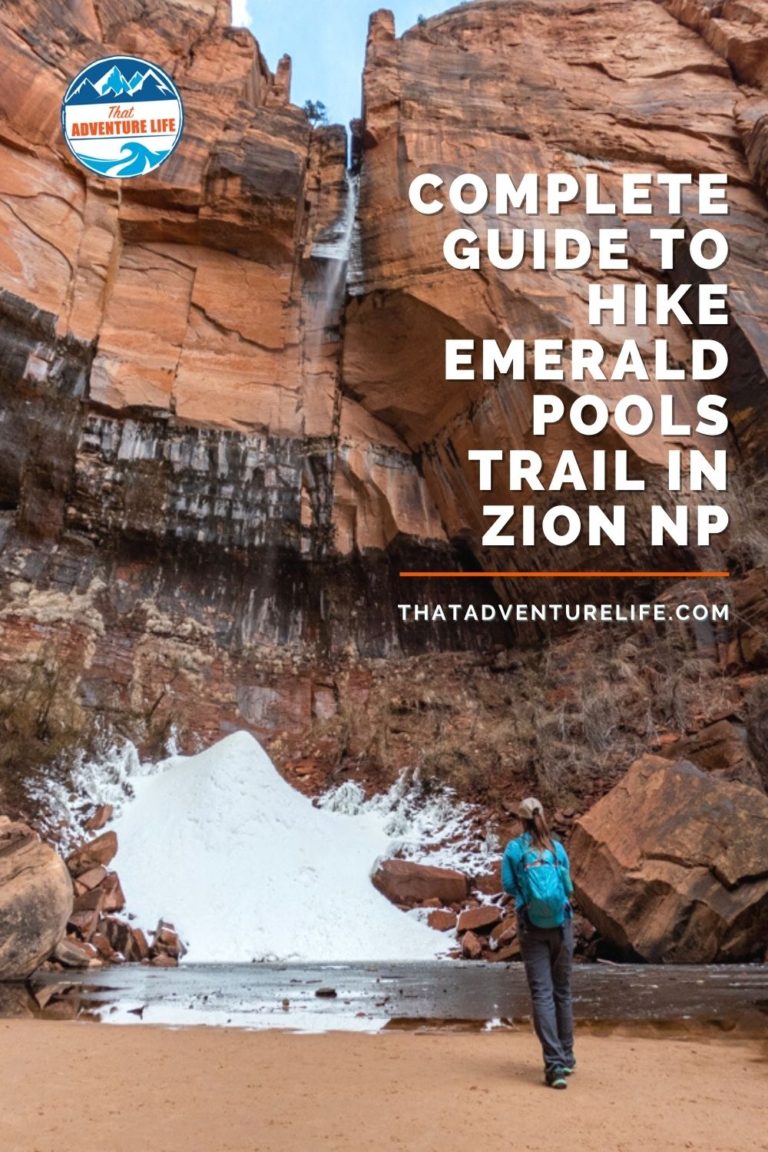
A Complete Guide to Hike Emerald Pools Trail in Zion NP
As one of the classic trails in Zion National Park, the Emerald Pools trail features breathtaking sceneries, glistening pools, and sparkling waterfalls. It also doesn’t require a permit, unlike Angels Landing or the Subway. Furthermore, the Emerald Pools trail is perfect for beginner hikers and families of all ages. Emerald Pools “trail” is a collection of short trails and spurs that centered around the 3 pools: Lower, Middle, and Upper Pools. While the hike to Lower Emerald Pools is easy, getting to Middle and Upper Pools is considered moderate. That being said, we don’t think it’s that hard. As long as you watch your steps and take your time, most hikers should be able to go all the way to Upper Pool.
Note: Please make sure to respect this beautiful place and the surrounding areas. Always practice LEAVE NO TRACE. This means no loud music, no graffiti, no taking artifacts or fossilized items, and pack out what you pack in! Please help us protect this place for generations to come!
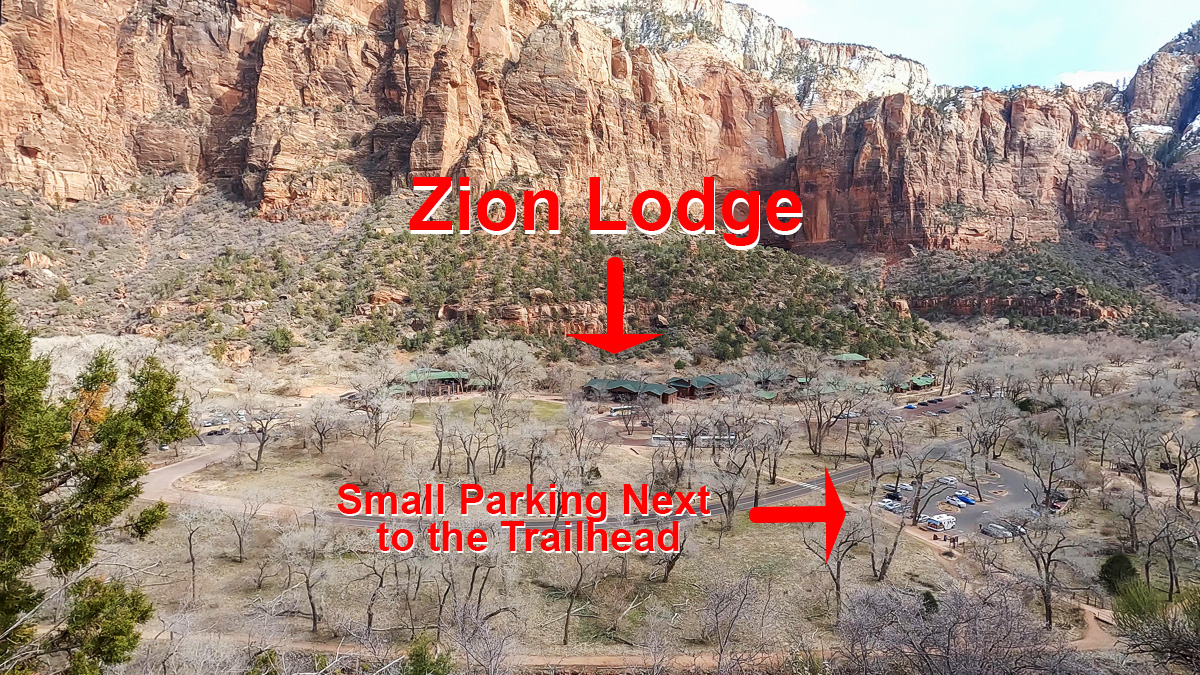
If you can drive in, the main parking lot is a small, paved lot right in front of the trailhead. You can also park at the Zion Lodge across the street.
Restroom
There are restrooms at the Zion Lodge.
Fee
There is a fee to enter the Zion National Park. Please check the park’s website for updated infos. You can also use your annual pass such as America the Beautiful Pass here.
Important Things
FLASH FLOOD RISK
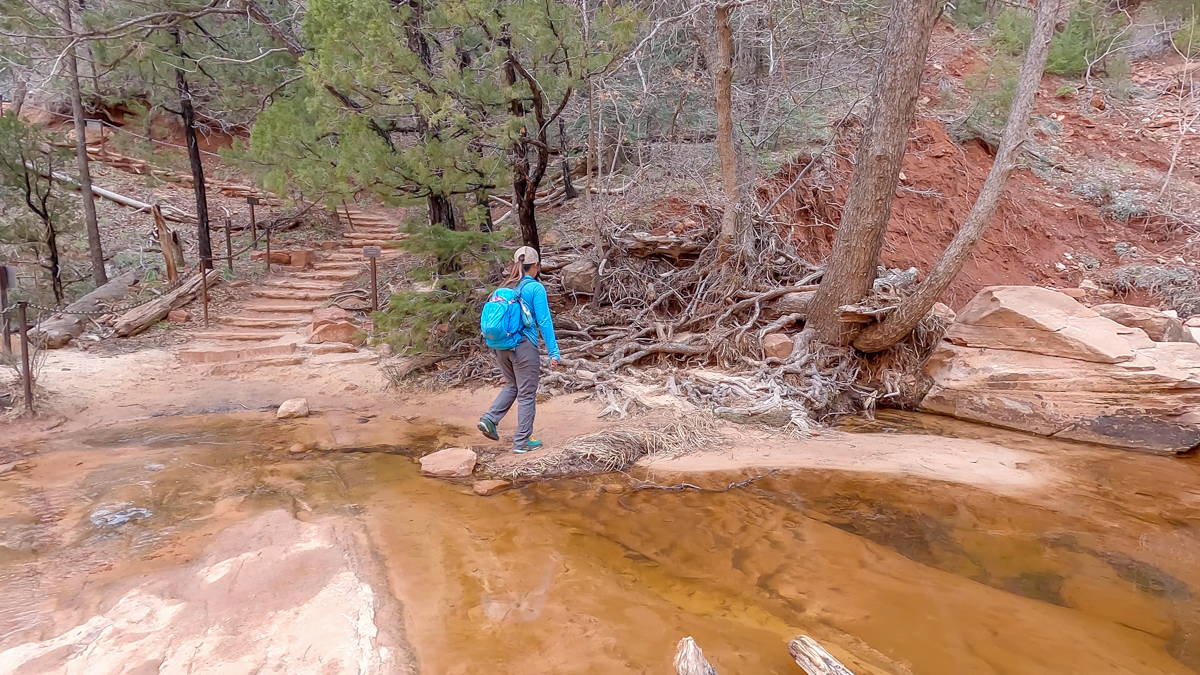
If the Middle Trail stream running more that 2 ” deep, it can be dangerous. Also, the streambed surface can be very slippery. Please make sure to be careful crossing over
NO SWIMMING in the streams or pools
The trailhead for Emerald Pools is located at SHUTTLE STOP #5 – ZION LODGE.
Distance
Lower Emerald Pool – 1.2 miles roundtrip
Middle Emerald Pool – 1.8 miles roundtrip
Upper Emerald Pool – 2.4 miles roundtrip
Elevation Gain
70 feet to lower pool, 150 feet to middle pool, 350 feet to upper pool.
Level
It’s easy to reach the lower pools, moderate to the middle, and upper pool.
Time:
1 – 3 hours depending on which pool you hike to
Pet-friendly
Dogs aren’t allowed on this trail.
Ideal Time
This trail can be hiked year-round. Summers are very hot so it is best to hike early in the morning. You also can avoid the crowd. Spring and fall are best seasons to hike. During winter, there might be ice on the trail, which can make it a bit more difficult. Spring runoff creates powerful, dramatic waterfalls.
Weather
Video
Emerald Pools FAQs
When we first looked into hiking Emerald Pools, it was a bit confusing to figure out which route is which. Therefore, before we start, we’ll address a few questions that most hikers would have
What are Emerald Pools?
Emerald Pools are 3 separate “pools” that formed along a stream as it descends down part of Zion National Park’s canyon walls. These are the Lower Emerald Pool, Middle Emerald Pool, and Upper Emerald Pool. While the Lower and Middle Pools are located along the loop trail, you’ll have to hike a short spur to get to the Upper Pool. These pools are neither deep nor emerald.
Which Emerald Pool is the best?
In our opinion, the Lower and the Upper Pools are both worth a visit, with Upper Emerald Pool being the most photogenic, in our opinion. The Middle Pool is alright. I mean, if you have time, you can stop by and see it, but it’s kind of plain. Both Lower and Upper Pools have waterfalls. These waterfalls are more impressive in Spring or after a big rainstorm.
Can You Swim in Emerald Pools?
Nope. Zion National Park forbid swimming in ALL of the pools.
How Difficult is Emerald Pools Trail?
The difficulty of Emerald Pools Trail in Zion National Park depends on which pools you want to visit. Lower Emerald Pools are rated easy. However, it is a bit more difficult to reach Middle, while getting to Upper Emerald Pool will require more effort. This is due to steep, sandy sections with uneven footing. Fortunately, it is not technical so as long as you take your time, most hikers could make it to all 3 pools.
Emerald Pools Hiking Routes Explained
If you haven’t done Emerald Pools Trail yet, it can seem a bit confusing. Since there are multiple ways to get to each pool, first-time hikers can find the trail perplexing. It’s actually not that bad. Here are a few tips that you need to know:
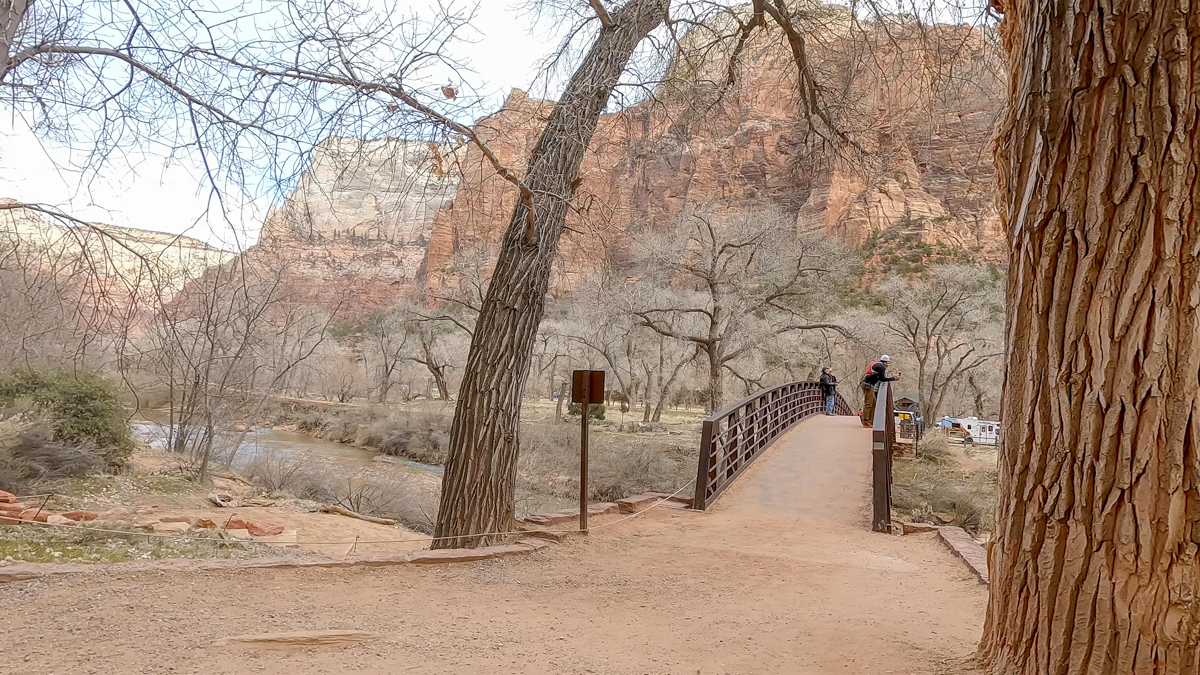
The main way to get to Emerald Pools starts across from the Zion Lodge, shuttle stop 5. You will be crossing a bridge over the Virgin River. You can also get to Emerald Pools via Kayenta Trail, however, this will add at least 0.7 miles each way to your total distance. Kayenta Trail connects to the Grotto, shuttle stop 6.
Right after you cross over the bridge, you’ll come up to a fork. Going either direction will take you to any pool, regardless of what the directional sign says.
You can hike the Emerald Pools Trail in a loop or as an out and back.
Turning right at the fork is the shortest way to all the pools if you just want to do an out and back. Turning left makes Emerald Pools trail into a longer loop hike.
Getting There
Emerald Pools Trail trailhead is located across from Zion Lodge, on the other side of the Virgin River. There are a few ways to get to the Emerald Pools trailhead:
Hiking – You can hike to Emerald Pools trail using either Sand Bench Trail from the South or Kayenta Trail from the North.
Car or Shuttle – when the park shuttle is running, usually from April through October, you will need to take a shuttle to shuttle stop #5, the Zion Lodge. The shuttle starts at the Zion Visitor Center in Springdale. When the shuttle is not running, usually in the winter, you have to drive your car in. Again, the trailhead for Emerald Pools is across from Zion Lodge. You can either park at the lodge or at a small lot across the street from it. The bridge is right behind this small parking lot.
The Adventure
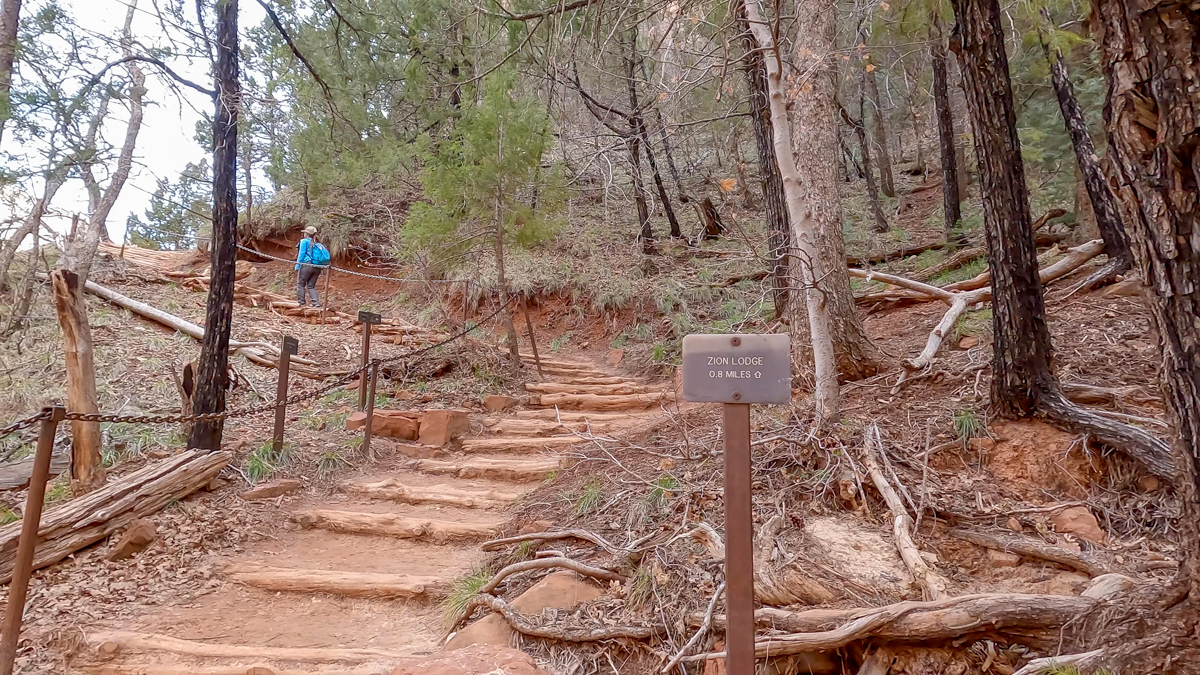
The Start of the Trail:
We actually started the Emerald Pools trail from the Kayenta trail, which we will cover in next week’s article. To make this easier, we will explain the Emerald Pools trail as a full loop after you turn right at the fork.
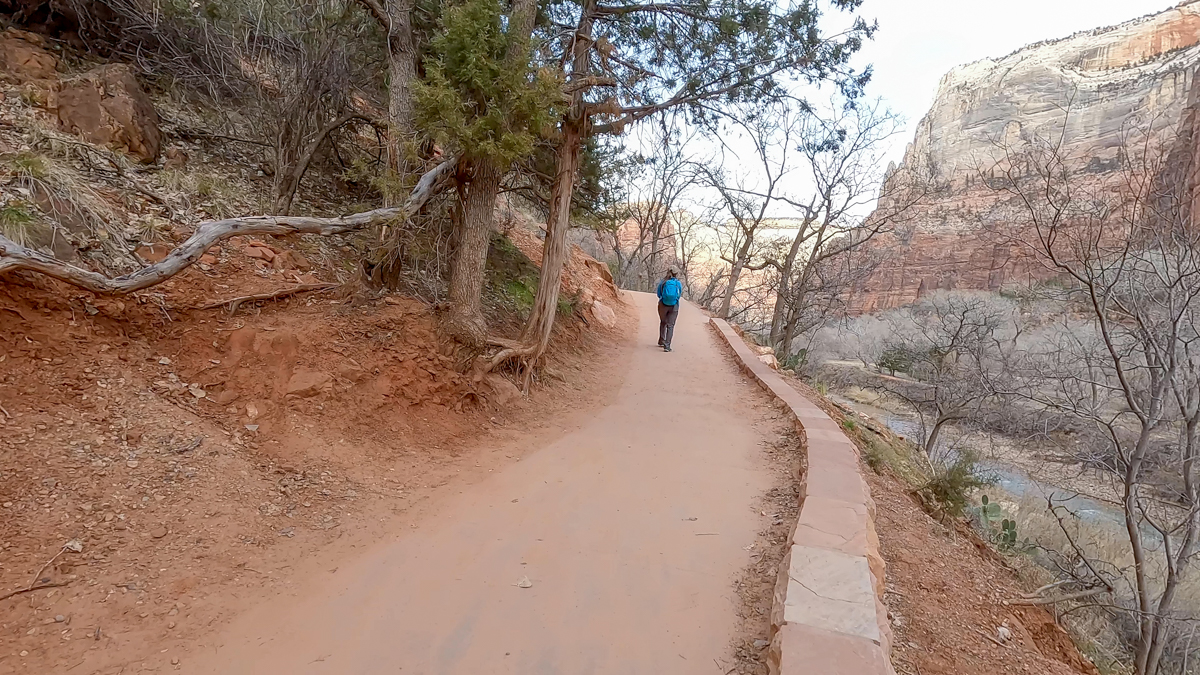
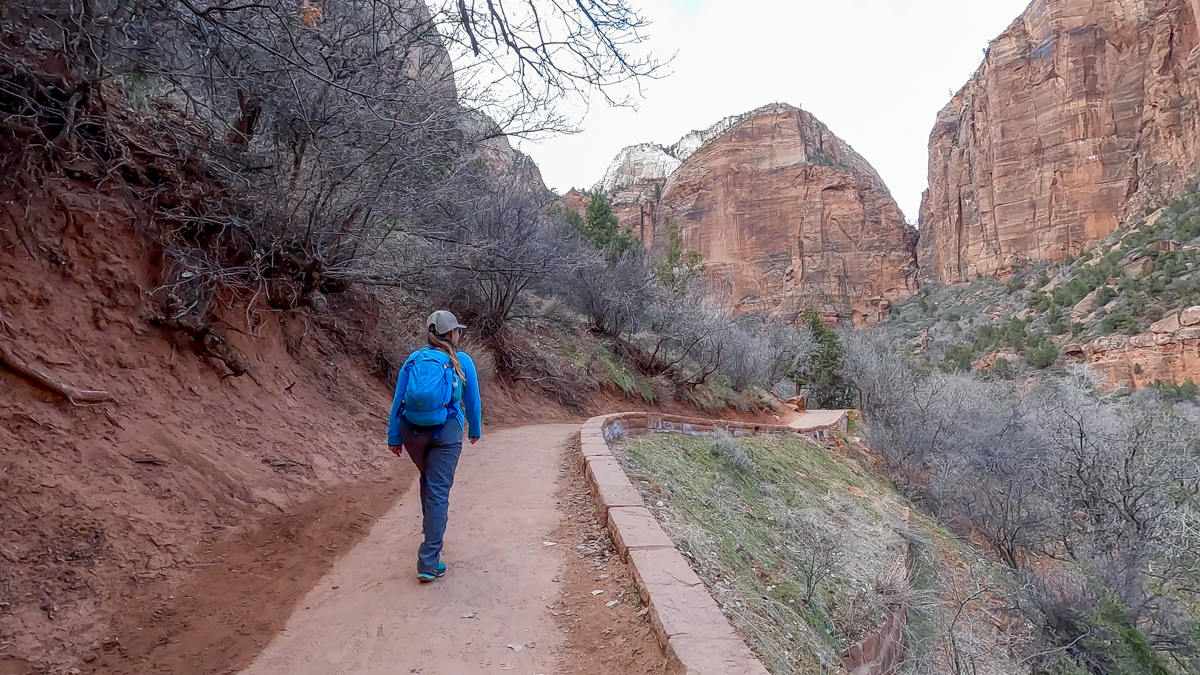
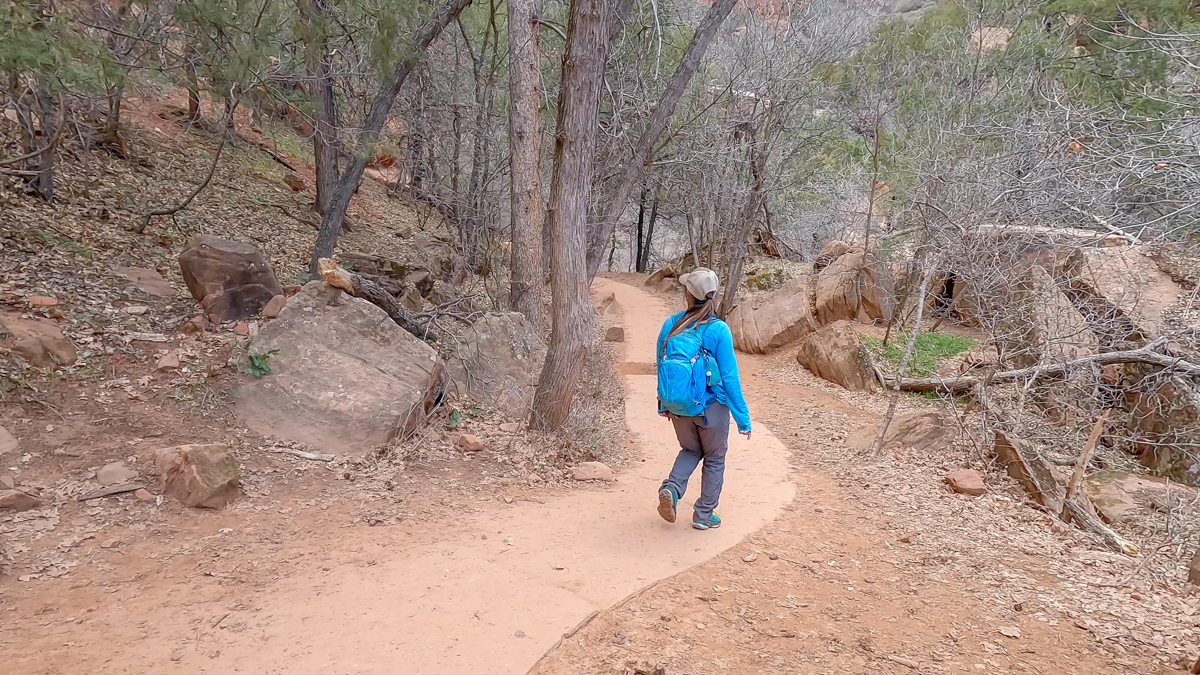
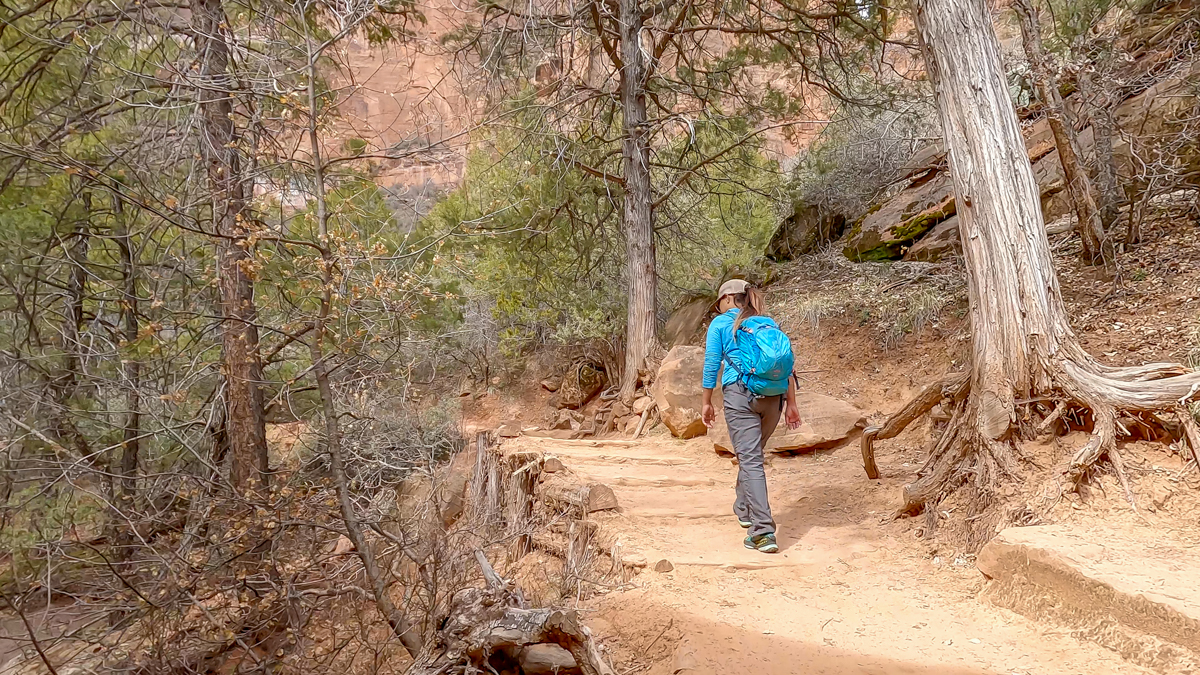
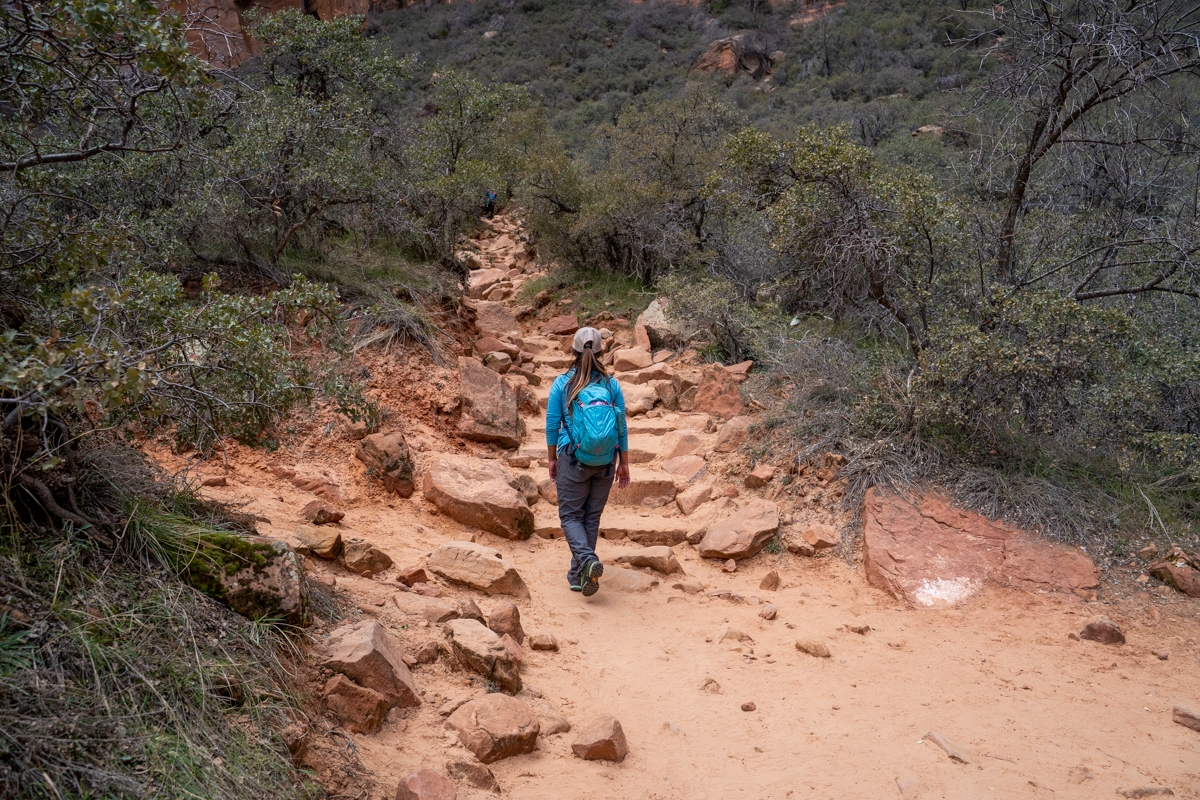
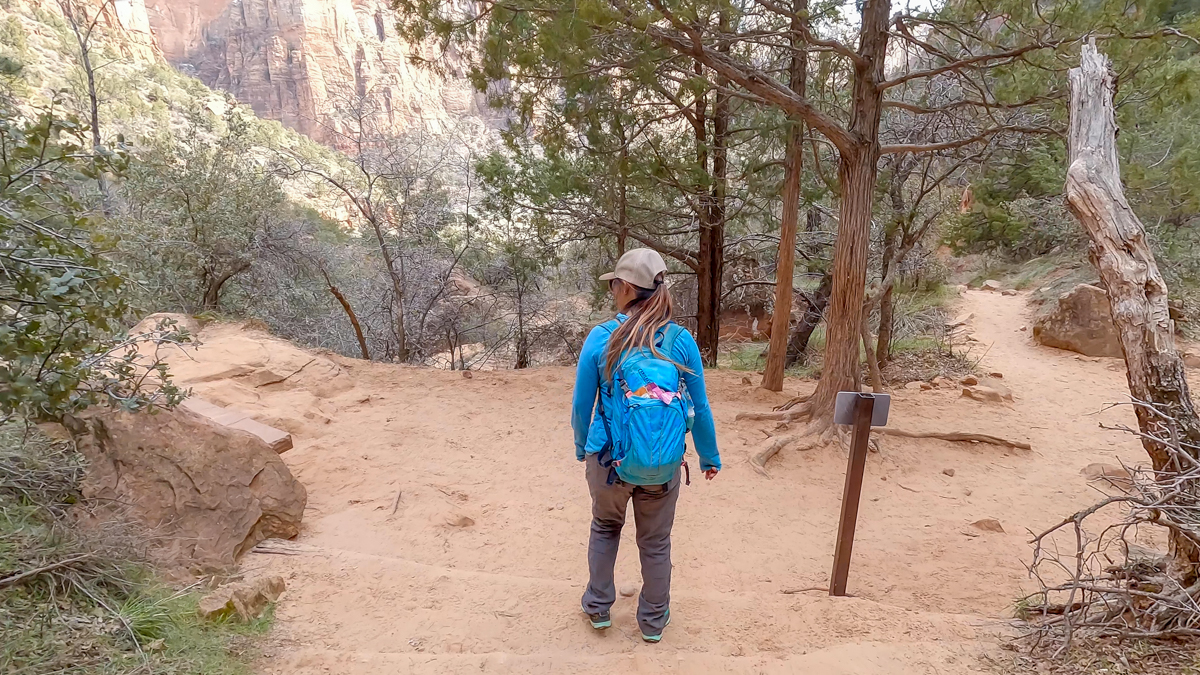
Immediately after crossing over the bridge, you’ll come up to a fork. As we said above, either way, will take you to any pool. We opted to go right first. The first section of the trail is paved and runs parallel to the Virgin River. About 0.2 miles, the trail curves left and proceeds into the canyon. You’ll also start to gain a slight elevation. Since this section of Emerald Pools trail is mostly flat, it is a nice, easy stroll with most of it surrounded by trees.
Previous
Next
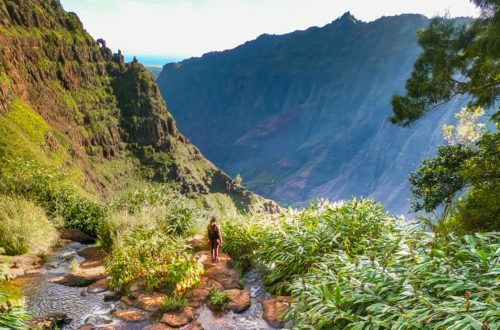
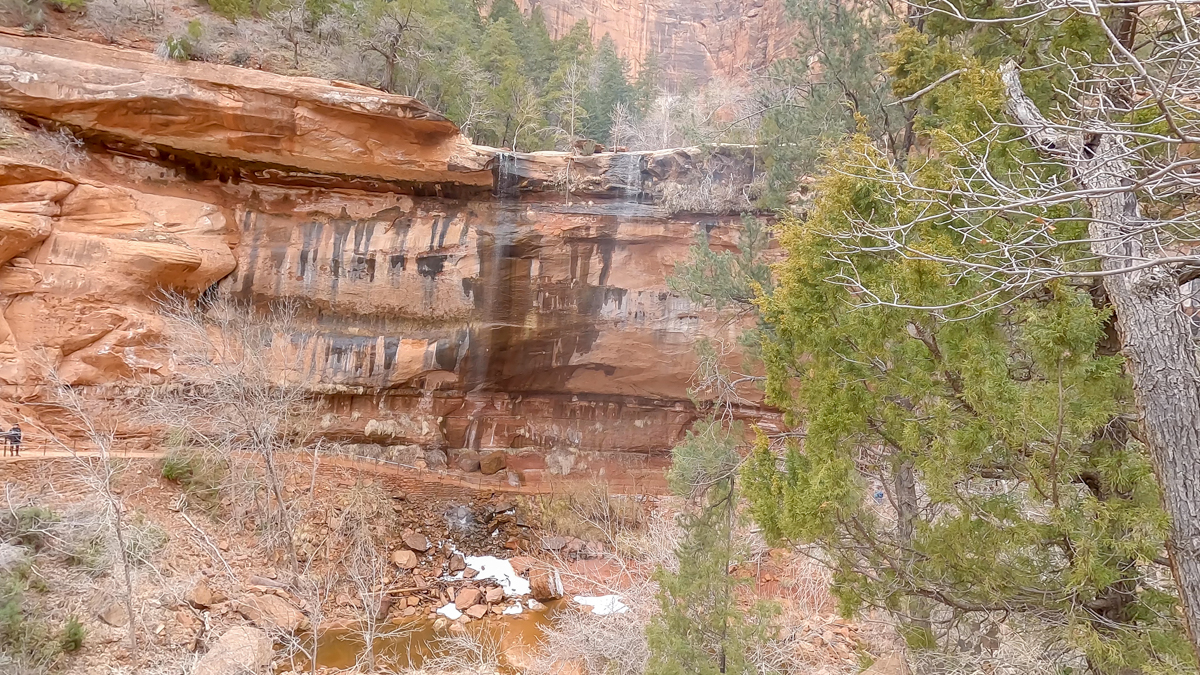
Lower Emerald Pool
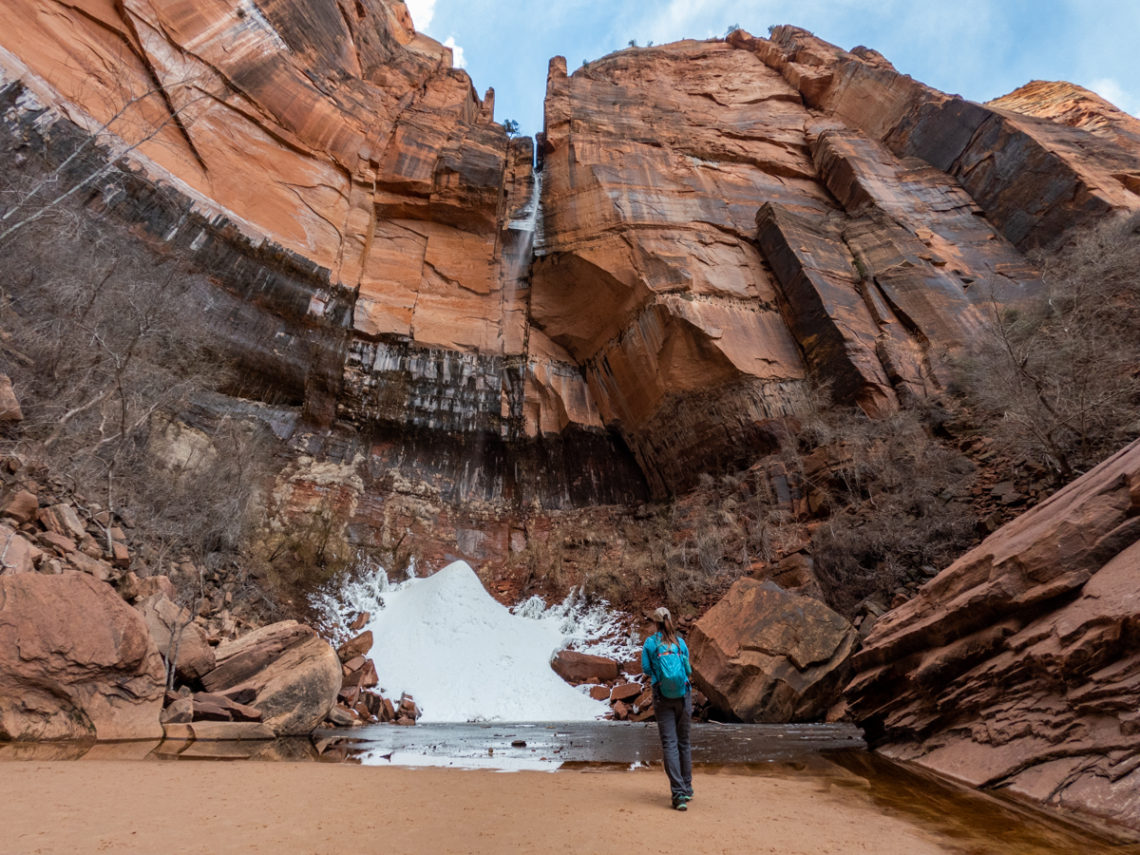
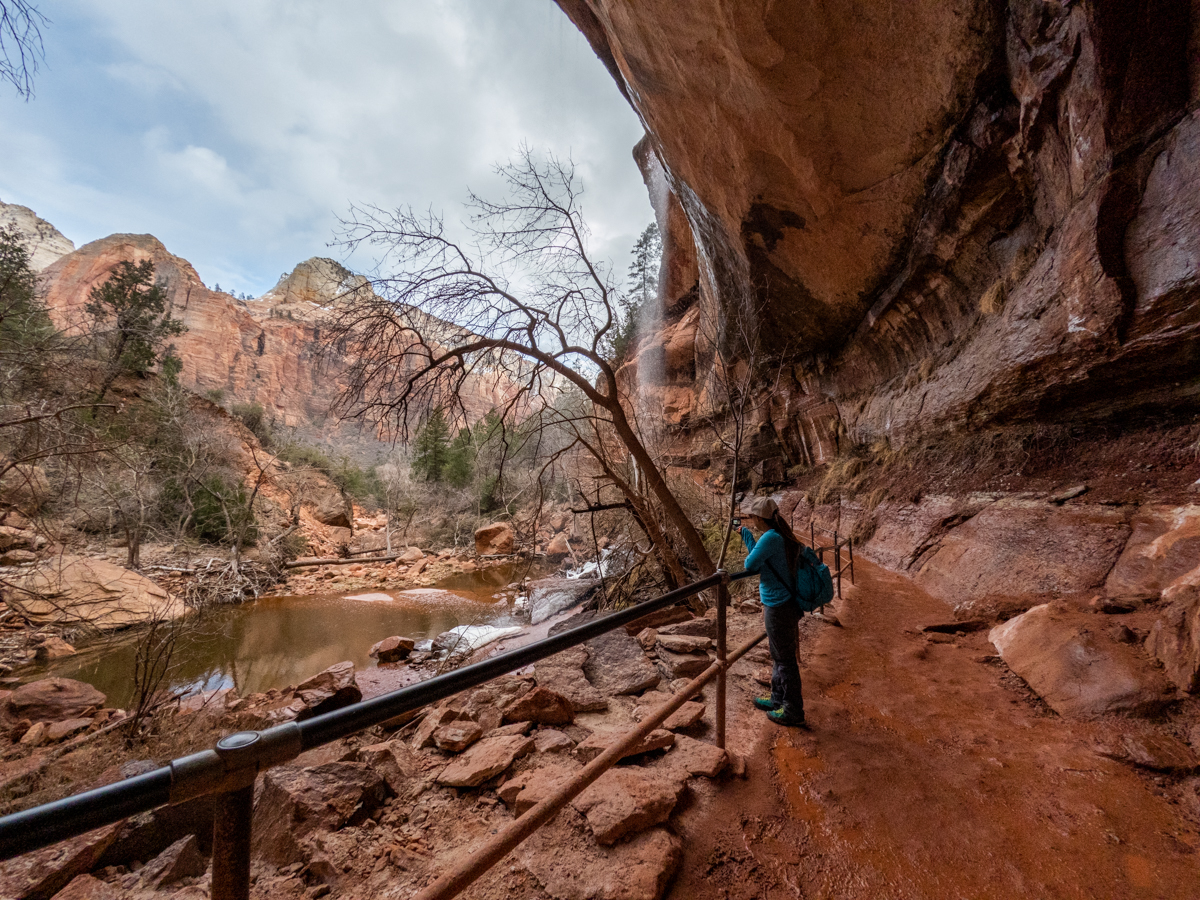
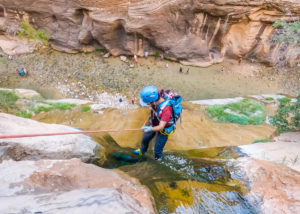
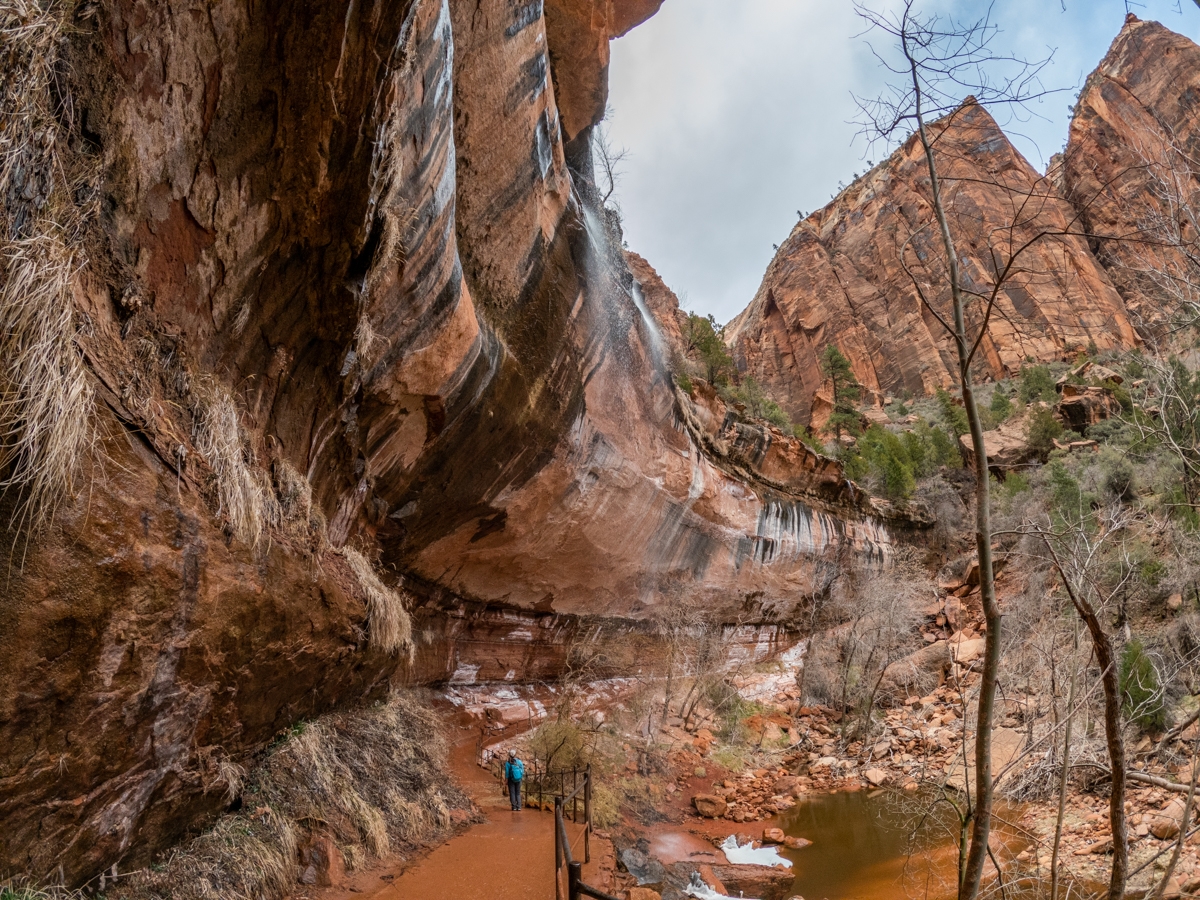
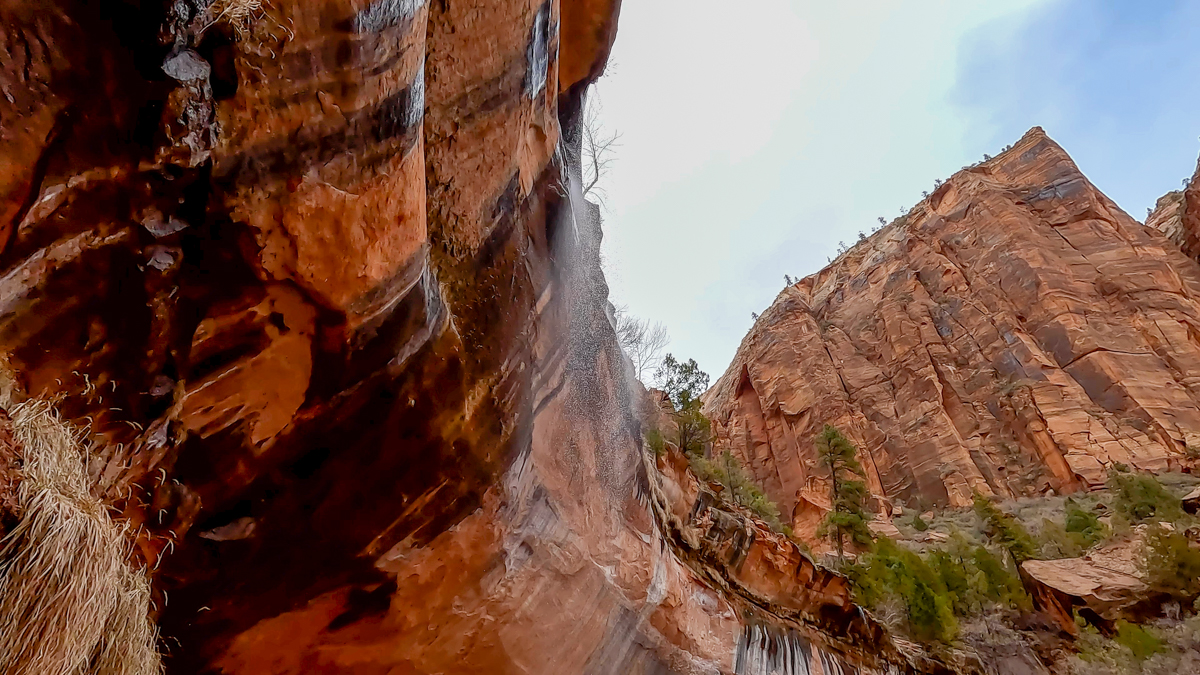
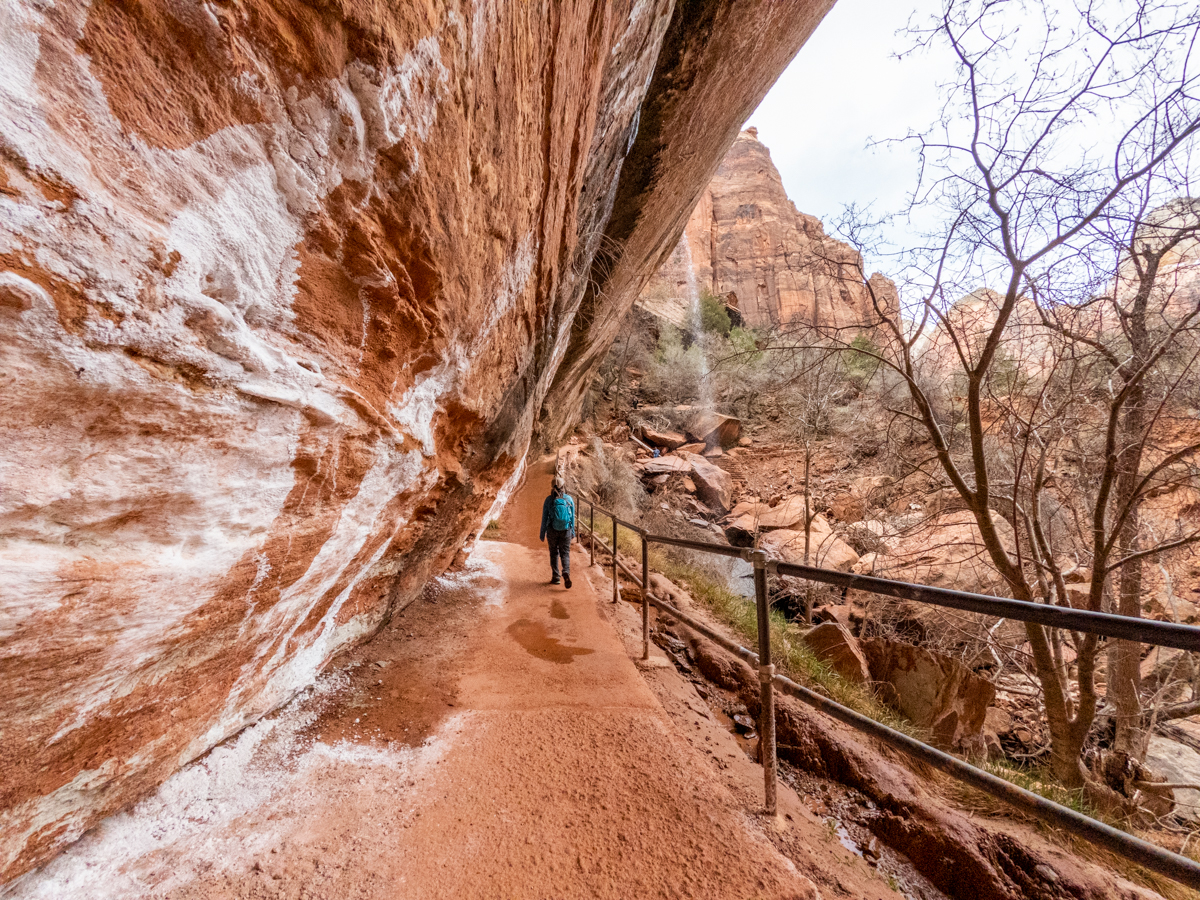
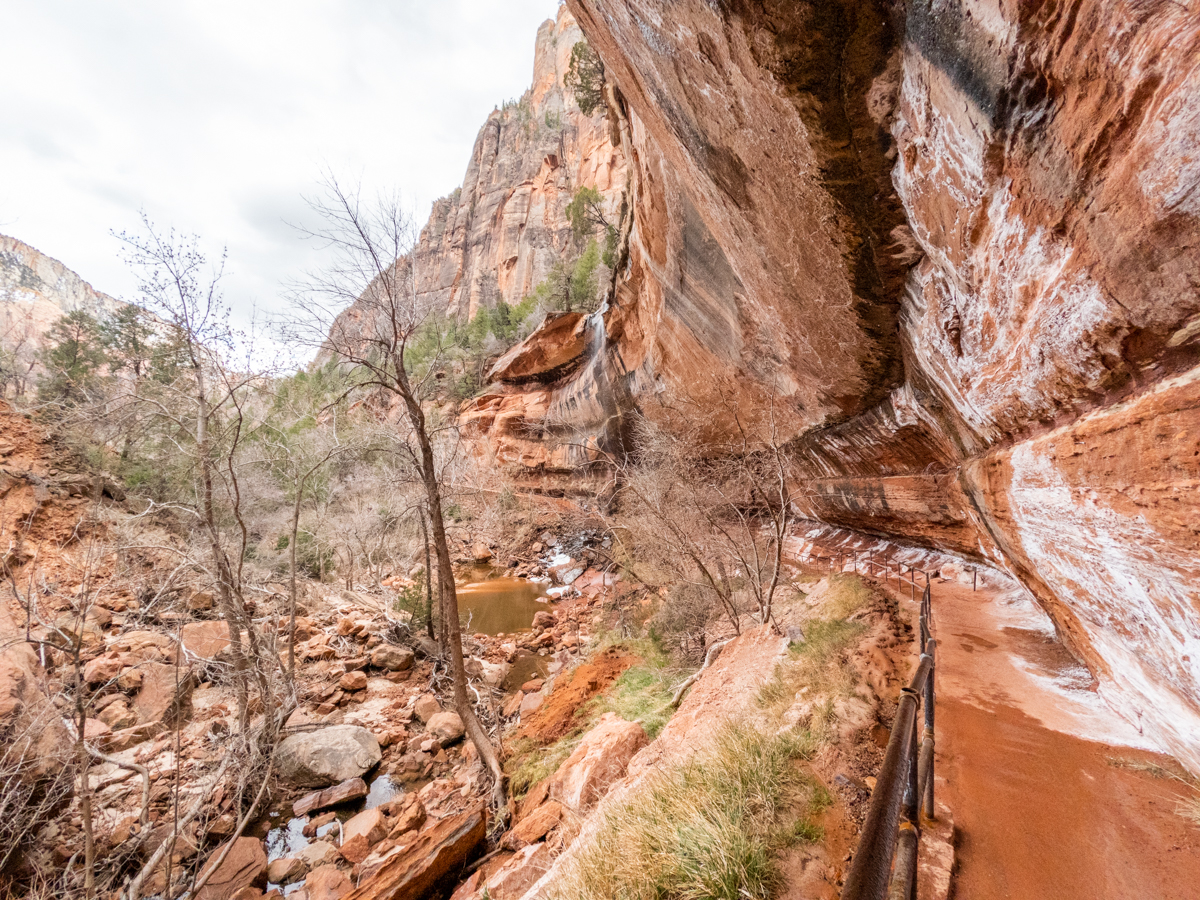
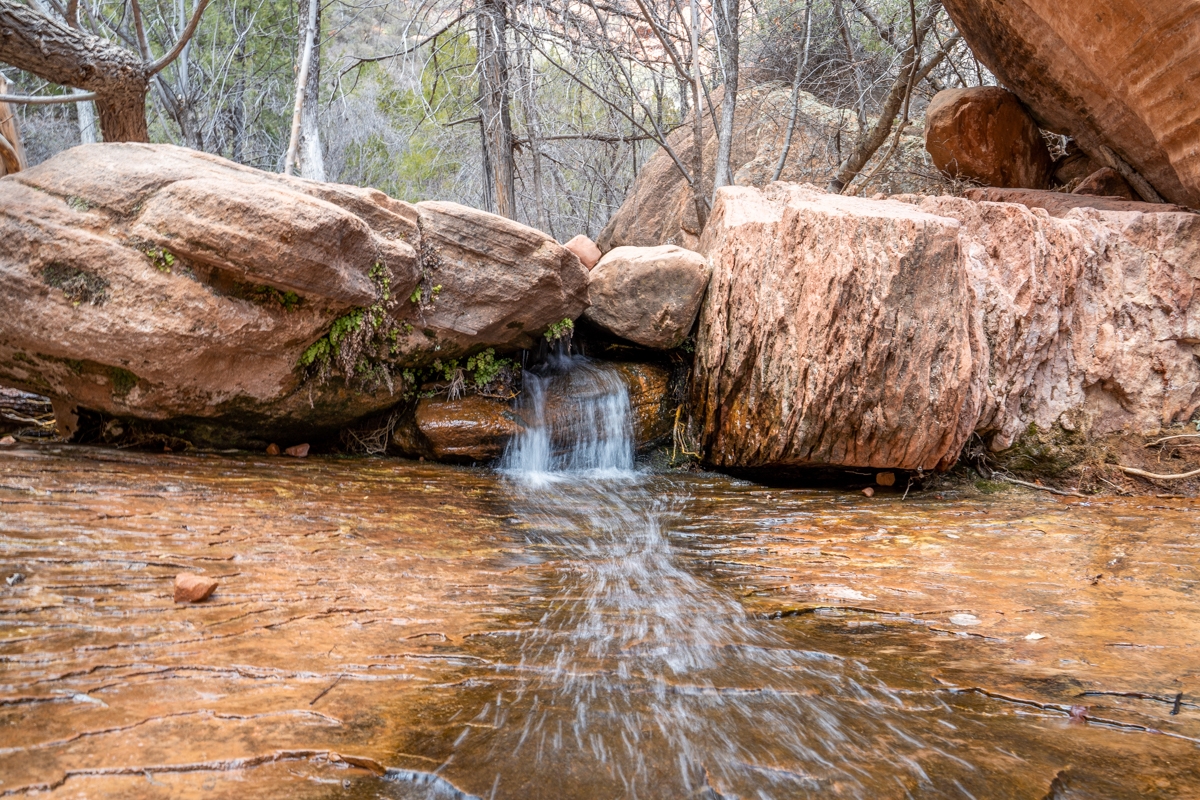
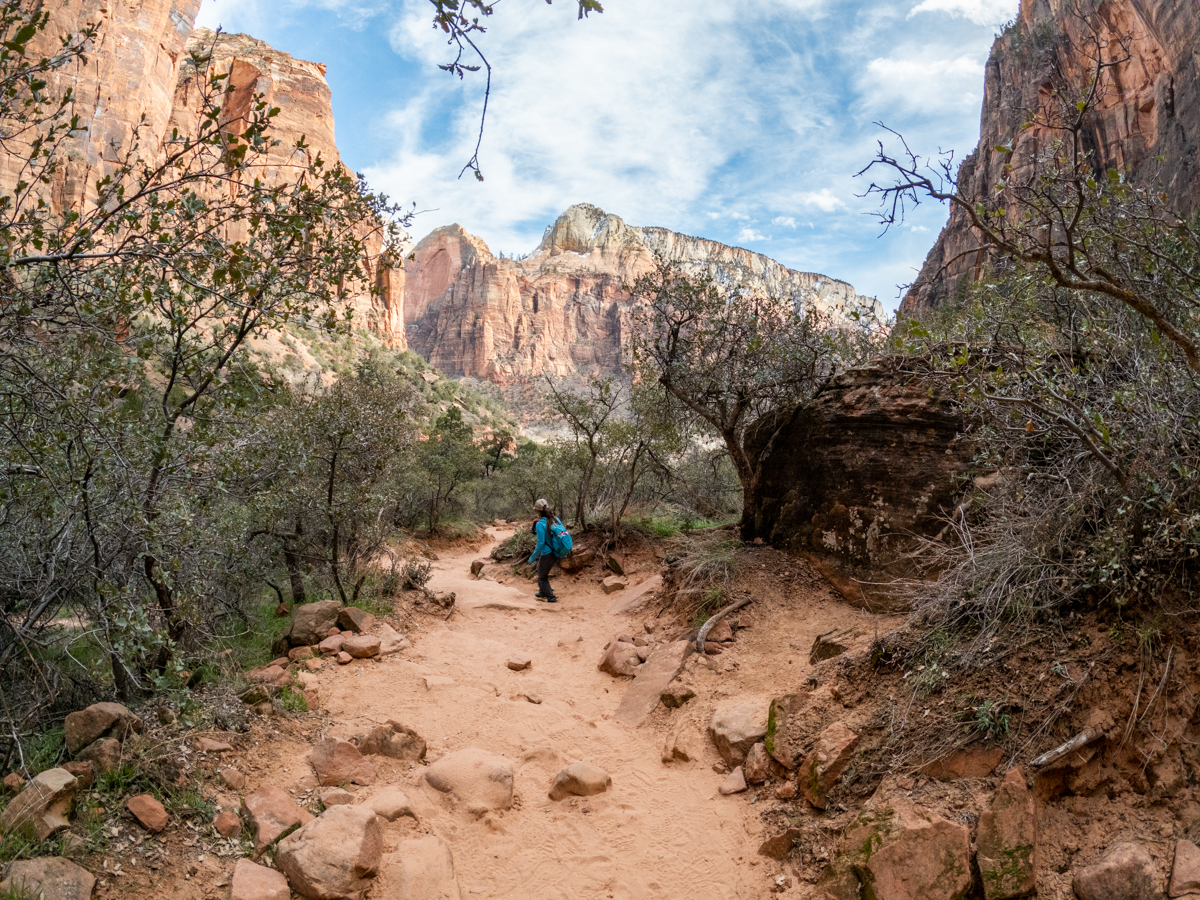
About 0.6 miles from the bridge, the trail opens up to the view of a big alcove, and the view of a beautiful waterfall plummeted over the alcove into the pool below. This is Lower Emerald Pool. The funny thing is, even though the trail is named Emerald Pools, the spectacular waterfalls are the main attractions on this trail. The pools are quite mediocre. If Lower Emerald Pool is the only pool you want to see, you can turn back here. To continue on, you can follow the trail that runs behind the water. Be careful when going through this part. Even though there are railing along this section of the trail, it can get muddy and slippery. During spring runoff, the waterfalls can be pretty impressive.
Previous
Next
View Point
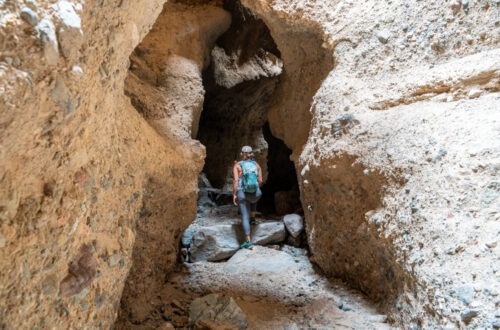
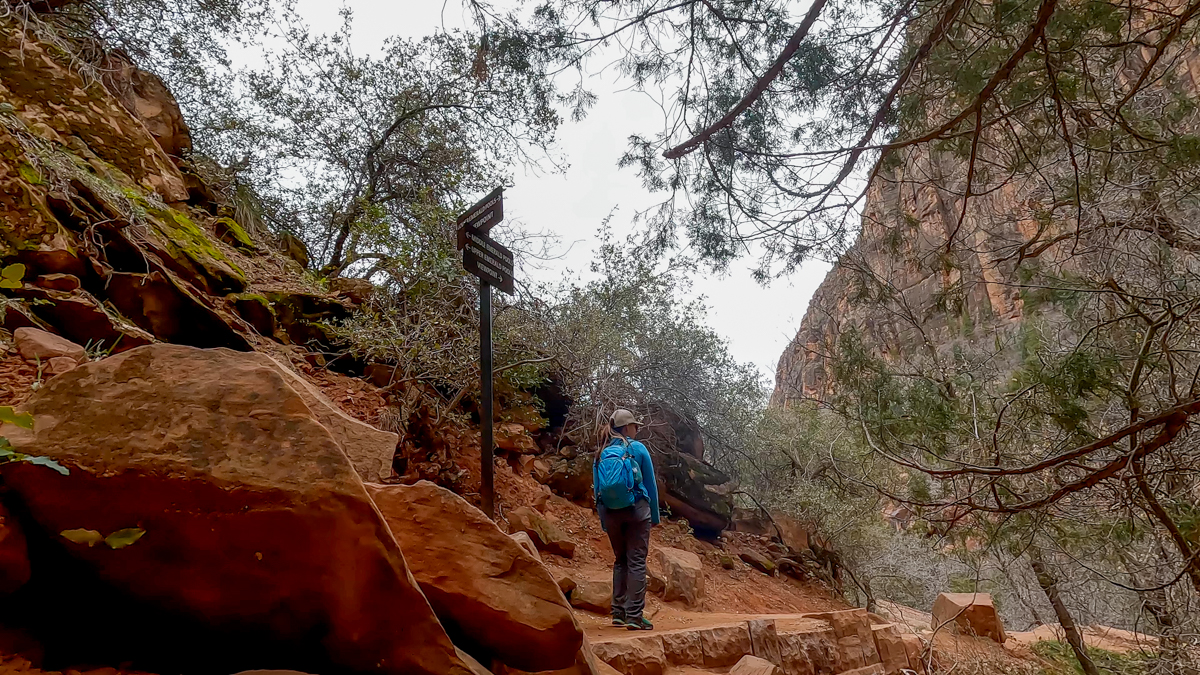
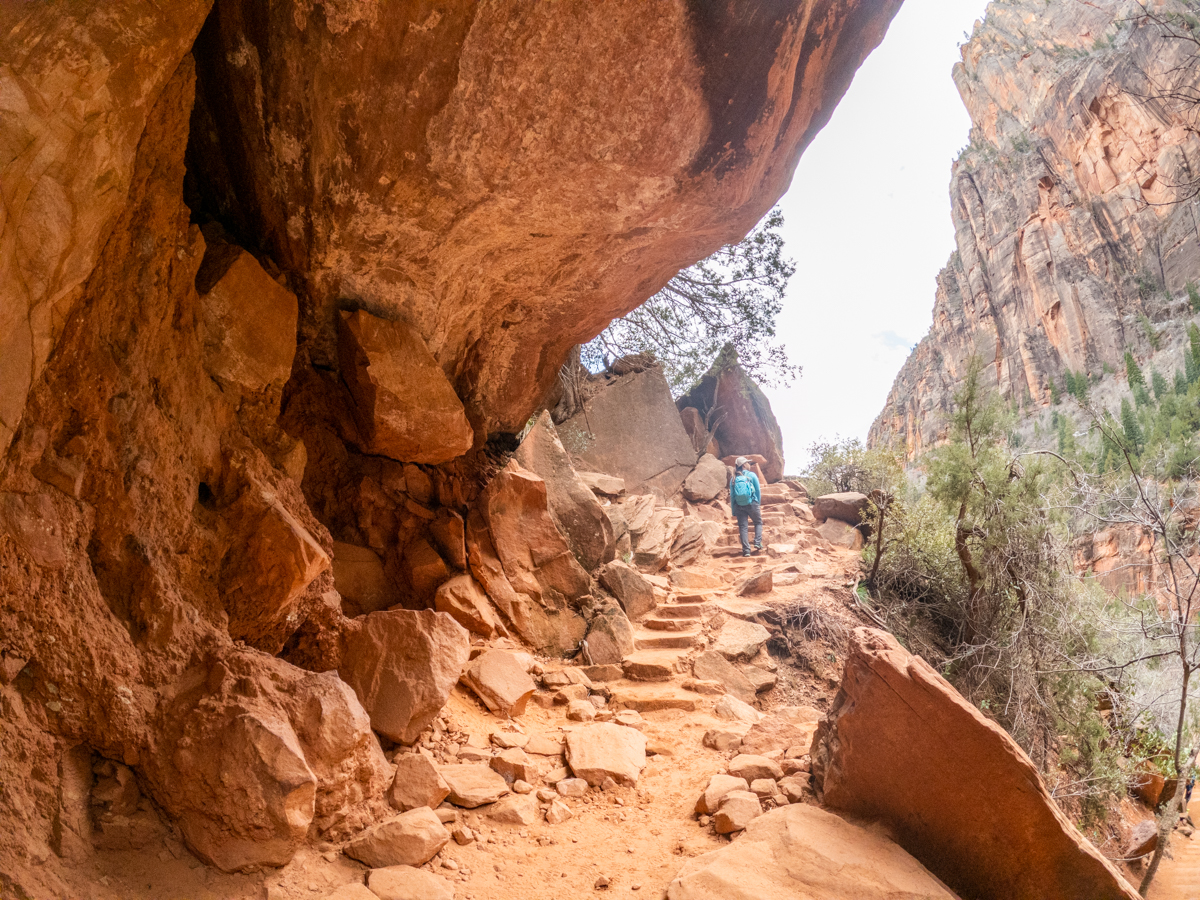
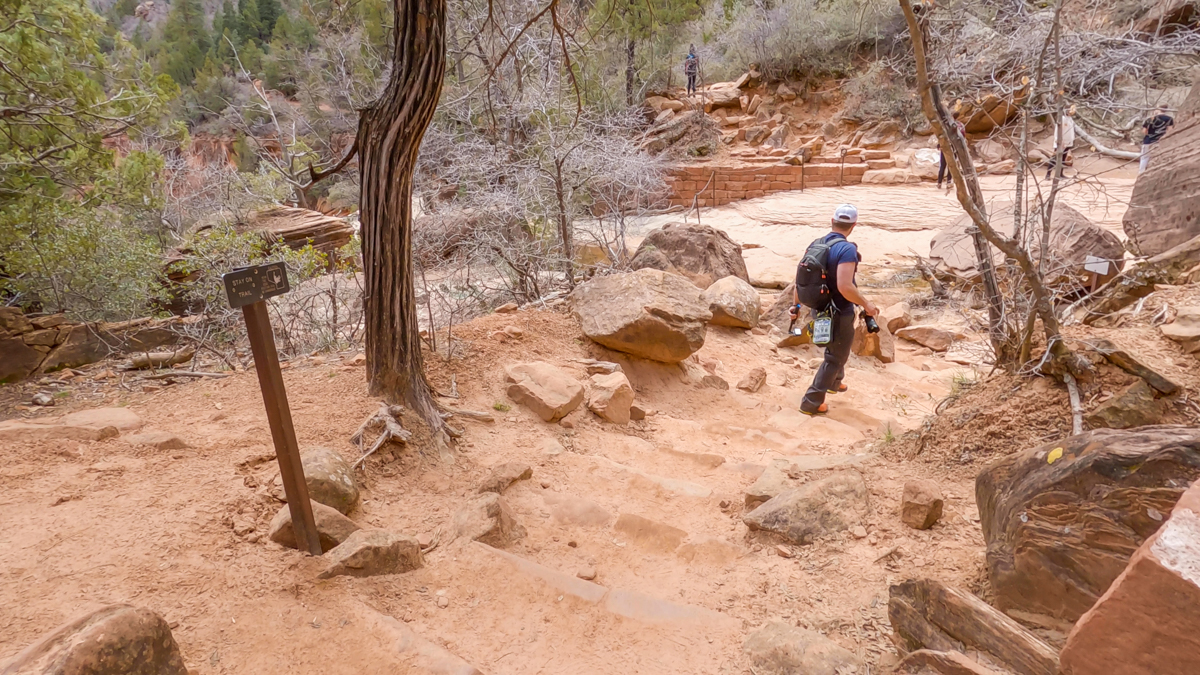
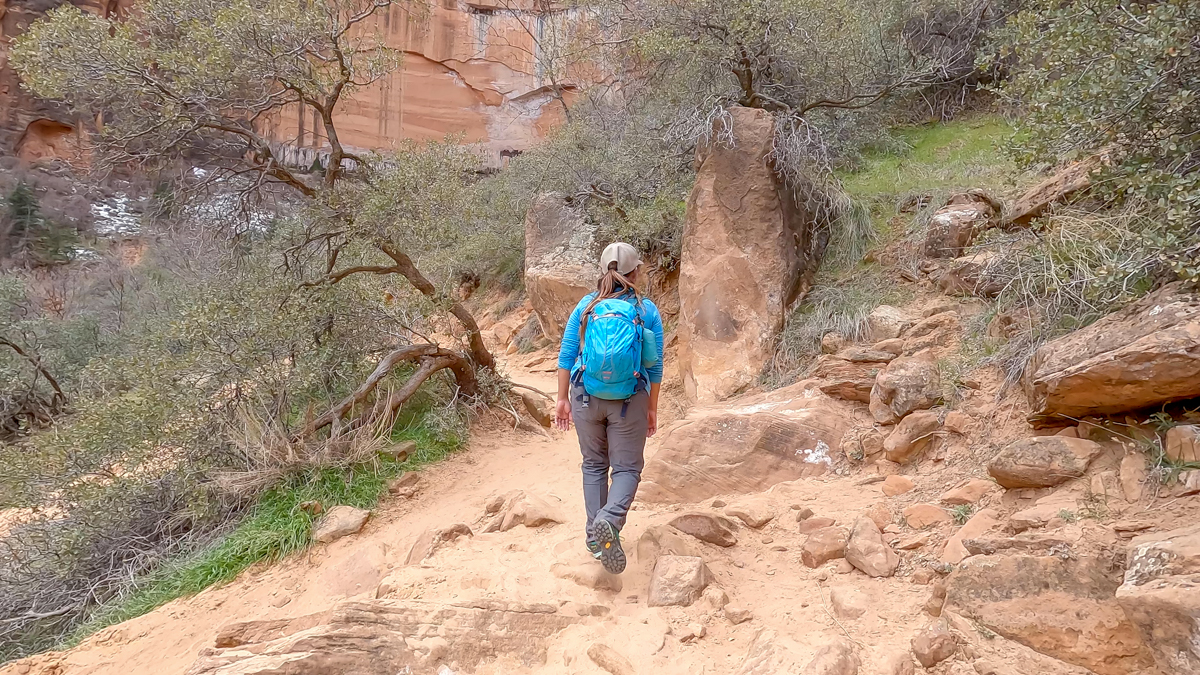
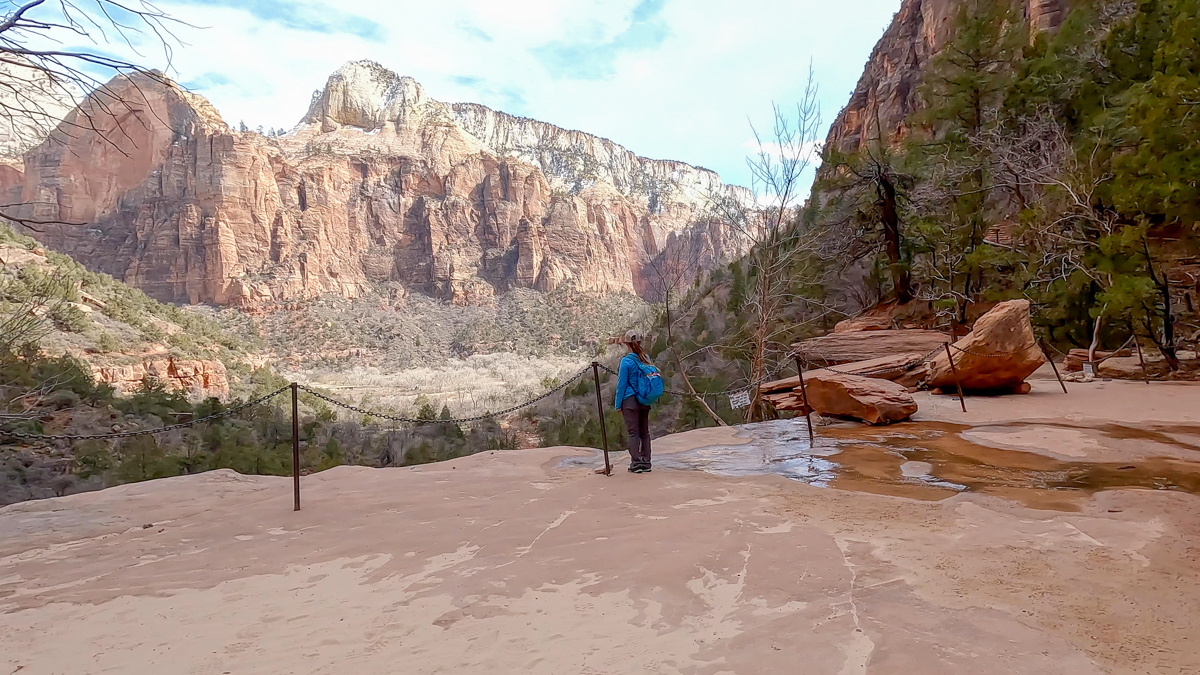
After crossing under the waterfall for Lower Emerald Pool, the trail can get a bit confusing. Luckily, there are signages along the way. The trail leaves the alcove and follows up a series of steep, natural staircases. It came to an intersection with a couple of signs pointing the way. You can either go left to do Middle Emerald Pool or go right toward a viewpoint. The viewpoint will give you a different view of the waterfall of Lower Emerald Pool.
Previous
Next
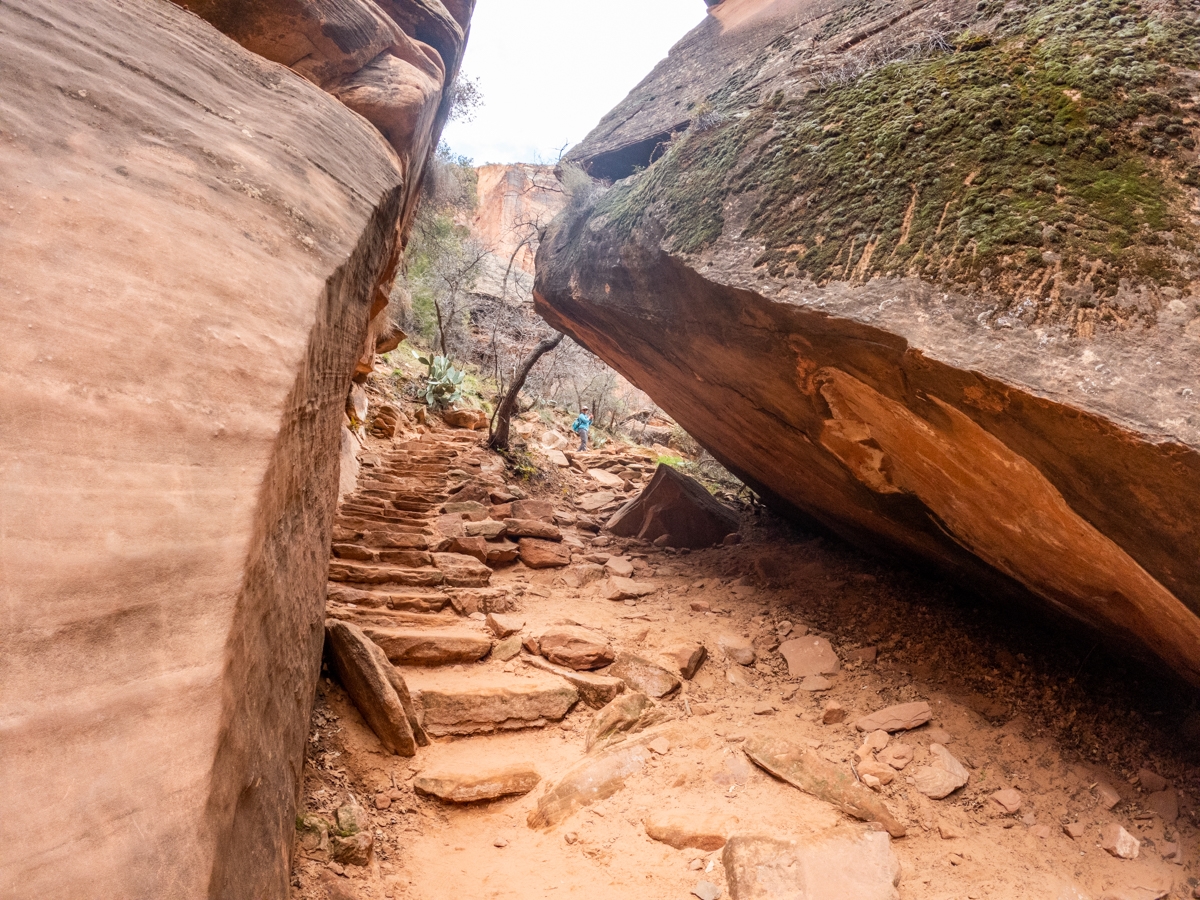
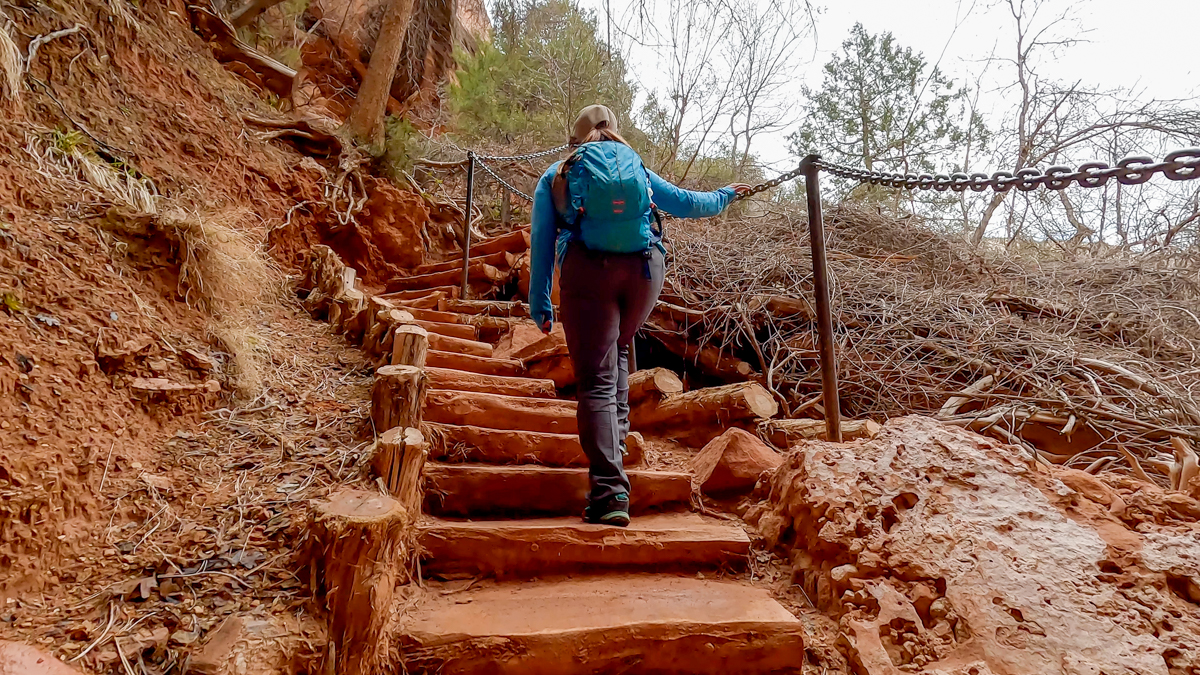
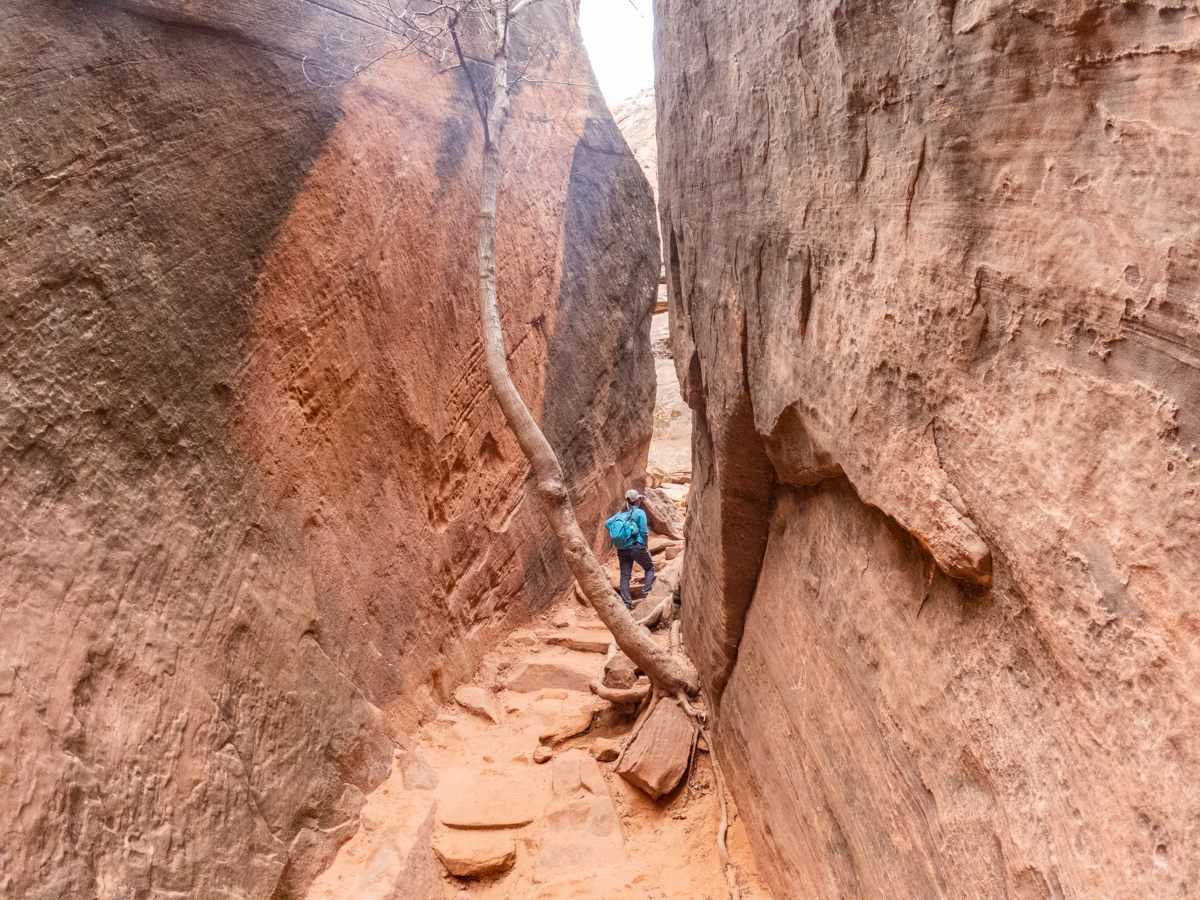
Middle Emerald Pool
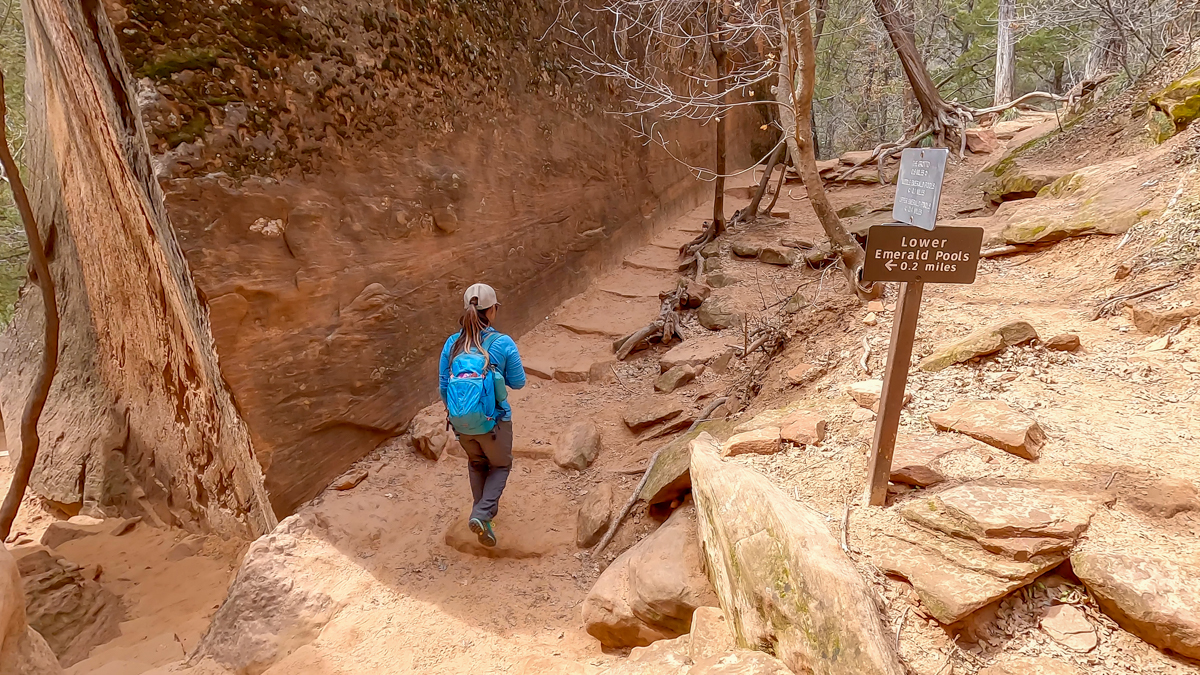
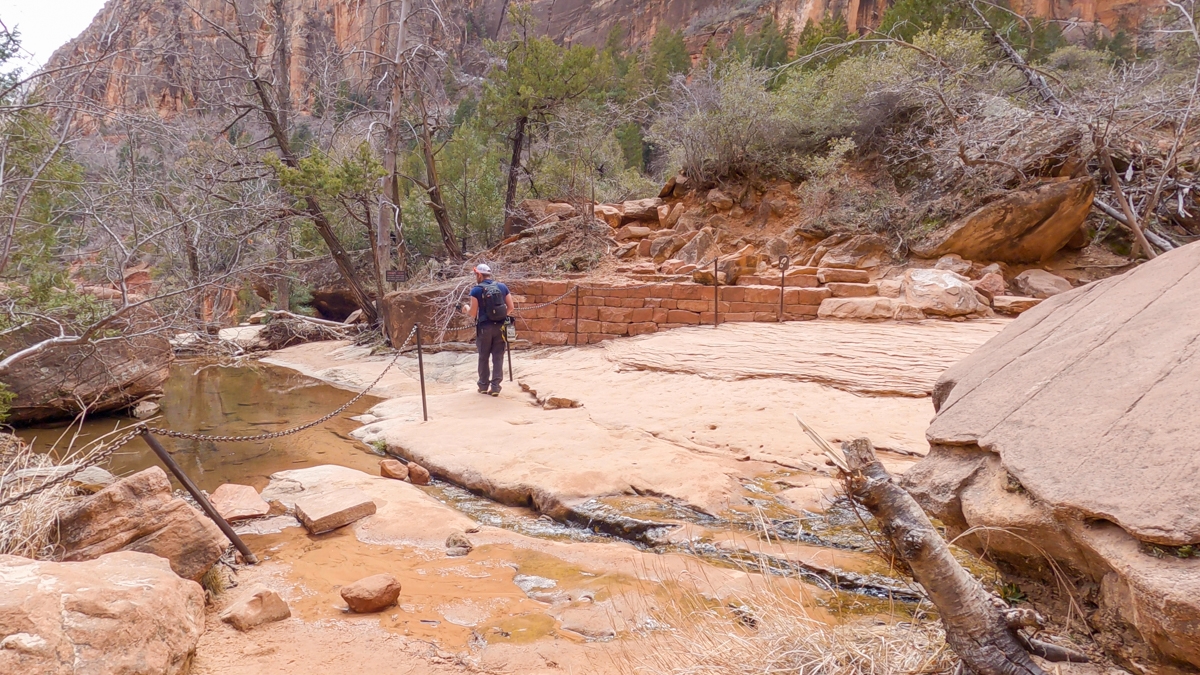
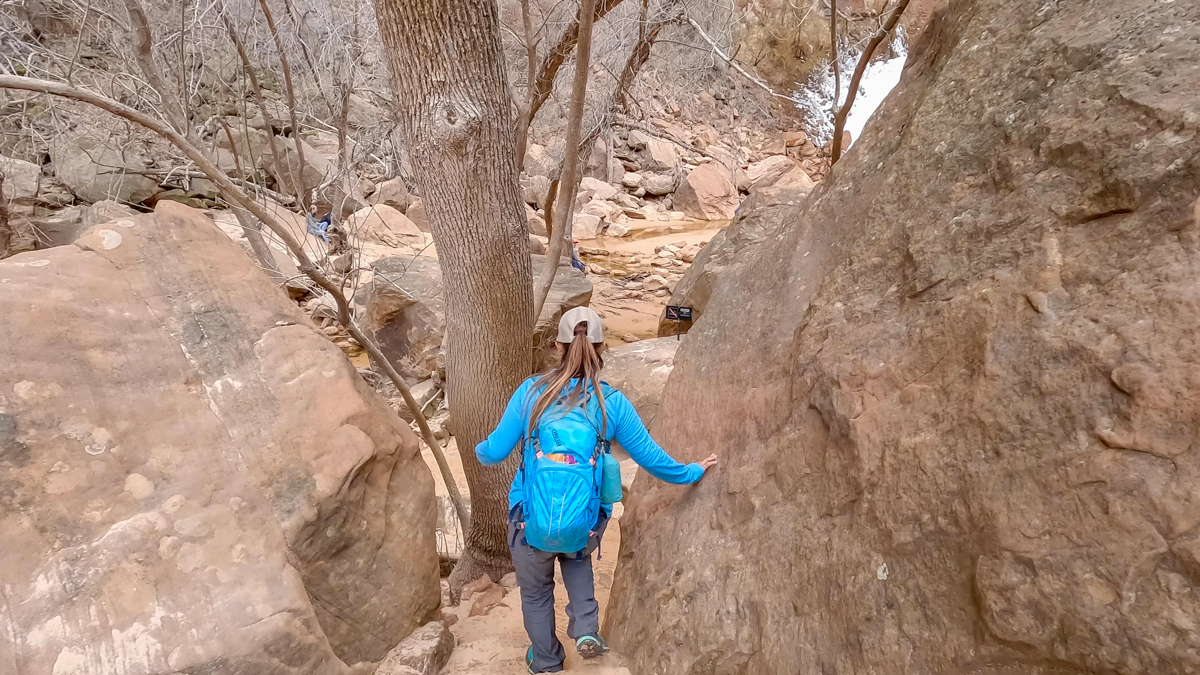
After finishing with the detour, you can get back to the main trail. This part of the trail is my favorite part. It’s really pretty as the trail snakes up the rocky stairs and between tall boulders, almost like a mini slot canyon. Once you got up the beautiful staircases, you’ll see a couple of small directional signs, next to an opening between the two big boulders. If you want to do the Kayenta trail, this is where they will connect. Otherwise, follow the signs for Middle Emerald Pool. About 0.2 miles, you’ll reach the Middle Emerald Pool.
Middle Emerald Pool is not really a pool but more like a wide area in the stream, on top of the waterfall. To be honest, it was underwhelming. We didn’t realize this was it until we saw the sign. It was a bit disappointing. If you’re crossing over this area, make sure to stay within the chainlink and watch your steps. The slickrock area can be slippery.
Previous
Next
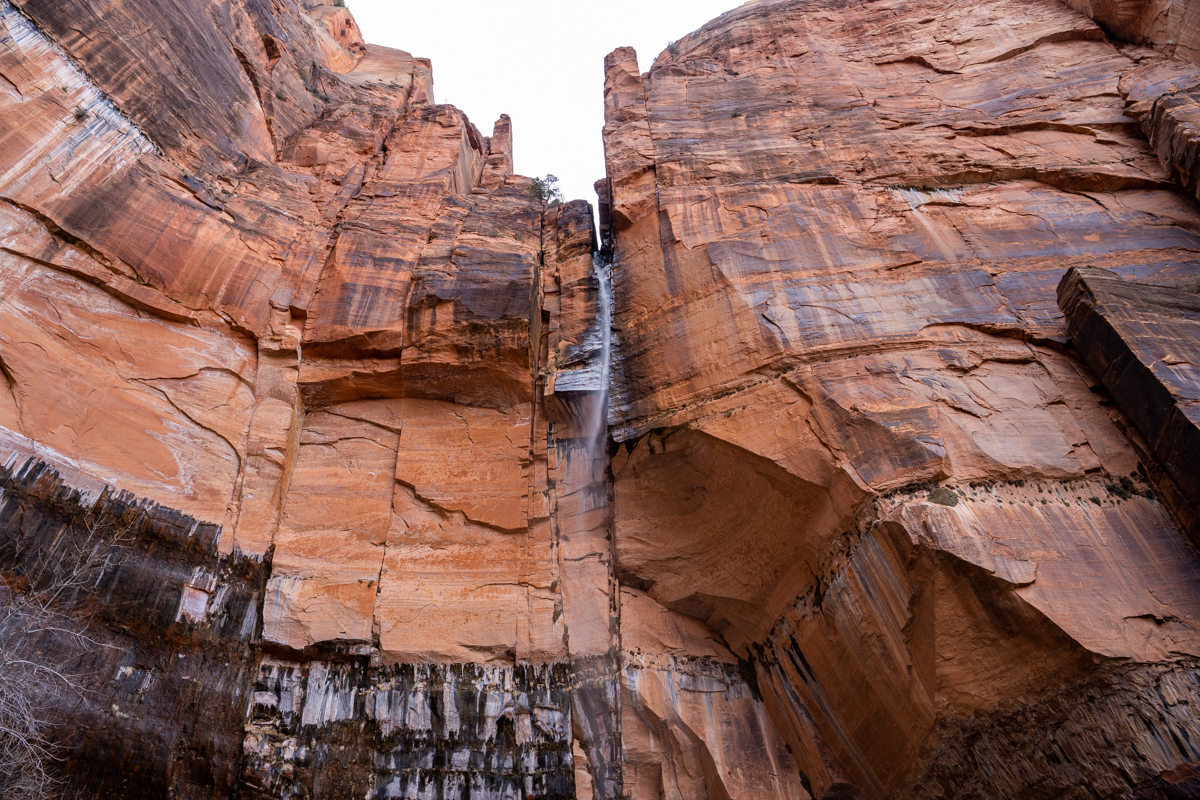
Upper Emerald Pool
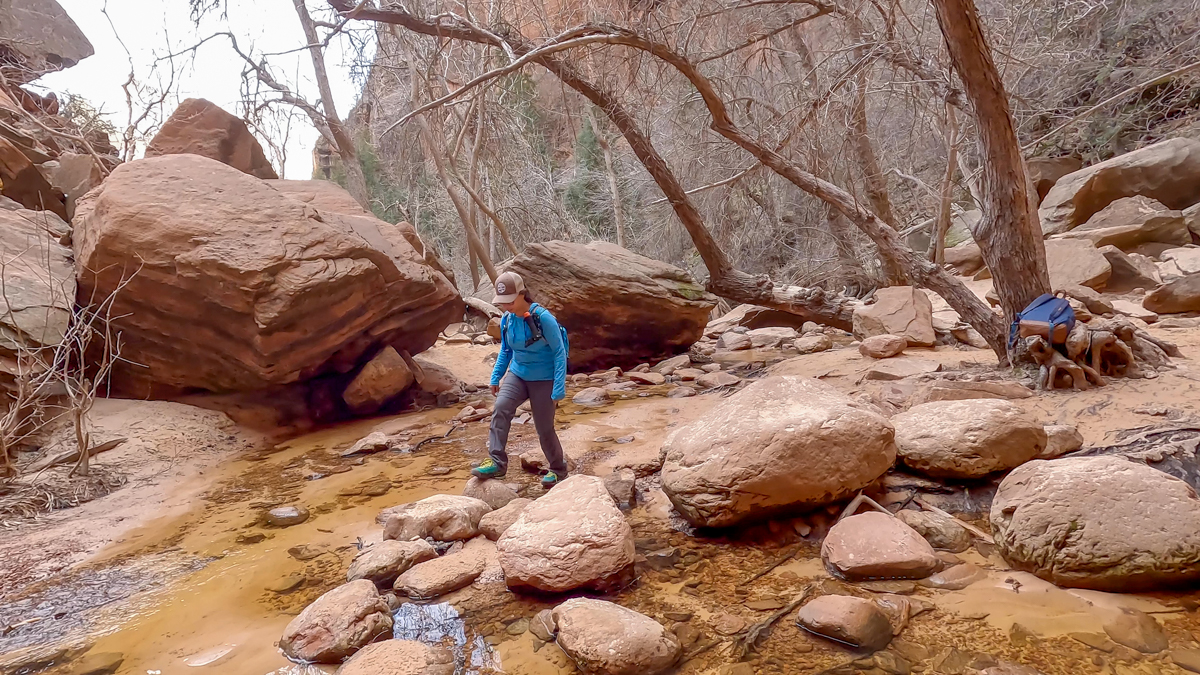
From Middle Emerald Pool, follow the sign for the trail to Upper Emerald Pool. The trail will get very steep. It can also be rocky and slippery in certain sections. You might have to do some minor scrambling as well. Even though this section is steep, it is only 0.3 miles. So, it won’t take too long for you to make it to Upper Emerald Pool. Before getting to Upper Pool, you’ll need to cross over the stream. Be careful if you’re trying to boulder hop.
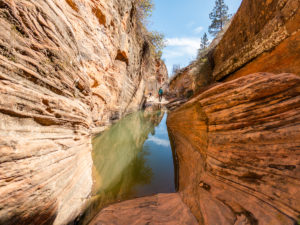
The Upper Emerald Pool is quite beautiful. The glistening pool is cradled in between the giant walls of stone. If you look up from the pool, you can see the ribbon-like waterfall, pouring down from above. Depending on the time of the year, this waterfall can be voluminous. If you want to get close to the waterfall, you can scramble up toward the left side. However, watch out for Poison Ivy. We went in the winter so the pool and its surrounding area were covered in snow and ice. It was interesting to see the pile of snow below where the waterfall was flowing down. Once you’re done here, return the way you came.
Previous
Next
Complete the Loop
Once you get back to the junction where the Upper Emerald Pool trail starts, go right to complete the loop. You’ll soon cross over the top of the second waterfall. Make sure to stay away from the cliff. The sandstone can be very slick and slippery, especially when there is a lot of water. After crossing over, follow the sign for the lodge. It is a long, almost flat walk to the bridge and the parking lot. You’ll also get some beautiful views of the valley below, as well as the view of the lodge from above.
These are the gear that we personally use and find them helpful for this particular adventure. Don’t forget to check out our Recommended Gear section as well.
adventure gear
This is our favourite hiking shoes. We use them for canyoneering as well. Lots of traction. Vy’s version.


