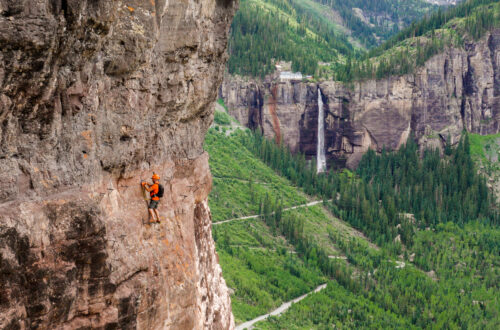
Waipoo Falls is an impressive 800 ft tall waterfall in the heart of Waimea Canyon in Kauai. The falls are broken into two tiers. The beginning part is a short waterfall of about 25 ft. It then flows down rocky terrain before plunging down to create the main, taller waterfall. We always stop to look at this gorgeous waterfall every time we drive into Waimea Canyon. The last time we were there, we decided to hike the popular hike Waimea Canyon Trail to Waipoo Falls. If you are hoping to have a great view of the falls at the end of this hike, sadly you won’t. You can’t hike to the bottom of Waipoo Falls. This hike will only take you to the top of the falls. It is not your classic waterfall hike but it is a beautiful hike nonetheless.
STATS:
Where:
Waipoo Falls trailhead (it is the same as Canyon Trail trailhead)
22°06’34.4″N 159°40’10.0″W
Parking lot: 22°06’34.6″N 159°40’12.2″W
Waipoo Falls: 22°06’15.9″N 159°39’41.6″W
Parking:
The Waipoo Falls trail parking is the same parking lot for Pu’u Hinahina Lookout. It is a decent size, paved parking lot.
Restrooms:
There are restrooms at the parking lot but not on the trail.
Distance:
3.2 miles R.T.
Elevation Gain:
840 feet
Level:
Intermediate. There is quite a bit of elevation change within a short distance. The trail also can be very slippery when wet.
Estimated Completion Time:
2 – 3 hours depending on how many breaks you take and how long you spend at the swimming hole.
Ideal Weather:
Cool, dry days are best. The trail can get very slippery when it rains or right after recent rain.
Ideal Time:
Early mornings will give you cooler temperatures and a better chance of getting a parking spot.
Dog-friendly:
No pets are allowed on the trail.
Weather:
GETTING TO WAIPOO FALLS TRAIL:
There are multiple starting points to get to the Waipoo Falls Trail. However, the most scenic and popular route is the Waimea Canyon Trail to Waipoo Falls. The trailhead begins in the Pu’u Hinahina Lookout parking lot, between markers 14 and 15 on Hwy 550. Don’t forget, you won’t be able to hike to the bottom of the taller waterfall. However, you will come across a couple of the smaller falls and the stream that becomes the waterfall.
If you want a full view of the Waipoo waterfalls, the first viewpoint is at the official Waimea Canyon Overlook, just past mile marker 10. The second viewpoint is in our opinion, the better one. It is only a couple of miles up the road at a roadside turnout just before mile marker 13. For some reason, the Waipoo Falls seems much closer here.
THE ADVENTURE:
We met up with Dustin’s dad, and uncle Larry after finishing our favorite hike through Kalepa Ridge. They sat that one out because it was too strenuous for them. However, they were excited about Waipoo Falls Trail, especially since I told them it was only 3.2 miles roundtrip. I might have forgotten to mention the 840 ft elevation gain (oops). Although, I think they were both happy that they did the hike in the end.
It had rained a few days before we did the Canyon Trail to Waipoo Falls hike. We were hoping the trail would be dry by the time we went, but it was still very muddy and slippery from the start. This trail can be treacherous when wet because most of the surface is smooth rock or clay, on a significant decline. At the start of the trail, there was a big pile of broken branches. Previous hikers had left the branches there so others can use them as walking sticks. Excitedly, Paul, and Larry grabbed their sticks and we proceed on our adventure.
Most of the hike is through a shaded rainforest with tall trees lining the trail. Because of this, there were big puddles of water and mud in the beginning. As Larry wobbled through the slippery red dirt, he jammed his good size tree branch/walking stick down into the mud for balance. It broke in half under his weight. Apparently, these tree branches aren’t the sturdiest so if you end up using one, just don’t put all your weight on it.
This hike was quite beautiful as we weaved our way through the forest. The sunlight was penetrating through the dense foliage, casting a golden light over the trail covered with knotted tree roots. As beautiful as this trail is, you need to make sure to watch your step on this hike. Besides the mud, there are big boulders, overhanging tree branches, fallen trees as well as knobbly tree roots sprouting out all over the trail. Because of its location, this hike is also prone to flash floods as well. If you go during heavy rain, I would not try to attempt this hike.
There are a couple of splits along this trail that can be a little bit confusing. The first one is about 0.5 miles in, signified by a couple of metal signs. At this point, make sure to follow the sign toward Cliff Trail, Waipoo Falls (go straight). About 200 ft or so after passing the first split, we came up to the second split with a small metal sign pointing directions to either Cliff View Point or Canyon Trail. Cliff View Point is a short 500 ft trail to a small outlook over the Waimea Canyon. If you feel like skipping this little detour, you can keep going straight on Canyon Trail.
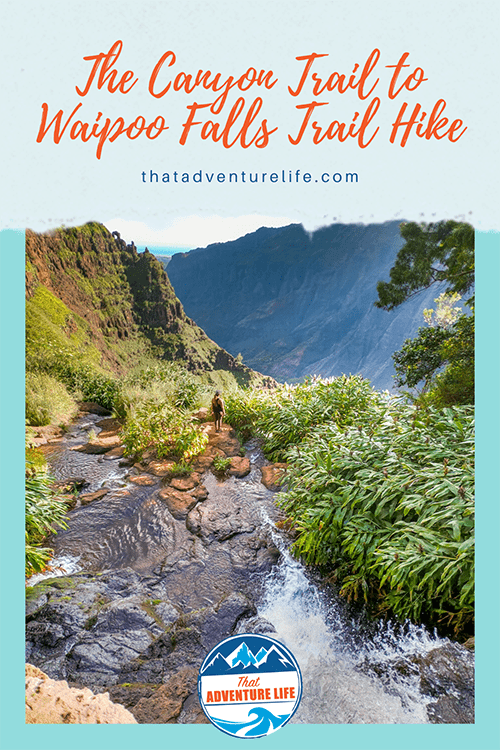
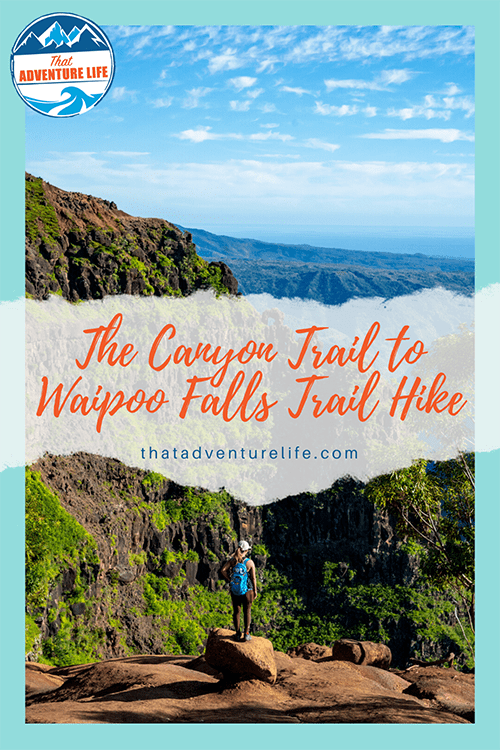
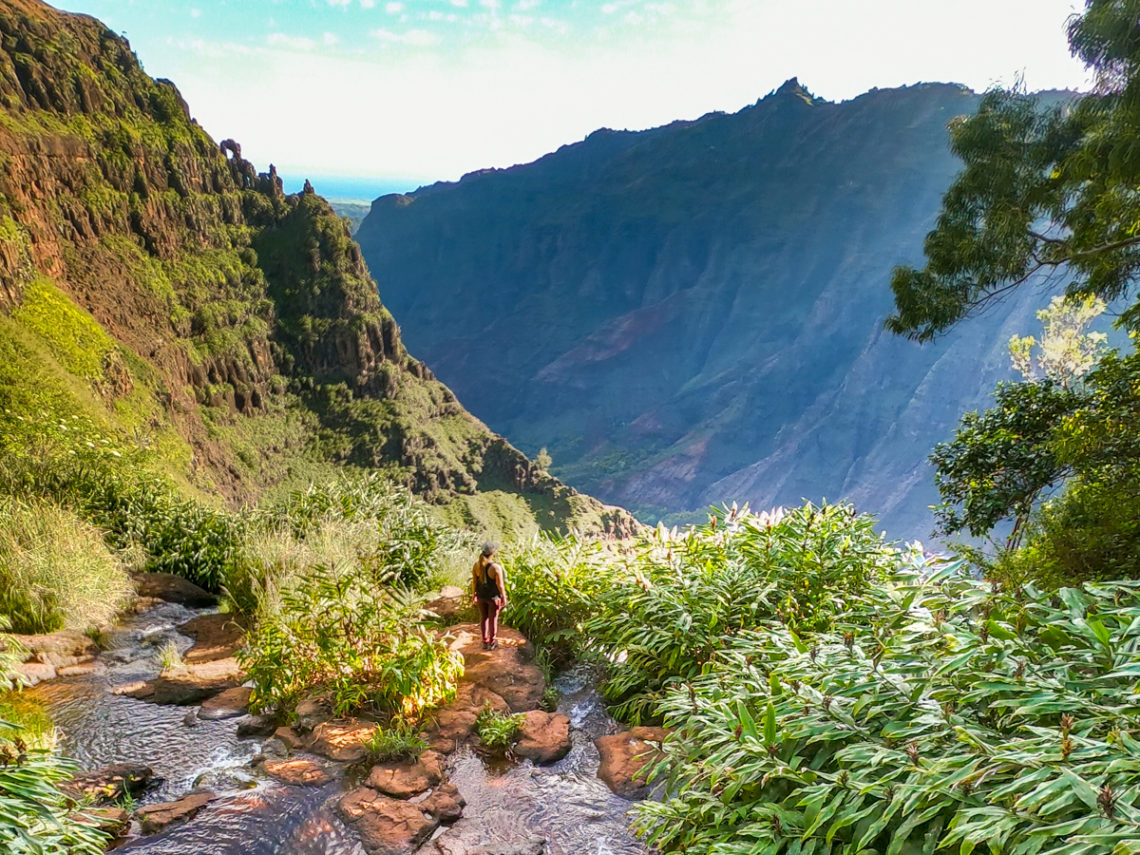
At 1.4 miles, the forest opens up to a huge stretch of red dirt, overlooking a massive drop-down into the Waimea Canyon. If you look up from here, you can see the Pu’u Hinahina Lookout all the way at the top. The view here is breathtaking. It is the best view of this hike in our opinion. From here, you can see why they call Waimea Canyon the Grand Canyon of the Pacific.
After spending some time admiring the beauty of mother nature, we pressed on toward our destination. Toward the end of this huge stretch of red dirt, there are slick rocks that you have to slide down before curving left to continue on through another forest. Please be careful here. These rocks are very slippery, especially when wet. If you need to, sit down and slide yourself down.
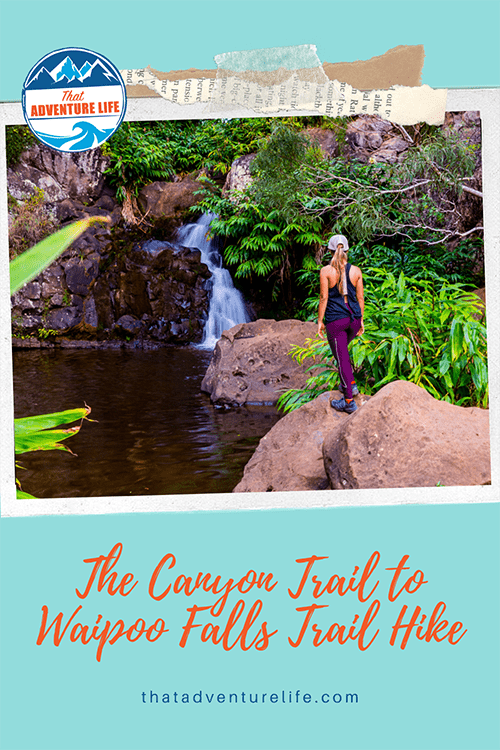
Soon after curving left, we came up to another split. If you’re turning right here, the trail will take you straight to your destination: the top of Waipoo Falls. We made the left instead and found ourselves at a small swimming hole at the bottom of a small waterfall. There are big boulders and tropical plants surrounding the swimming hole. Because of this, it is a perfect place if you want some peace and quiet. Even though this is a busy hike due to its short duration and ease of access, you can always find plenty of areas here to enjoy the tranquility of Hawaii.
After taking in the scenery, you can go to the top of the Waipoo Falls by either crossing over the stream or heading back the other way. Since we didn’t feel like jumping across the stream, we followed the original route.
Once we got to the top of Waipoo Falls, we realized that there is a small 15 ft waterfall there. It’s pouring down into a small pool before plunging straight down a steep cliff. Because of Paul’s bad knees, he and Larry decided to wait for us from here as Dustin and I found our way down to the small pool at the bottom. The flow of Waipoo Falls depends a lot on the amount of recent rain. Even the smaller fall here can be quite impressive if you get to see it in the winter or after a lot of rain. Once we got down to the small pool, we were actually right above the 25 ft waterfall. Unfortunately, you won’t be able to get any lower. Since these sheer cliffs are quite fragile, I wouldn’t recommend going too far out on the edge or attempting to climb down.
Because we did our hike later in the day, the sun started to go down soon after we got down to the small pool. None of us felt like stumbling on tree roots in the dark, therefore, we headed back after taking a few photos. We traced our steps back through the same route. Again, please make sure to watch your steps on the way back. The trail was very slippery, especially through the big boulders. Because of this, combined with your tired legs, it can be dangerous. Uncle Larry would have fallen down the rocky steps if Dustin wasn’t fast enough to catch him.
Even after everything we put them through, both Paul and Larry were happy that they did the hike with us. We definitely recommend hiking this trail if you are in the area. Don’t forget to check out our most favorite hike in Waimea Canyon, the Kalepa Ridge Hike. Meanwhile, you can read about our other adventures in Kauai such as tubing down the sugar plantation or zipping down the Na Pali Coast on a Zodiac boat. If you love snorkeling, check out our blog of the best 3 snorkeling spots for beginners in Kauai.
If you do island hopping, you can check out on some fun things to do on Oahu and the Big Island such as Top 10 off the beaten path things to do in Oahu, Top 10 things to do on the Big Island, exploring Kaumana Lava Caves, hike Kiholo – Queens Bath Hike, or taking scenic drives through Kapoho Kalapana Road Scenic Drive, Chain of Craters Road – Hawaii Volcanoes National Park or Onomea (Pepe’ekeo) Scenic Drive – Hilo.
Happy Adventuring. Don’t forget to follow us on Instagram, subscribe to our Youtube channel, and sign up for our newsletter!
RECOMMEND GEAR:
Don’t forget to check out our Recommended Gear section as well.
• Hiking shoes
You definitely need hiking shoes for this, especially ones with good tractions. Vy’s shoes are Merrell Women’s Moab 2 Mid Waterproof Hiking Boot. Dustin’s shoes are TARGHEE III WATERPROOF.
• Snacks/Lunch
It is a difficult hike, make sure you bring enough snacks and/or lunches with you for energy.
• Sunscreen
Hawaii’s sun can get very intense. PLEASE bring sunscreen. We use eco-friendly, reef-safe sunscreen, All Good Organic Sunscreen Butter – Zinc Oxide – Coral Reef Safe and All Good Sport Sunscreen Lotion – Coral Reef Safe (3 oz)(2-Pack) or Stream2Sea SPF 30 Reef Safe Sport Tinted Sunscreen.
• Water
Bring more than you think you need. Vy uses the Camelback L.U.X.E. Dustin uses the Clik Small pack (sadly Clik is no longer around)
• Trekking Poles
Trekking poles will help with the steeper sections. We use TrailBuddy Lightweight Trekking Poles.
CAMERA GEAR:
• Camera:
Sony a7 III
Gopro Hero 7 Black
• Lenses:
Sony 24 -70mm f/2.8 Carl Zeiss Vario Sonnar T Zoom Lens
• Accessories:
GoPro The Handler Floating Hand Grip – Official GoPro Mount
Aluminum GoPro protection frame