The Big Horn Mine trail has been a long-time favorite of ours because of its beauty, historic structures, mine shafts, and proximity to our house. The trail is not very challenging, but the altitude will probably have you breathing a little bit heavier on some of the hills. Located just outside Wrightwood, CA, it is a fairly short drive for most Southern Californians. It is also nice and close to several mountain towns, so there are plenty of options if you want to make another stop after the trail.
STATS:
Where:
Big Horn Mine trail – coordinates 34.373385, -117.752033
Parking:
Yes
Distance:
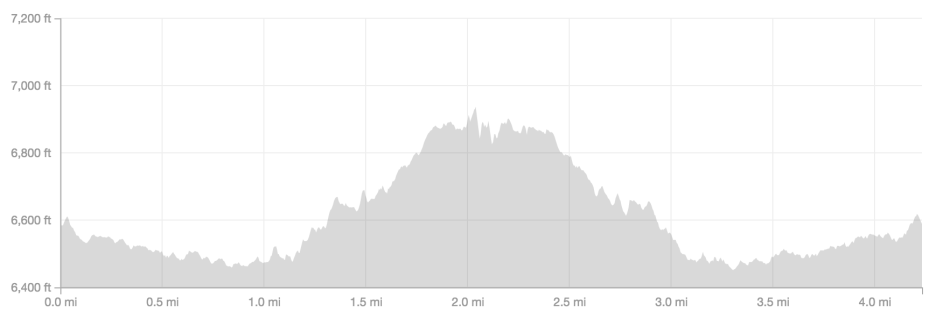
4.2 miles R.T.
Elevation:
674 ft
Level:
Beginner
Dog-Friendly:
Yes, on a leash
Permit Required:
an Adventure Pass is required to park.
Season:
Big Horn Mine trail can be accessed year-round, even though it is a little less pleasant in the snow or in the heat. There is minimal shade.
Trail Condition:
Well-maintained trail, well-marked, and easy to follow.
Warnings: Beware of loose rocks and snakes during summer months.
Big Horn Mine trail might not be for people with extreme fears of heights, the dark, and claustrophobia (only if you are going into the mines).
GETTING THERE:
These coordinates 34.373385, -117.752033 will take you directly in front of the parking lot for the trailhead. If you google Big Horn Mine trail, the location Google Maps will take you is about 100 yards off the parking lot. If you come from the 15 freeway through Wrightwood, you will need to drive a little bit further up. The parking lot will be on your left-hand side.

If you are coming up from San Diego:
- We usually take the 15 freeway like you are going to go up the Cajon Pass.
- Exit on Highway 138 Palmdale / Silverwood Lake and make a left.
- Just after you cross over the freeway, there is a Shell station on your left. (This is a great spot to grab some snacks and an adventure pass which is required to do this hike. We’ve seen people who have gotten tickets when hiking without a pass.)
- After leaving the Shell station, continue in the same direction that you were heading. Enjoy the amazing rock formations that will soon be coming up on your right side. I don’t know why, but it reminds us of some kind of space landscape.
- 8.6 miles after you get on the 138, you will get to Highway 2 West.
- When you see the Mountain Top Cafe. Make a left.
- You will be on this road for 14 miles. You will notice how the landscape changes dramatically as you climb. The scenery changes from a desert landscape to a mountain scene right before your eyes. It will wind its way through the cute little town of Wrightwood.
- There is one fork in the road at this large gray castle-looking structure (The Big Pines Visitor Center). Be sure to stay to the left.
- The parking lot for the trailhead will be to your left. It is quite big. However, it does get pretty busy even when we go on a Wednesday.
THE ADVENTURE:
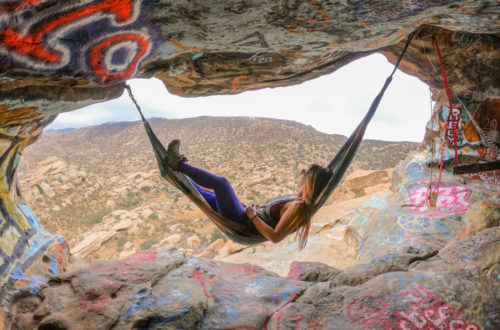
*Quick rant: It has been five years since the last time we hiked here. I can’t believe the amount of trash, graffiti, and people carving their names on rocks and trees on the Big Horn Mine trail. If you are going to do this hike or any hikes for that matter, please respect the land and nature. If you pack it in, please pack it out. Save it for the next generation!*
To start the trail, head over towards the bathrooms. There you will find several trailheads. You want to go through the big white gate. Luckily, this trail is very straightforward. There are only a couple of forks on this trail. Around 0.1 of a mile, you will come to the first fork. There is a sign that will point you in the right direction. Just in case it is graffitied over, go right.
About 1 mile in, the trail starts to switch back and forth from a nice wide trail into a single-track trail with a decent-sized drop-off on the left side. Watch your step here. There are a lot of areas that vary from medium-sized gravel to baseball-sized rocks. We both slipped a couple of times. It would be really easy to roll your ankle if you weren’t careful. Once you get to the narrow trails, it seems like the view gets even more beautiful! There are quite a few hand-painted arrows on the trail, don’t follow them. As you can see in the pictures below, some of them are pointed to dead ends, straight down to the valley floor. Just follow the trail and you’ll be fine.
Around the 1.35-mile mark, you will get to see your first mine shaft. This one has always been sealed shut. It is also usually full of water, so we have never made the effort to explore it. The good thing about seeing this first mine is knowing that you are less than a mile from the big mine! The challenge is that it is mostly uphill for the rest of the way. But keep going! The payoff is well worth it!
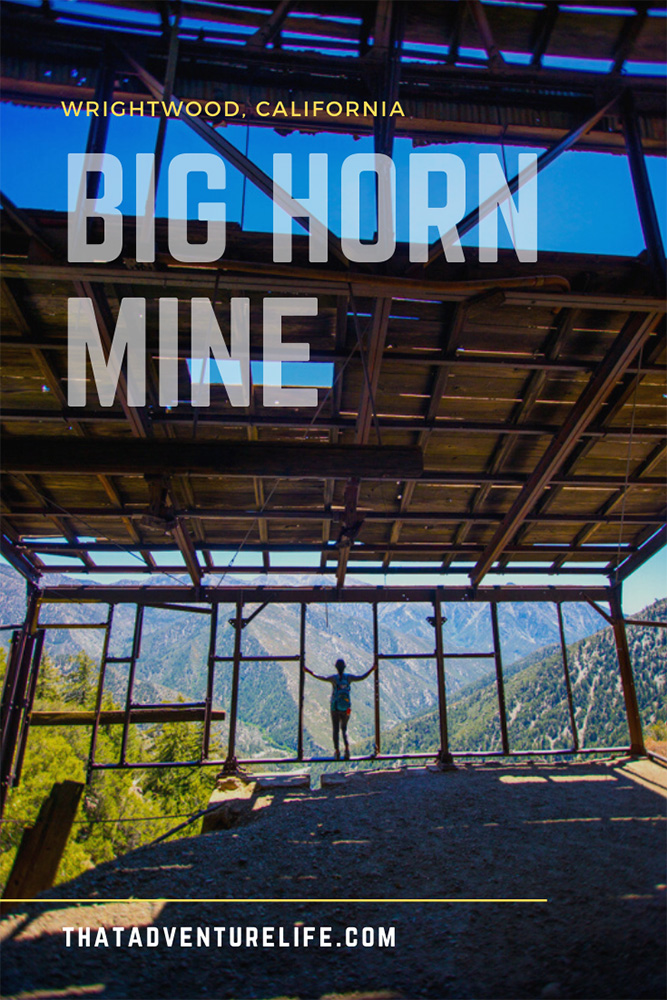
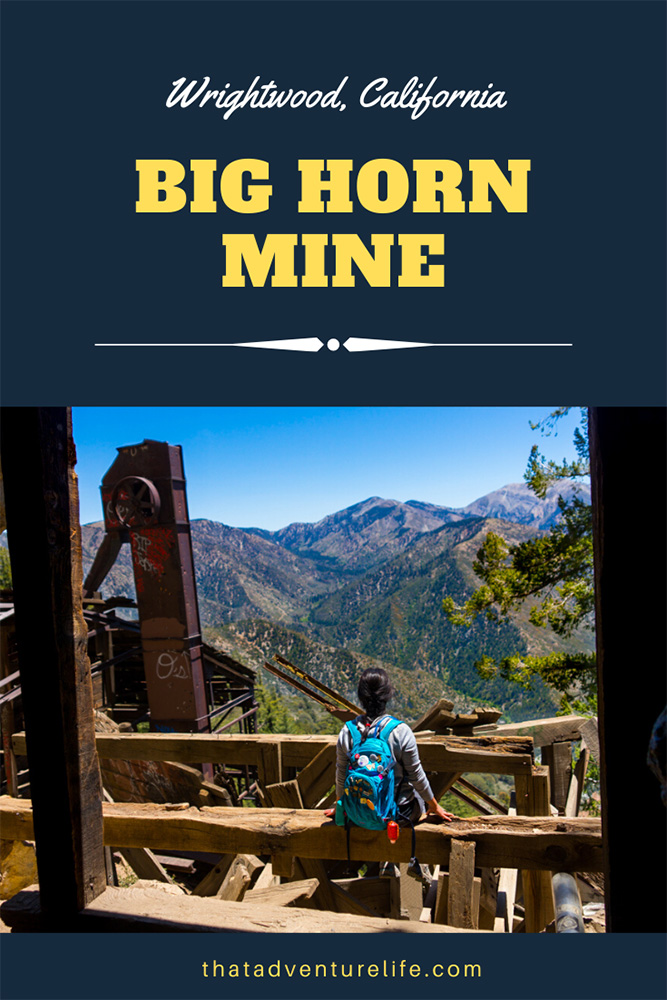
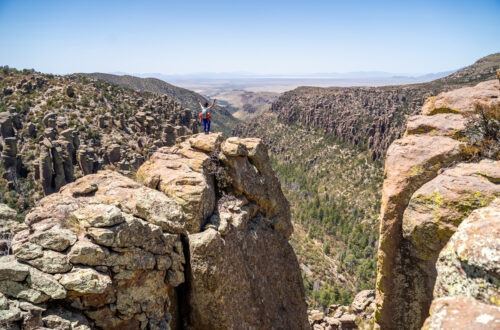
When you reach the top of the hill you will see the last fork in the road. Once again, go right. If you go left you will just go to an opening that has a couple of concrete slabs, nothing too exciting. The great news is that the hills are done at this point! Now it is just a short .2 mile walk to the amazing remains of the Big Horn Mine. After you go under the fallen tree, you’ll soon catch a glimpse of the awesome, abandoned wooden structure in the distance.
Once you get closer to the structure, you’ll come to a couple of openings in the mines. These mines are another fun part of the Big Horn Mine trail. These openings were cut open the last time we were here. However, they were sealed shut this time around. The way down to the abandoned wooden structure is to your left. This spot is a little tricky. There is an almost dried-up little 7-foot waterfall that you need to make your way down. Just follow the worn-out path and take your time, you’ll be fine.
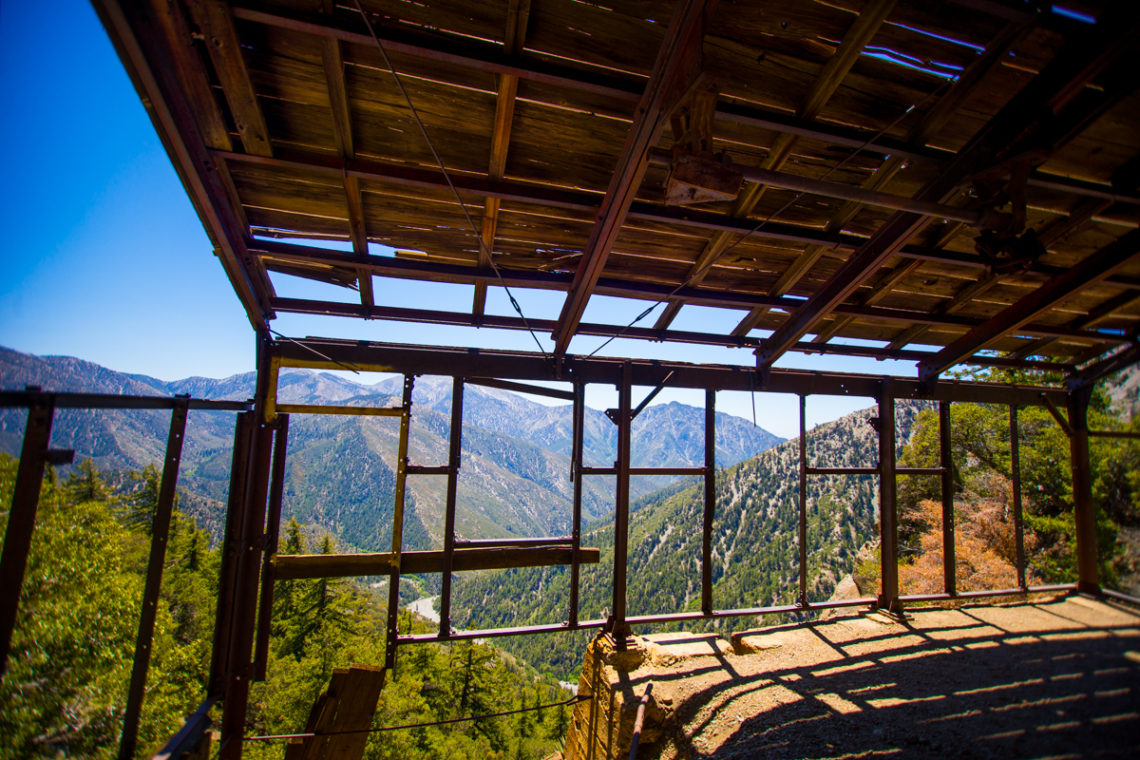
Once you get inside the wooden mill, the view is incredible. This is the best spot to take a break and eat your lunch. Make sure to pack your trash back out with you! Be careful when you’re exploring. This is a very old wooden structure. It might collapse at any time. From here, you can make your way back or explore the mine further at your own risk.
Exploring the mines:
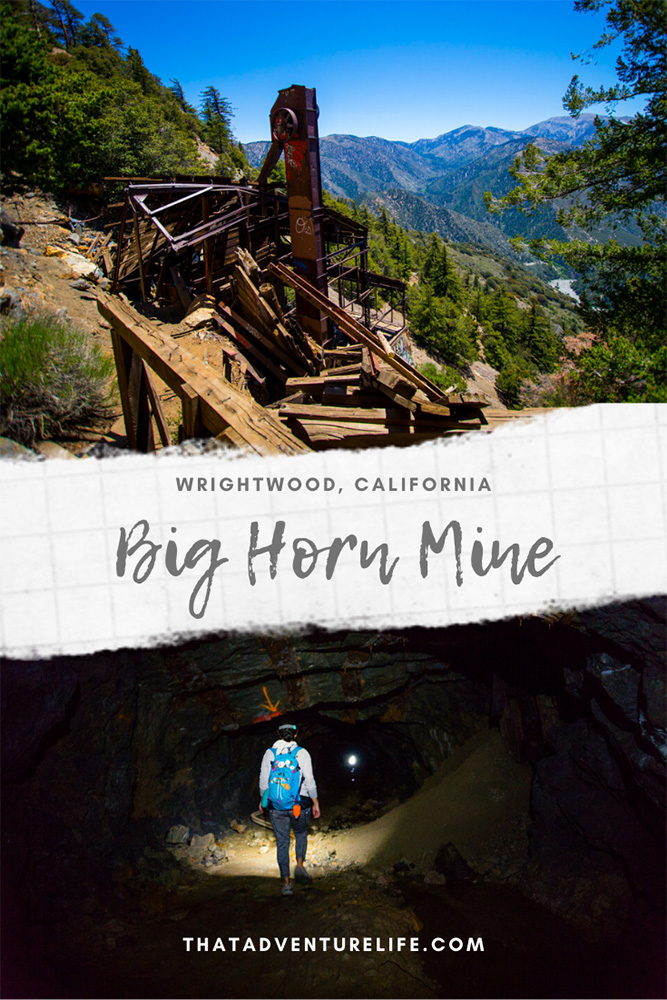
From time to time the mine shafts are sealed up. But it never fails, some random adventurer comes along and re-opens the mine shafts. At the time of the writing of this article, the upper shaft was the only one that was accessible. Explore at your own risk! To access this shaft, make your way up the hill that runs behind the stamp mill. There is a crumbling wooden structure that most likely used to be for the mining carts, that you can use to climb your way up to the opening of the mine.
There was only one piece of the metal gate missing, so it was a bit of a tight squeeze to get in. Since I’m tiny, it wasn’t a problem for me. Dustin was struggling a little to be able to squeeze himself through it. Watch your head once you enter. The ceiling is quite jagged and low for the first 90 yards or so. This may not be an adventure for the faint of heart. If you know someone that has been to the mines before, I highly recommend going with them. There are a lot of twists and turns inside the mines and it would be pretty easy to get lost.
Luckily, the last time we went, someone was awesome enough to bring string with them. You can always follow that back out to the exit. There are also arrows painted on the walls. These proved to be very helpful. A headlight or flashlight is an absolute must! Also, make sure to bring a jacket. The temperature drops significantly once you’re inside. You will be in complete darkness if you decide to venture in far enough.
There are lots of cool things to see inside the mine shafts. There are tracks for mining carts, very old support structures, and 3 levels of mines. Be sure to watch your step. There are several very deep vertical shafts in there and if you fall down one you are probably not coming back. I haven’t had any problems with oxygen in there before, but it probably can’t hurt to bring some matches to check in case you get feeling a little strange. Again, please be careful and pay attention to where you’re going. DON’T GET LOST!!!
The road back:
The way back is super easy on the Big Horn Mine trail. You simply follow the way that you came and as an added bonus, it is mostly downhill! Once again, watch out for snakes. The last time we went, the group of hikers in front of us spotted a rattlesnake scrambling into a pile of rocks, just before the first mine shaft. Stay aware and if you see them give them room.
Happy Adventuring. Don’t forget to follow us on Instagram, subscribe to our Youtube channel, and sign up for our newsletter!
RECOMMEND GEAR:
Don’t forget to check out our Recommended Gear section as well.
• Sunscreen
The trail can get very warm. Bring sunscreen! We use eco-friendly, reef-safe sunscreen, All Good Organic Sunscreen Butter – Zinc Oxide – Coral Reef Safe, and All Good Sport Sunscreen Lotion – Coral Reef Safe (3 oz)(2-Pack) or Stream2Sea SPF 30 Reef Safe Sport Tinted Sunscreen.
• Good hiking shoes with some traction, better with ankle support for the gravel.
Vy’s shoes are Merrell Women’s Moab 2 Mid Waterproof Hiking Boot. Dustin’s shoes are TARGHEE III WATERPROOF.
• A jacket
If you are going into the mines this is critical! The temperature drops significantly inside the mine. We love our packable Patagonia Puff Jackets! It can keep you warm, yet pack up super light. You can get Vy’s version here, and Dustin’s version here. If you want some lighter, we love the packable Patagonia Women’s Houdini® Jacket and Patagonia Men’s Houdini® Jacket
• Headlight or flashlight. This is mandatory if you are planning to go inside the mine.
We both used the Black Diamond Cosmo.
• Lunch and plenty of snacks.
The mill is a gorgeous place to grab lunch while celebrating that you made it!
• Lots of water!
It is a short hike, but there is no shade on the trail and it will get very hot during the summer or full sun. Vy uses the Camelback L.U.X.E. Dustin uses the Clik Small pack (sadly Clik is no longer around).
• Gloves (We used $2 work gloves from Harbor Freight)
It’s not required but can be helpful in exploring the mine.
• Matches:
This is not required but is also great for exploring the mine, especially if you think you are running out of oxygen.
• First aid kit
CAMERA GEAR:
• Camera:
Sony a99
• Lenses:
Sony 24 -70mm f/2.8 Carl Zeiss Vario Sonnar T Zoom Lens
Sigma 10-20mm f/3.5 EX
Save your pins: