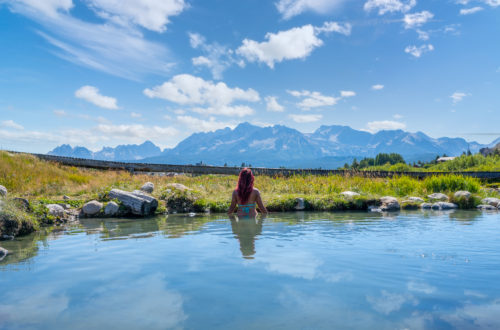
It was another beautiful day on the north shore. We were off for another day of adventure before the sun had even graced us with her appearance. Luckily, being on Southern California time made the early mornings much more manageable. The Makapuu tide pools have been on Vy’s bucket list since the beginning of the trip, so we made our way there.
STATS:
Parking:
FREE!! Makapu’u Point Lighthouse Trailhead – Makapuu Lighthouse Rd, Honolulu, HI 96825
Distance:
2.19 R.T.
Elevation:
2585 ft
Level:
Moderate to Difficult. (There is a lot of rock scrambling).
Ideal Weather:
Calm day, low tide is the best. The waves can get pretty big and wash in and out. You won’t be able to swim in the tide pools when it’s high tide.
Warning: To get to the tide pools, you have to scramble down a lot of rocks. It can tricky and dangerous for children or people with poor balance. Unfortunately, this hike is pretty much impossible for people with walking disabilities.
GETTING THERE:
The easiest way to get to the Makapuu tide pools trailhead is to set your GPS destination to the Makapuu point lighthouse trail. Just in case your GPS isn’t working, you can just take the Kalanianaole Highway (Hwy 72) until you see the sign for the trailhead. The trail is inside Kaiwi State Scenic Shoreline. It is well-marked and you can get there from either side of the island. If you are coming from Waimanalo beach, it will be just around the corner (0.9 of a mile) from the Makapu’u beach park on your left. If you are coming from Honolulu, it will be 2.6 miles past the Halona blowhole on the right.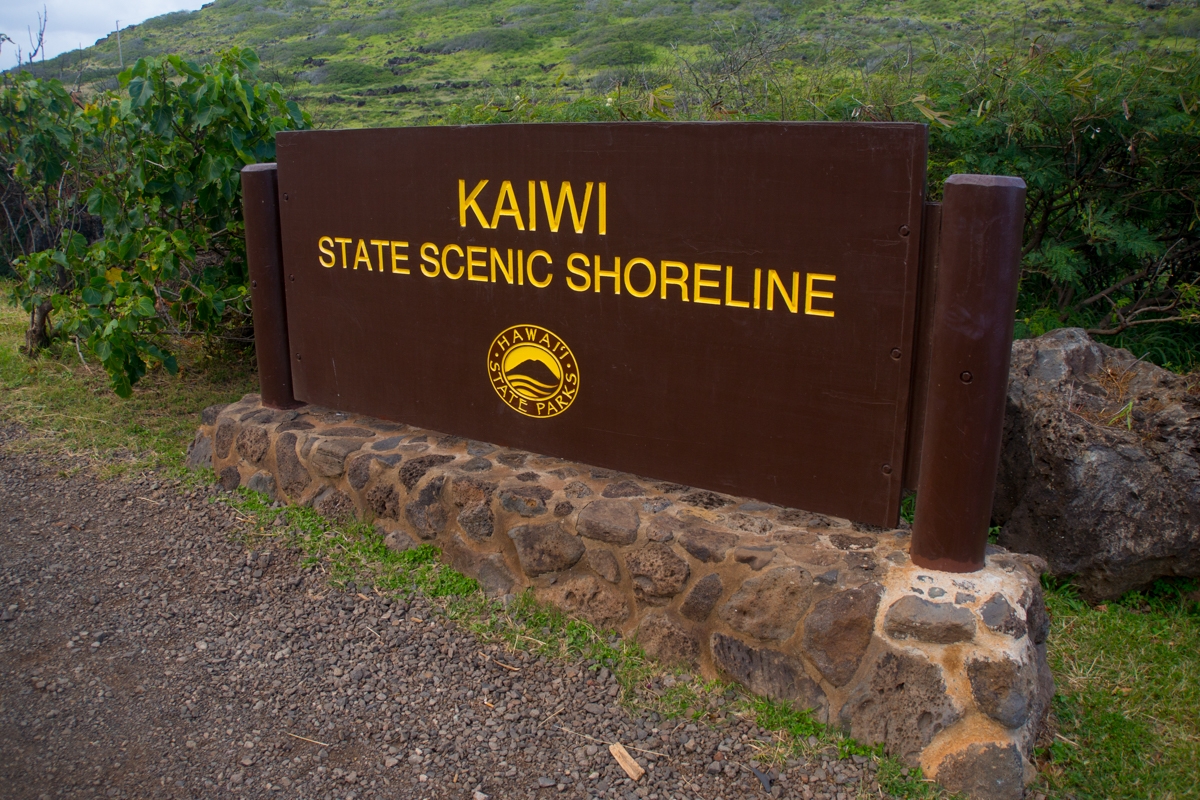
You can park at the lighthouse trail parking lot. When we arrived at the parking lot, it was quite full. Luckily, the parking gods smiled upon us, and a spot opened up right as we pulled in. Parking is free, so it may be a smart decision to get there a little earlier to avoid the crowds, and also the heat. If the lot is full, there is street parking as well. Good shoes and water are a must for this one. The trail starts at the end of the parking lot. You will find a series of yellow poles, followed by a nice paved path. WARNING: Do not leave valuables in your car. This parking lot is known to have a lot of break-ins!


THE ADVENTURE:
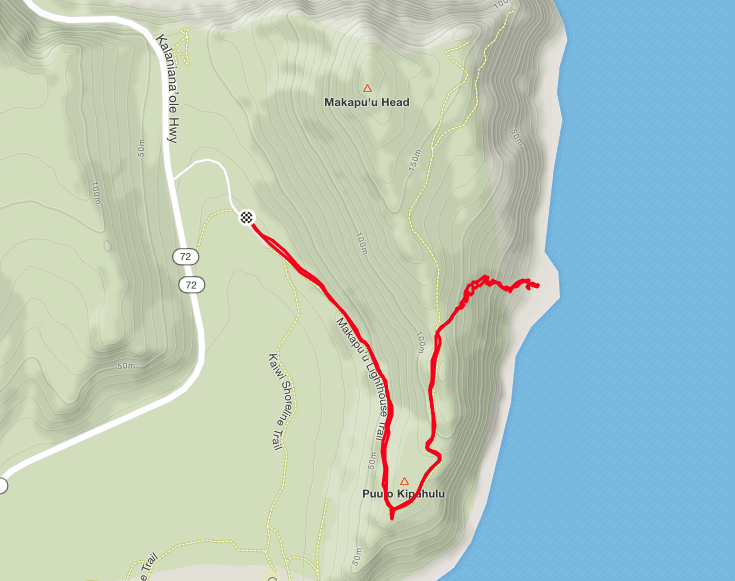
The hike to Makapuu tide pools is only 2.19 miles. It’s including the scramble down to the tide pool. However, you will need to take your time and watch where you’re going on the way down the pools. I’m also sure that you’ll want to take some time to enjoy the view, so you’ll need at least 2-3 hours for this adventure because it is too pretty to rush.
The first half of the trail is a bit deceiving. It is a nice, well-paved road. Be warned, it is all uphill. Over 300 feet gain in less than a mile. While it is not too steep to climb, it will definitely get you breathing heavily and sweating a little bit. Be sure to bring plenty of water and sunscreen. There is little to no shade on this trail. The black asphalt does seem to give off some extra heat.
The actual “hike” to Makapuu Tide Pools begins at the THIRD rest stop, about 0.8 miles from the parking lot. When you see the telescopes and a sign that says “A sanctuary for Kohola-Humpback whales”, you know that you have reached the right place. As you are facing the telescopes, you will notice a small, worn-out trail off to the left. The trail is heading down the cliff. This is where you want to go.


Pro tip– If you want the Makapuu tide pools to yourself (assuming that someone isn’t already down there), try to sneak onto the dirt trail when no one is looking. Chances are if someone sees you, they are probably going to follow you.
Now we are at the difficult part of the hike. The hike down is a steep hill with lots of loose rocks. There isn’t really much of a trail. There are a few arrows painted on the rocks here and there to give you some guidance. However, the majority of the way down the cliff is kind of improvised. You will see the tide pools below. As long as you’re heading toward the pools, you can’t get lost. Just take your time to find the best route for you, watch your steps, and PLEASE be careful. You do not want to fall on lava rocks. Keep your eyes on the prize. It’s definitely worth it.


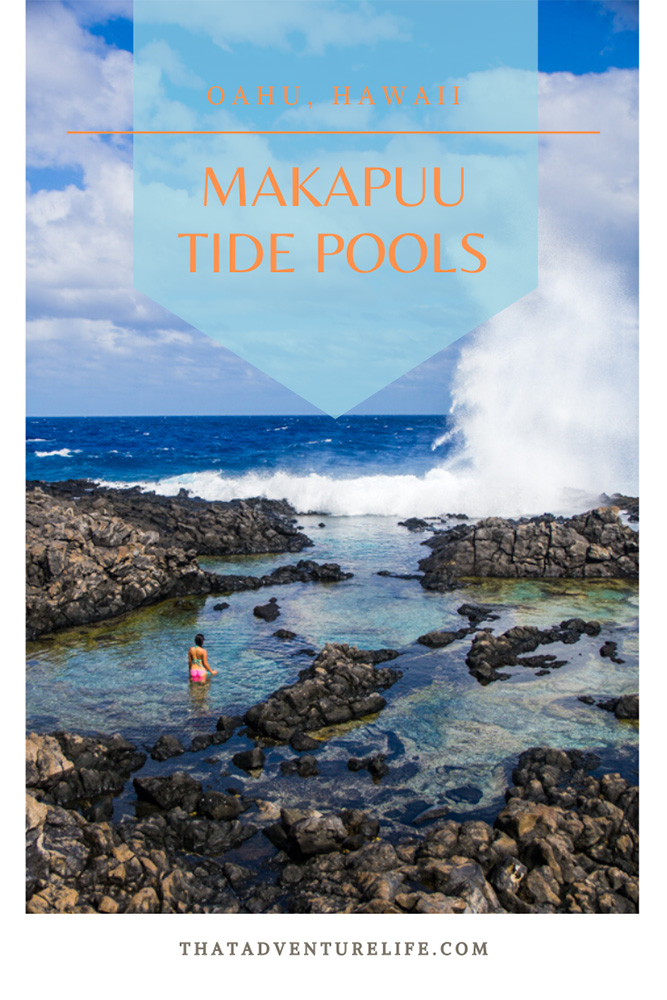
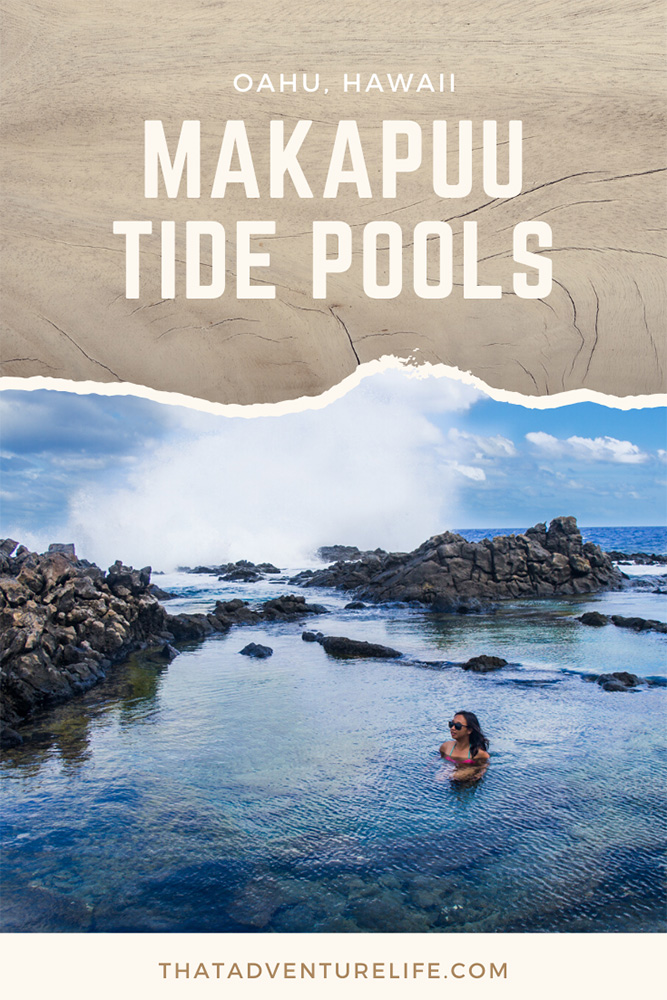
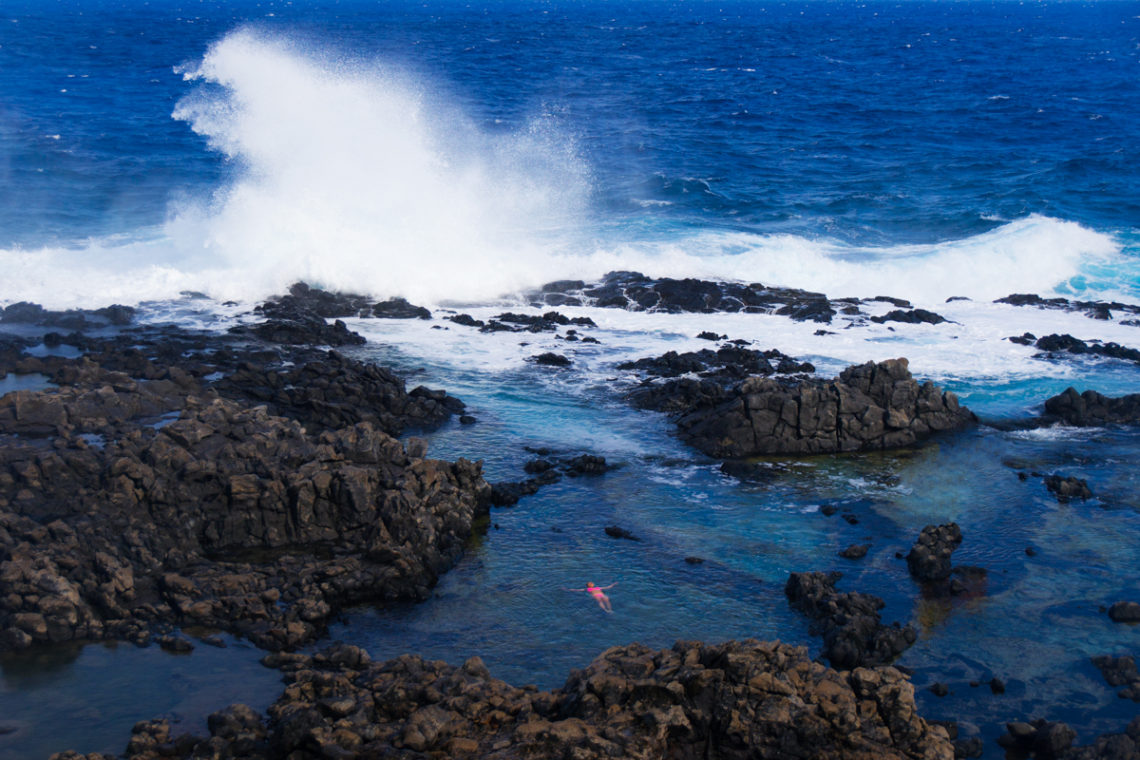
Once you reach the bottom, you can take a second to celebrate. You made it! This place is mesmerizing. The pools are large enough for swimming, especially on calm days. The crystal clear blue water is also home to a lot of beautiful fish. Besides the amazing tide pools, you also have the blowhole that is way better than the famous Halona blowhole.
When entering the tide pools, be careful. The rocks are very slippery. The day that we happened to be there, the waves were enormous. Every time the giant waves crashed against the pools, a torrent of water shot up at least 30 ft in the air. That being said, make sure you keep an eye out for the waves. This can get very dangerous as they can get very big and the currents can be strong. You may want to avoid the edge because it can be pretty unpredictable.


The huge waves were also giving plenty of water to the blowhole, which was erupting every 30 seconds or so. I would highly recommend bringing plastic bags or some sort of protection for electronic devices as well as a dry place for your clothes. When the blowhole goes off, it gets water everywhere! What I like about this blowhole, is that you can get right next to it. Vy and I took turns to get a couple of quick shots with it. I will say that it is very intimidating standing next to the blowhole. You can hear it growling like some sort of mythical beast.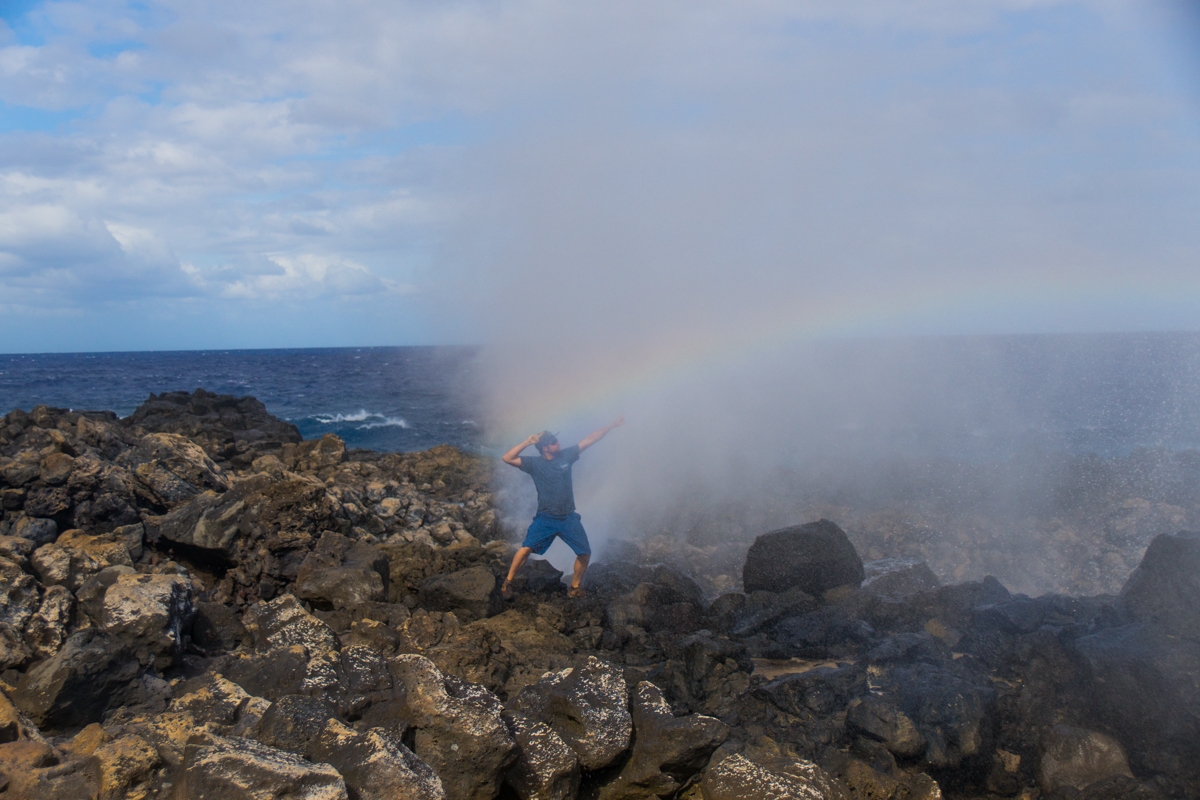
When you are done enjoying all of the incredible views and water features, you can head back up the way that you came down. If you look hard enough, you can usually find an easy way up most ledges. Luckily, the lava rocks will get you good traction if you are wearing the appropriate footwear. The arrows painted on the rocks are a little easier to spot on the way up and you should be back at the top in no time!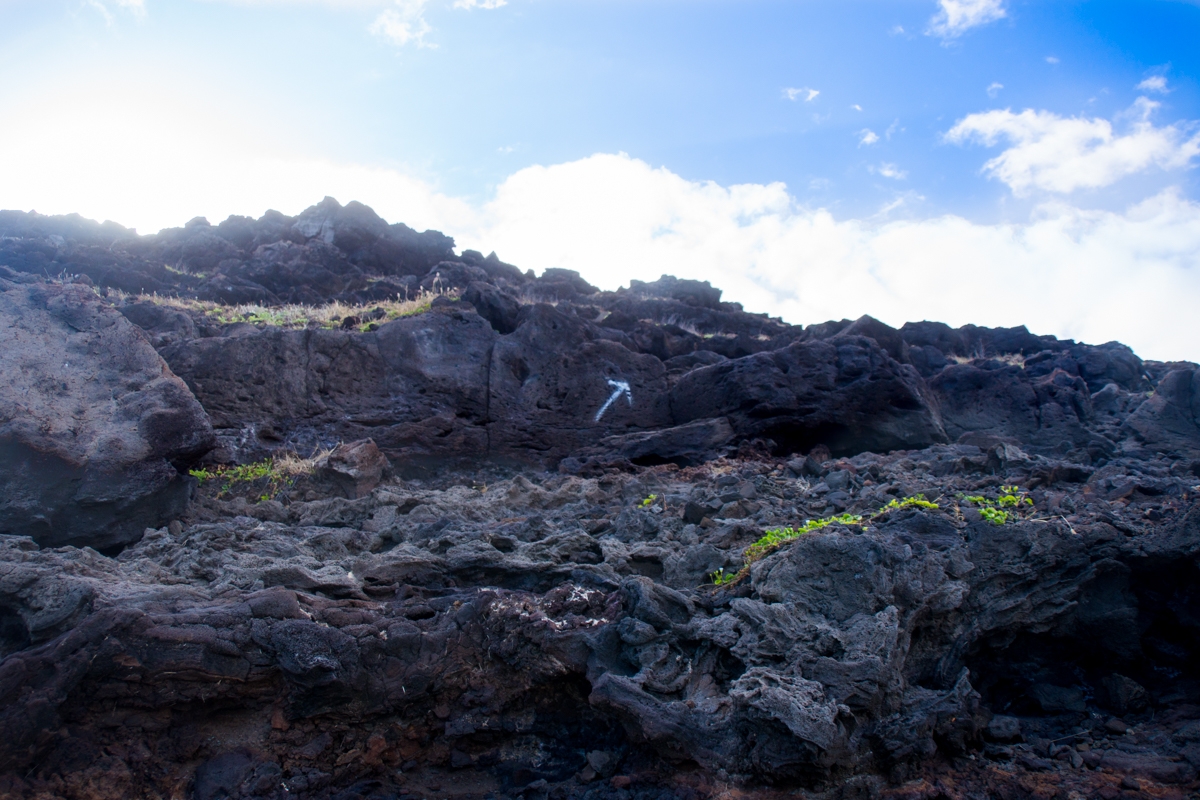
Once you reach the top you have two choices. You can either turn right and head up to the lighthouse or turn left to head back to the car. We had several other spots that we wanted to visit that day, so we opted to save the lighthouse for next time. The nice thing about the way back to the car is that all of that challenging uphill on the way there has now been magically transformed into downhill! If you’re up for other adventures in Oahu, check out our blogs on the top 10 things to do in Oahu, Sunrise at the Lanikai Pillbox, Lulumahu Falls, Kaena Point Hike, or Moanalua Valley Middle Ridge.
Happy Adventuring. Don’t forget to follow us on Instagram, subscribe to our Youtube channel, and sign up for our newsletter!
RECOMMEND GEAR:
Don’t forget to check out our Recommended Gear section as well.
• Sunscreen:
There is no shade along the trail. It is no brainer. Make sure you use reef-safe sunscreen to protect marine life. We use eco-friendly, reef-safe sunscreen. Alba Botanica Hawaiian Sunscreen.
• Good hiking shoes with a lot of treads.
THIS IS A MUST! YOU NEED THIS TO SCRAMBLE ON THE LOOSE ROCKS, UP AND DOWN THE TRAIL. Vy’s shoes are Merrell Women’s Moab 2 Mid Waterproof Hiking Boot. Dustin’s shoes are TARGHEE III WATERPROOF.
• Lots of water!
It is a short hike, but there is no shade on the trail and it will get very hot during the summer or full sun. Vy uses the Camelback L.U.X.E. Dustin uses the Clik Small pack (sadly Clik is no longer around).
• Some lunch or snacks
It’s such a beautiful spot for a nice lunch.
• Swimsuits
If you want to hang out inside the tide pools.
• Towels
To dry off of course.
• Water shoes
The pools are very slippery to get in.
• Drybag or plastic bag
The blowhole is going off almost every 30 seconds. It can get very wet.
CAMERA GEAR:
• Camera:
Sony a99
• Lenses:
Sony 24 -70mm f/2.8 Carl Zeiss Vario Sonnar T Zoom Lens
Sigma 10-20mm f/3.5 EX
Save your pins: