fbpx
That Adventure Life Logo
Adventure is not a hobby, it’s a lifestyle!
Canyoneering Hogwarts Canyon in North Wash, UT

Canyoneering Hogwarts Canyon in North Wash, UT

Hogwarts Canyon is a fun, beautiful, and fairly short canyon in North Wash, Utah. It is a great beginner canyon and a wonderful introduction to canyoneering in North Wash. It was no surprise why Danny, our North Wash canyoneering guide chose Hogwarts Canyon as one of the first canyons of our trip. The view under the arch on rappel 2 is definitely worth the trip!

Stats

Where

Starting Point:
Hog Spring Picnic Area:
6 UT-95, Lake Powell, UT 84533
N37° 57′ 46″ W110° 29′ 29

Exit Point: 
About 0.4 mile up the road from Hog Spring Picnic Area
37°57’38.8″N 110°29’07.4″W

Parking

There is a paved parking lot with room for around 13 cars at the Hog Spring Picnic Area.

At the exit point, you will need to park on the side of the road. Please keep an eye out for cars when parking.

Restroom

Pit toilet at Hog Spring Picnic Area.

Best Season

Spring, Summer, Fall

Weather

Gear Required

  • Standard rappelling and anchor gear.
  • Extra webbing 

Rating

3A I
Click here to learn more about canyoneering ratings.

Distance

Total: 1.3 miles
Technical: 0.3 miles

Elevation Range

4060 – 4580 Feet

Time

2.5 to 4 hours
(We had 9 people and took 4 hours)

Permit

None

Rappels

4 rappels. Max is about 90ft

Shuttle Required

It is a 0.4-mile hike back from the exit point to the Hog Spring Picnic Area. If you don’t want to do the hike or if you want to add on Merry Piglet Canyon, you can park the escape vehicle at on the side of the road near the exit point.

Vehicle

Passenger

Water

You might encounter water during the wet seasons

Video

The Approach

Getting to Hogwarts Canyon

The approach to Hogwarts Canyon begins at the Hog Springs Picnic Area. It is located on UT-95, about 33 miles from Hanksville. Hog Springs parking area is on the right-hand side. The exit for Hogwarts Canyon drops you back out on UT-95, about 0.4 miles up the road from Hog Springs Picnic Area. You can either hike back along the highway or park a shuttle car at the exit point. Since we were planning to do Merry Piglet, another fun canyon right across from the exit for Hogwarts Canyon, we chose the shuttle route.

The Approach

After regrouping with the members of our group that dropped off the shuttle car, we made our way across the wooden bridge. As you reach the first set of picnic tables, you are going to veer off of the paved sidewalk onto a somewhat faint trail on the right. The trail cuts through short water crossing with thick vegetation. Once past this crossing, the trail then curves off to the left.

The Climb

About 500ft into the approach, you will begin a steep climb on the left (southeast) of the trail. This will take you over to Hogwarts Canyon. It is a climb up a smaller, shallow ravine. This climb is quite steep. There are also a few sections that require just a little bit of rock climbing. Overall it is nothing too technical but it is a decent workout. Over the course of the climb, you will be gaining around 520 feet in a little under half of a mile.

The trail might not be apparent at times, but if you hug the left side of the climb you should be going in the right direction. If you pay attention, you can find rock cairns marking the route. There is a small flat section towards the middle of the climb that will give you a chance to catch your breath before the final short but steep climb to the top. Once you reach the ridge, be sure to take a second to enjoy the view.

Dropping Down to the First Rappel

Once you reach the ridge, you are done with climbing up for the rest of the canyon. It is now time to drop down to your first rappel. To get there, you will be descending around 250 feet over the course of the next 0.2 of a mile into the canyon. Follow the route RDC (right down canyon) to get to your first rappel. There are several nice viewpoints along the way for anyone looking for a nice photo op.

Technical Section:

Note: The conditions of Hogwart’s Canyon are ever-changing depending on the seasons or how much water it has. You will need to adapt or adjust your route accordingly.

Rappel 1

Once you reach rappel 1 you will find it on the right side of the canyon. This is a nice warm up rappel. it isnt completely vertical and is only around 40 feet. This is the easiest rappel of this canyon. There are reports of this rappel being done with a retrievable anchor due to the fact that the webbing might be missing.

Rappel 2

Rappel 2 is a short walk down the canyon and is our favorite. Our friend Danny was the only member of our group that had done this canyon before. He had been telling us how cool this rappel was. Technically,  it isn’t anything special, a 60 footer with a couple of small shelves on the way down. What makes this rappel special is that it drops you down into a room under an arch. Areas like this are what made us fall in love with canyoneering. This spot is BEAUTIFUL! Once you get to the bottom of Rappel 2, it is a short scramble down to a sandy area. This area can have water if there are recent rains.

Navigating the Semi-Keeper Pothole

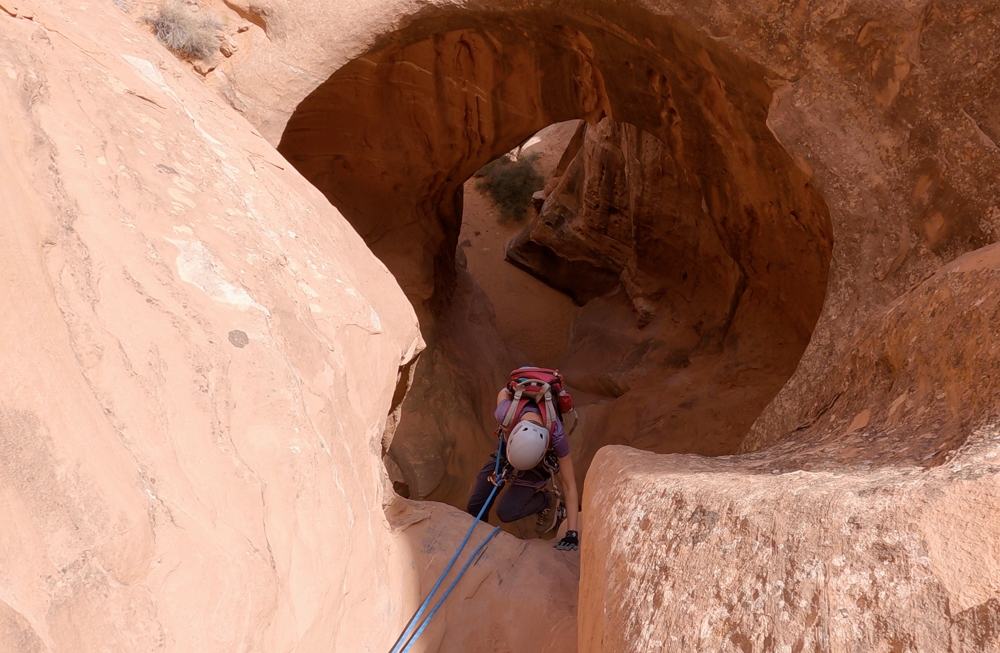
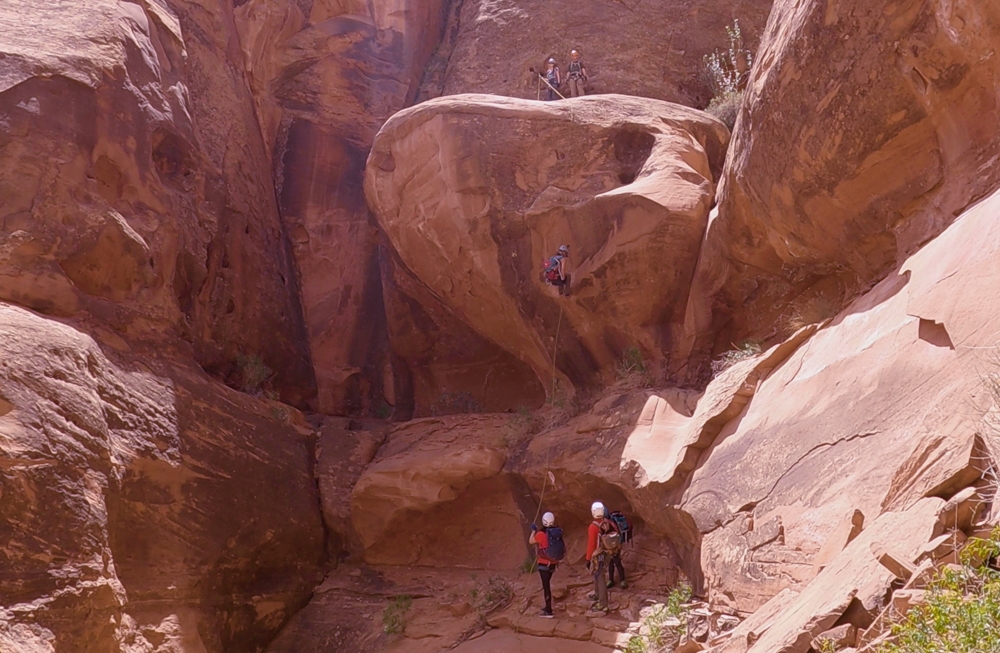
Right after rappel 2, there is a semi-keeper pothole that you will need to stem over. During wet seasons, there will be water here. While it is easy to stem across for most experienced canyoneers, it is possible to slip down into the pothole below. It is recommended to keep a rope handy to help less experienced canyoneers across if needed. Lucky for us, the canyon was bone dry when we went. Some of the smaller members of our group dropped down into it while the taller or more experienced members stemmed across the top of it.

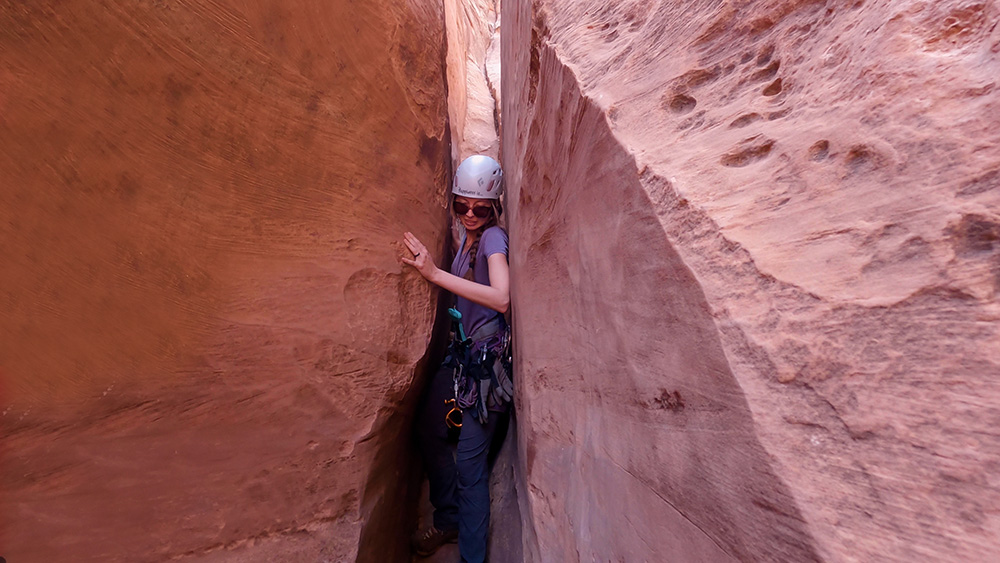
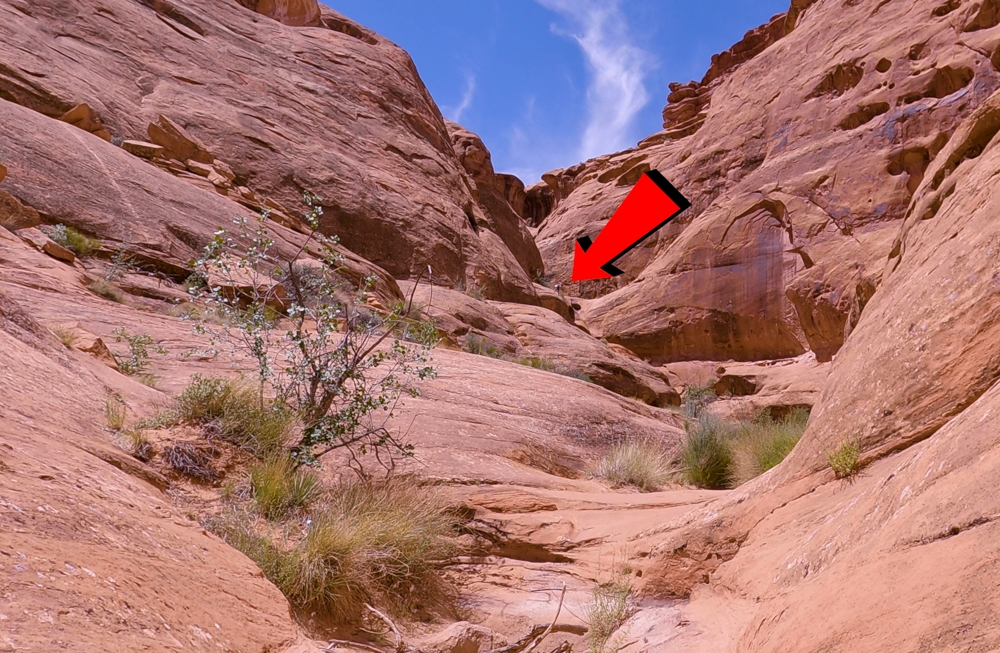
As soon as you get out of the pothole, you will be dropping into a very tight slot. You are going to have to remove your backpack to get through. If you are claustrophobic, this part could be challenging for you. Luckily, this slot is very short.

Rappel 3

Once we got out of the tight squeeze and were able to breathe again, we realized that we were at the top of rappel 3. The finish line was now in sight as we got our first look at the highway that we came in on. This rappel is a little bit more technical than the first two. It measures at right around 73 feet and has two free-hanging sections. Once again you might have to use a retrievable anchor here if the webbing is missing.

Rappel 4

The fourth and final rappel is a short walk down the canyon. At about 90 feet, it is not only the biggest but also the most technical rappel in Hogwarts Canyon. According to Danny, the anchor had been moved since his last visit. It used to be tied around a large boulder on the hillside RDC. However, it is now located down in a small pothole LDC. Make sure you double-check the anchor and the webbing here. We had to switch out the webbing because it was damaged. 

The start on this one is a little tricky because it is an immediate free hang that continues all the way down to the bottom. Make sure to watch out for the large tree/bush at the bottom. If you have someone belaying you, they can help pull you over to help you avoid it. 

Exit

One great thing about this canyon is how close the last rappel drops you to the highway. From the bottom of rappel 4, you are a simple couple minute mostly flat walk from the road. You will have to cross over a wash and climb up a small embankment, but it is a piece of cake! 

Hogwarts is such a fun and photogenic canyon! We definitely looking forward to do it again. Stay tune for Merry Piglet!

These are the gear that we personally use and find them helpful for this particular adventure. Don’t forget to check out our Recommended Gear section as well. 

adventure gear

We love these La Sportiva TX3 approach shoes! They have pretty good traction on wet rocks and muddy areas. They also drain well, especially when you have to wade through water.

This is the male version of the La Sportiva TX3.

This will be a long day in the sun! We use eco-friendly, reef-safe sunscreen, Stream2Sea SPF 30.

Face sunscreen is also important. We love these tinted, organic All Good Organic Sunscreen Butter.

Canyoneering bags are essential, especially for wet canyon. This Imlay Pandora Bag not only has tons of drainage holes, it’s also very well-made. It’s also perfect for shorter people like Vy with heigh range from 5ft – 5ft 4

Teton Sport makes a pretty decent beginner canyoneering bag. It has a few drainage holes that will be useful for wet canyons. What we love about this bag is the price and the amount of pockets it has!

It can get cold when. you’re deep in the canyon or later in the day. We love our packable Patagonia Puff Jackets! You can get Vy’s version here, and Dustin’s version here.

If you want something lighter, we love the packable Patagonia Women’s Houdini® Jacket and Patagonia Men’s Houdini® Jacket

We were introduced to this Hoodoo rappel device from our expert canyoneering friends. So far, we love it! 

Another popular option for the rappel device is this ATS

Of course, you will need to bring your canyoneering ropes.

So far, our Black Diamond Half Dome helmets have served us pretty well

You will need canyoneering harness. Climbing harness will work too.

Even when dry, you’ll still need dry bags for Water Canyon. There are a few swimming sections. You will need this to keep your items dry. 

other things to bring

Always good to bring some snacks with you. For healthy and easy snacks, check out some of our recipes.

camera gear

Save your pins:

Canyoneering Hogwarts Canyon in North Wash, UT Pin 1
Canyoneering Hogwarts Canyon in North Wash, UT Pin 2

Share the love

Leave a Reply

Your email address will not be published. Required fields are marked *