

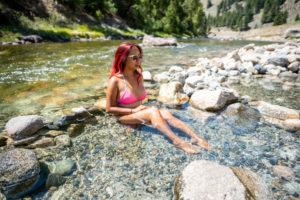
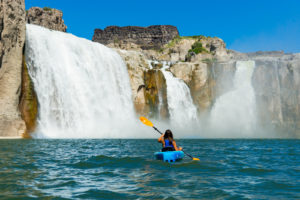
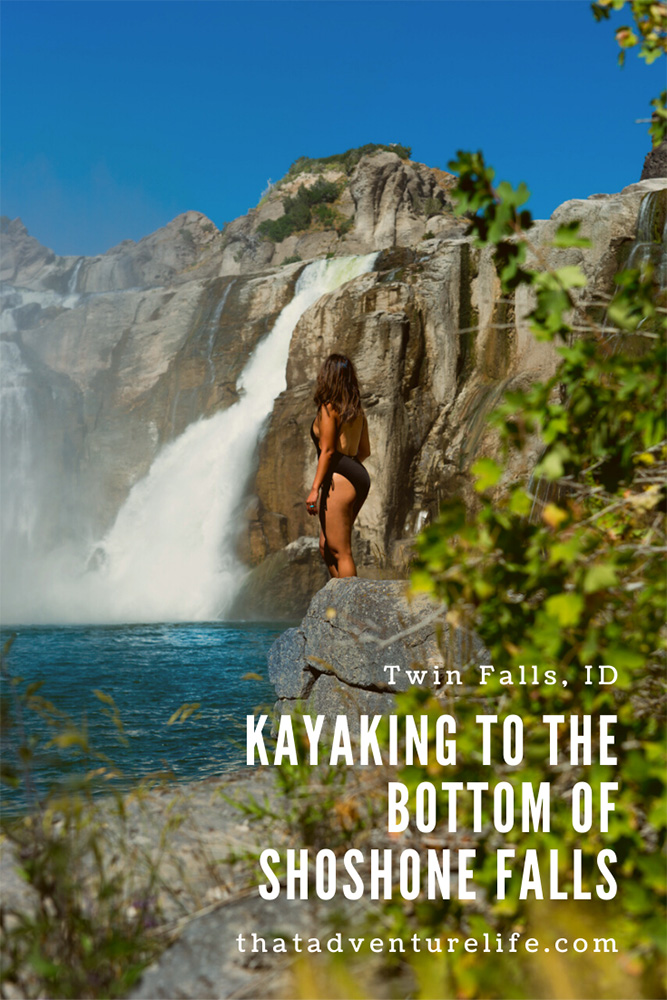
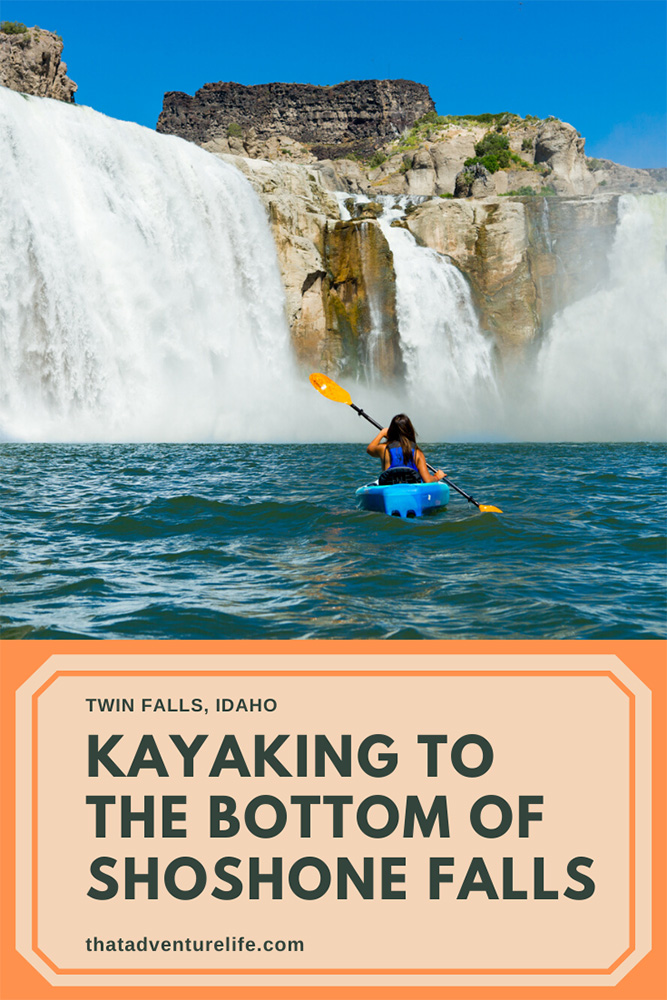
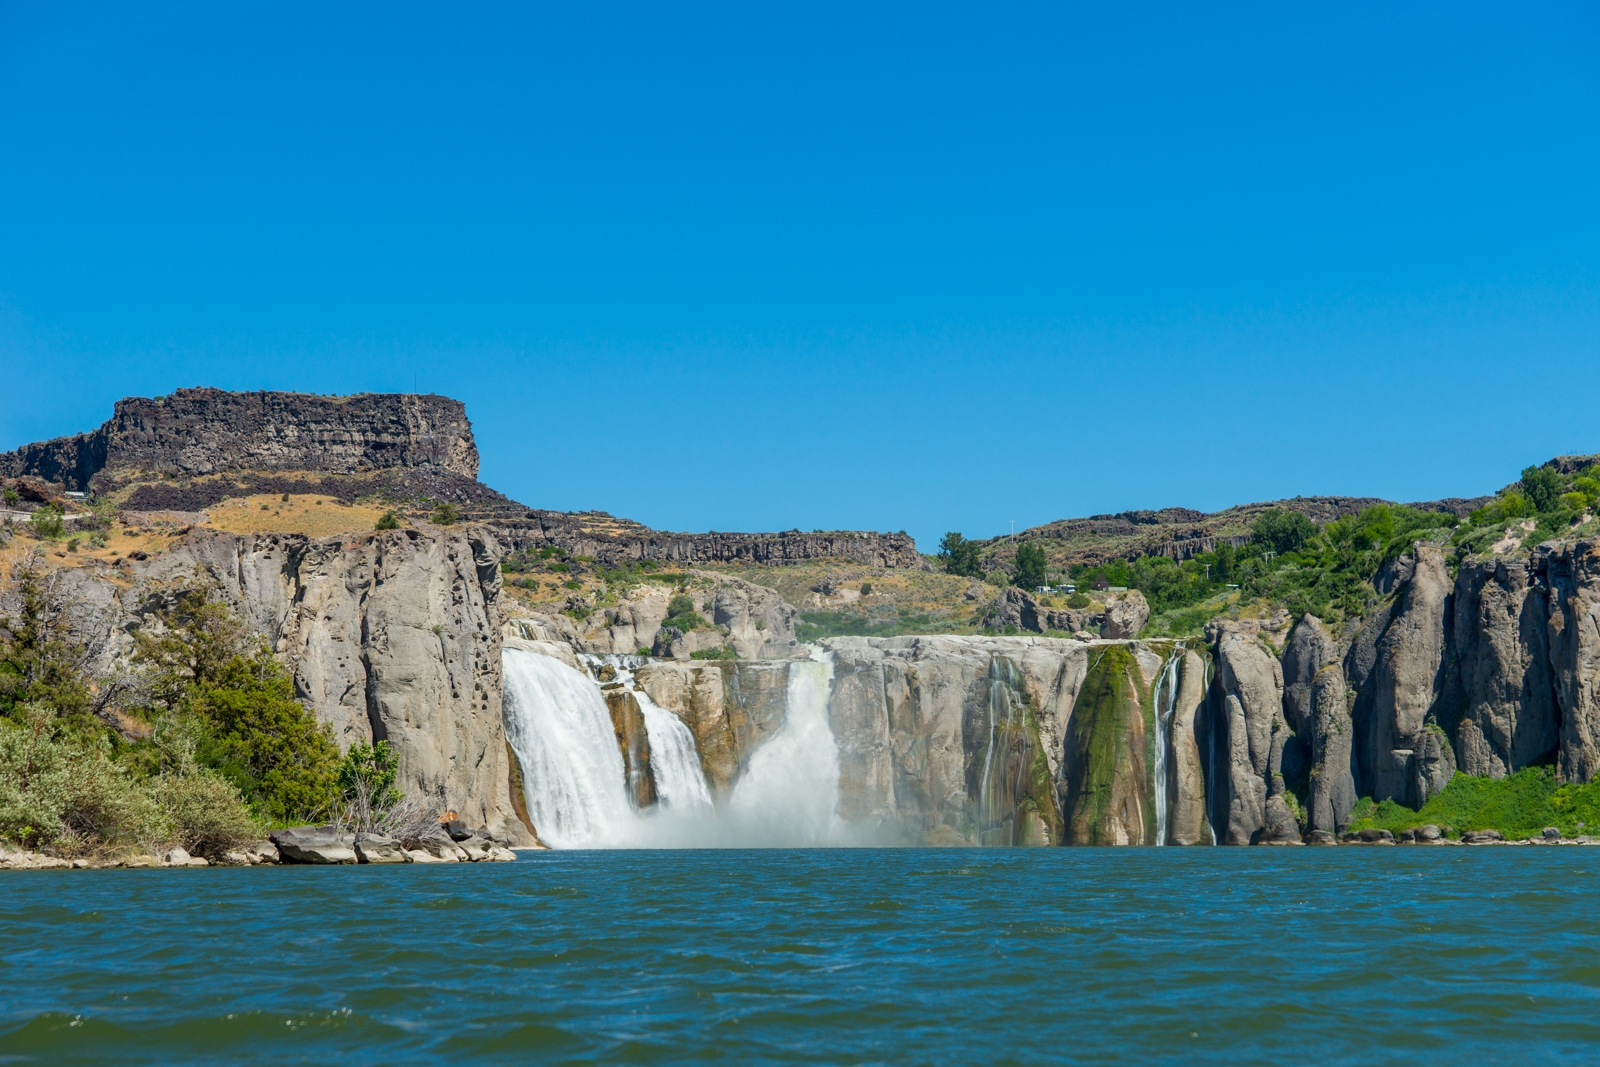
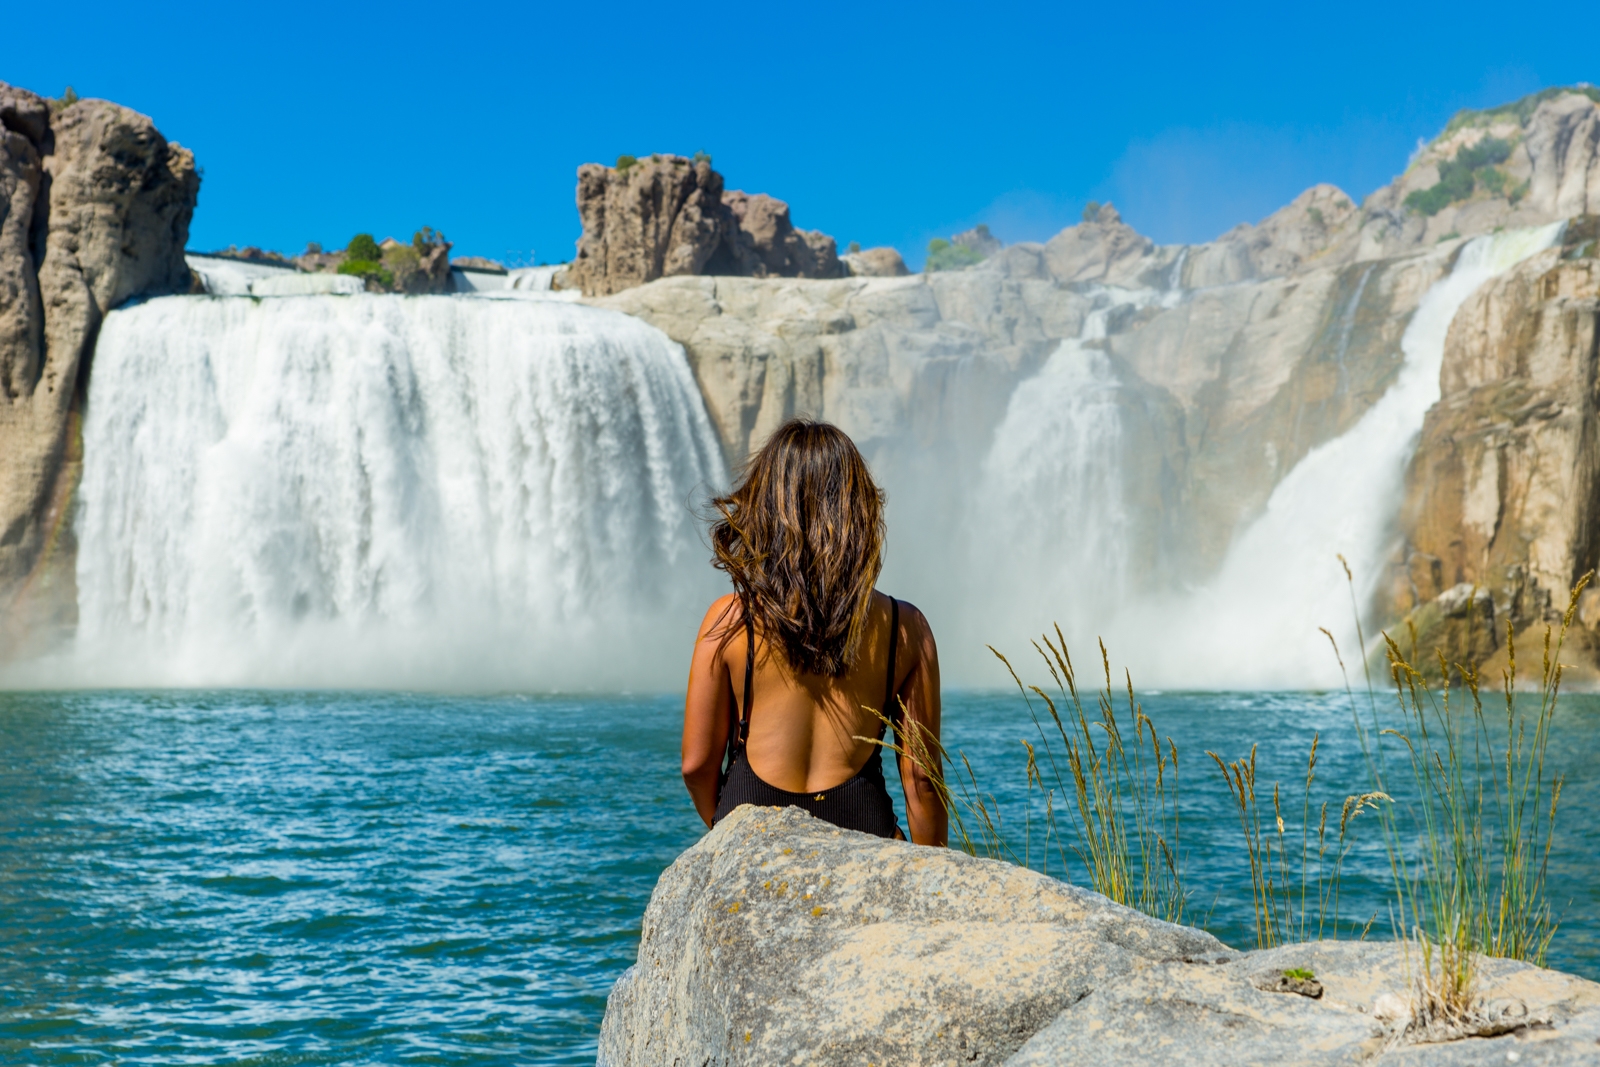
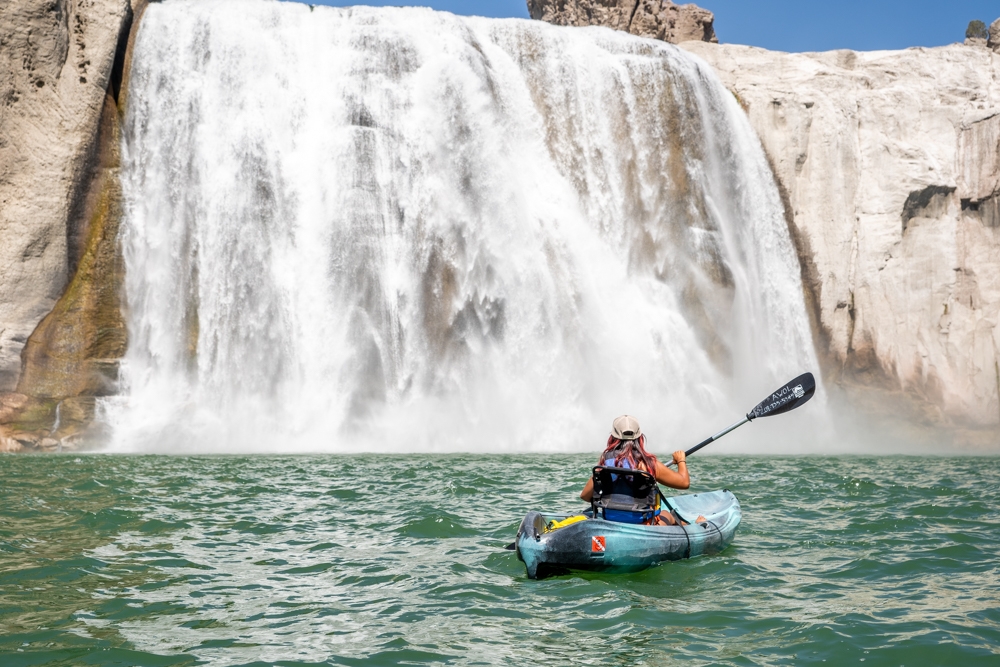
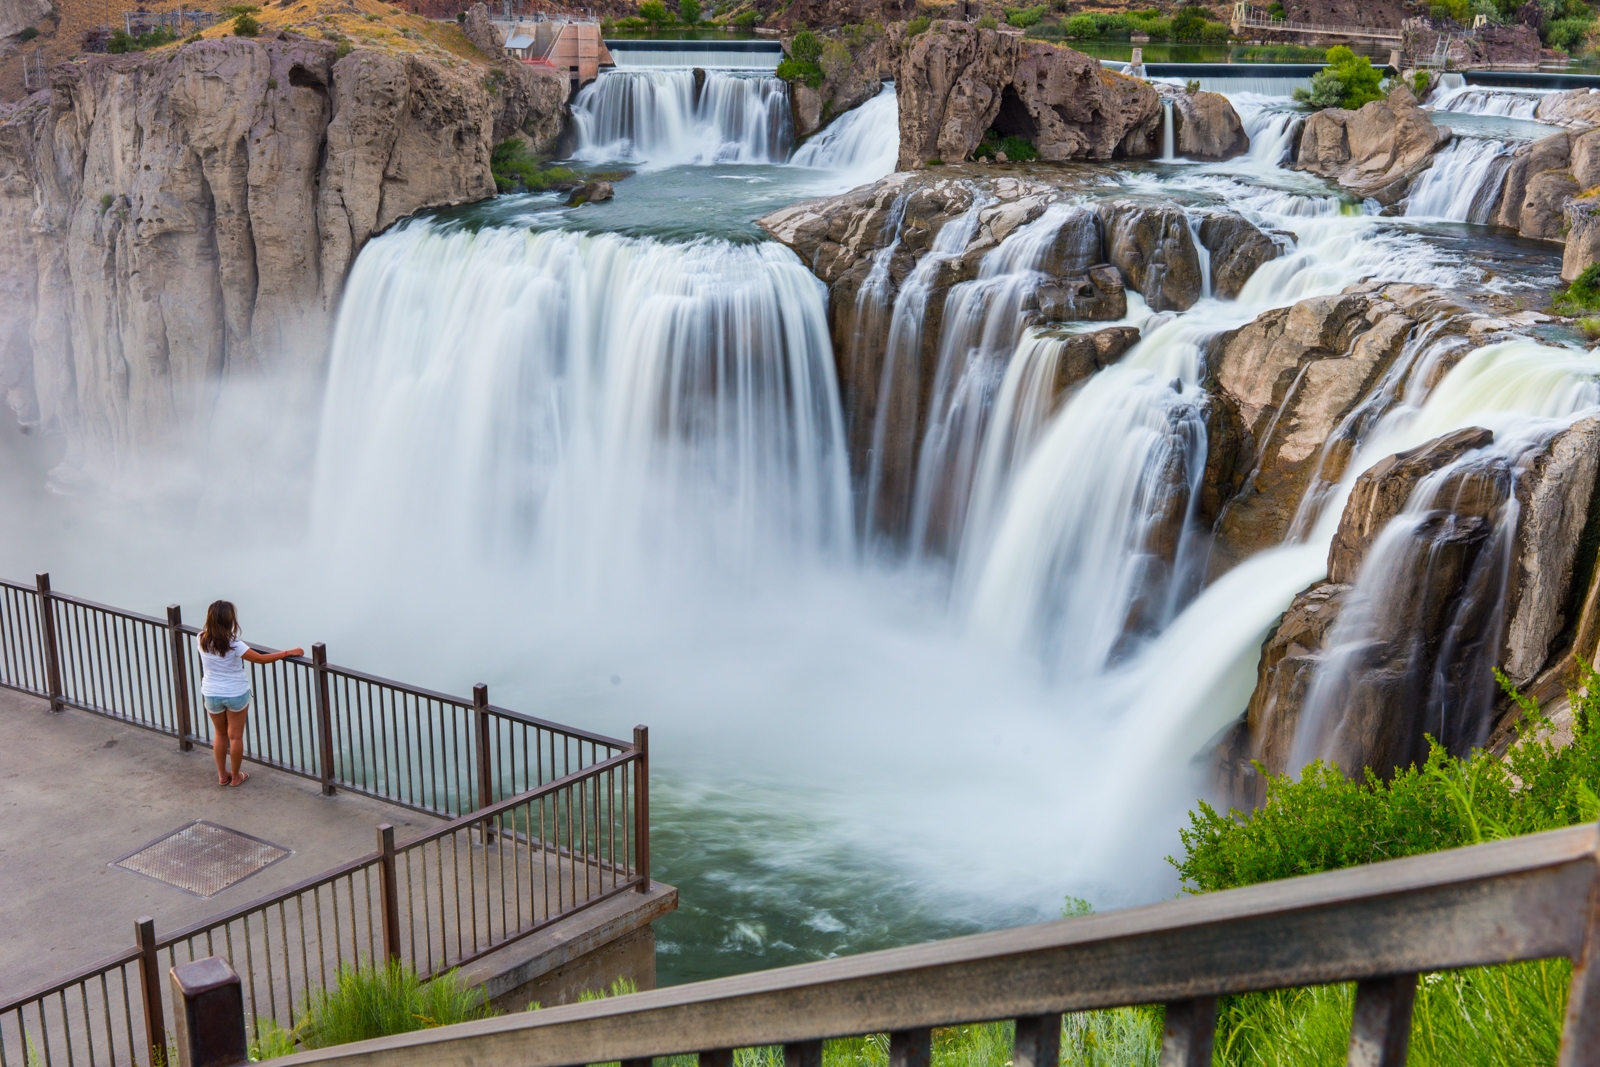
The first time we visited Idaho, our friends Brian and Kelsea told us about the beautiful Shoshone Falls in Twin Falls. With its height of 212 feet, Shoshone Falls are about 45 ft higher than Niagara Falls. It is also known as the “Niagara of the West.” The water flows over a rim nearly 1,000 ft wide. You can read more about the history and stats of Shoshone Falls here. The main viewing area for Shoshone Falls is from the top of the falls, however, we were ecstatic to learn that you can kayak the bottom of this magnificent waterfall. We loved it so much that we had to do it again when we revisited Idaho. Kayaking to the bottom of Shoshone Falls is a must if you’re visiting Idaho!
Note: Please make sure to respect this beautiful place and the surrounding areas. Always practice LEAVE NO TRACE. This means no loud music, no graffiti, no taking artifacts or fossilized items, and pack out what you pack in! Please help us protect this place for generations to come!
Stats
Where
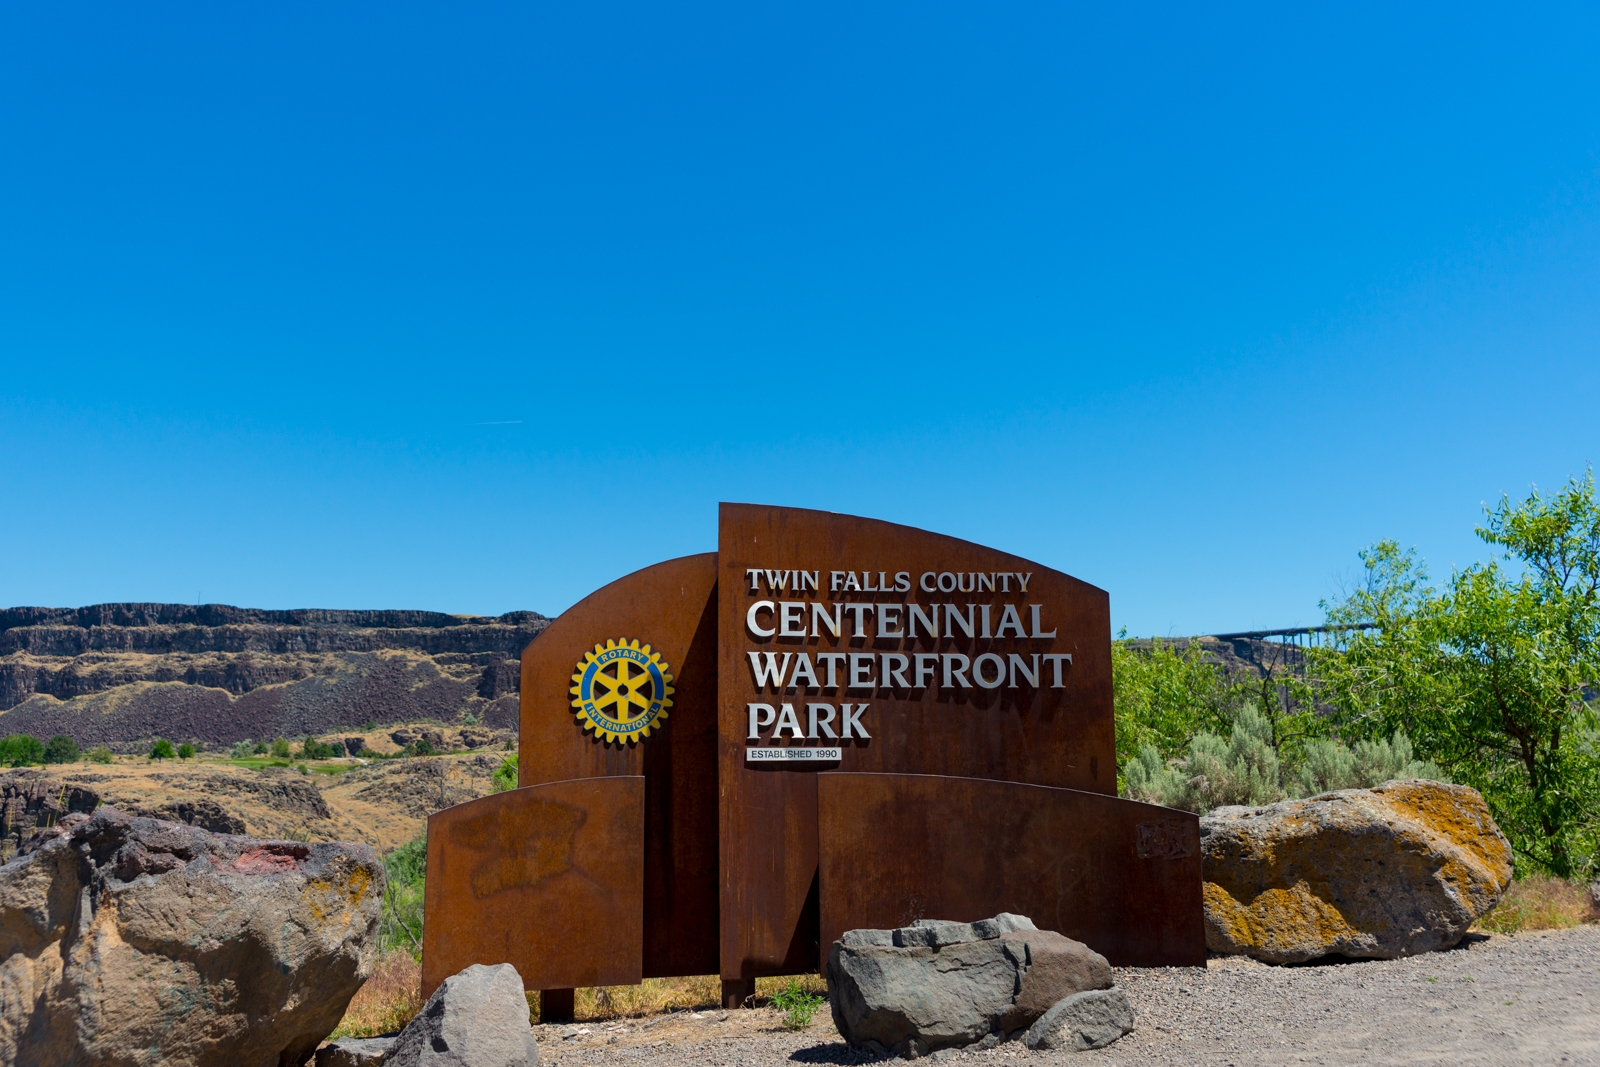
Centennial Waterfront Park:
Canyon Springs Rd, Twin Falls, ID 83301
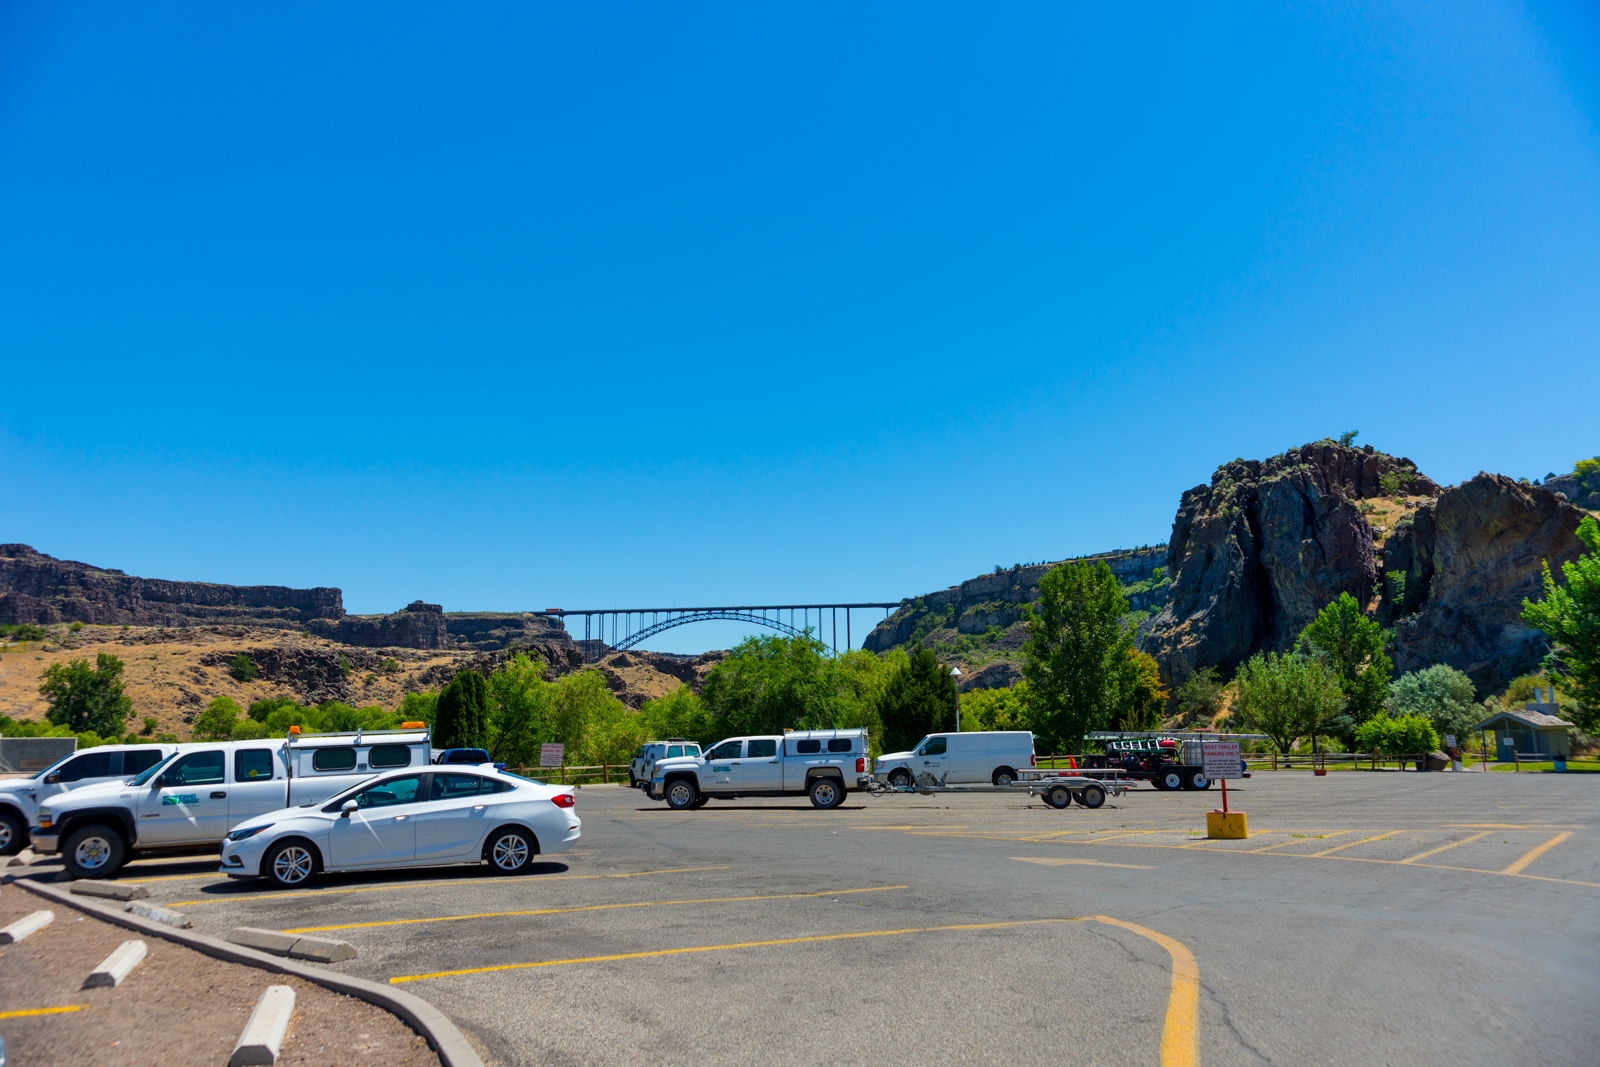
Parking
Paved parking lots with a good amount of parking spaces
Restroom
There are restrooms here
Fee
It’s free if you bring your own kayaks or paddle boards. If you decided to rent, you can check out the rental prices at AWOL Adventure Sports
Important Things
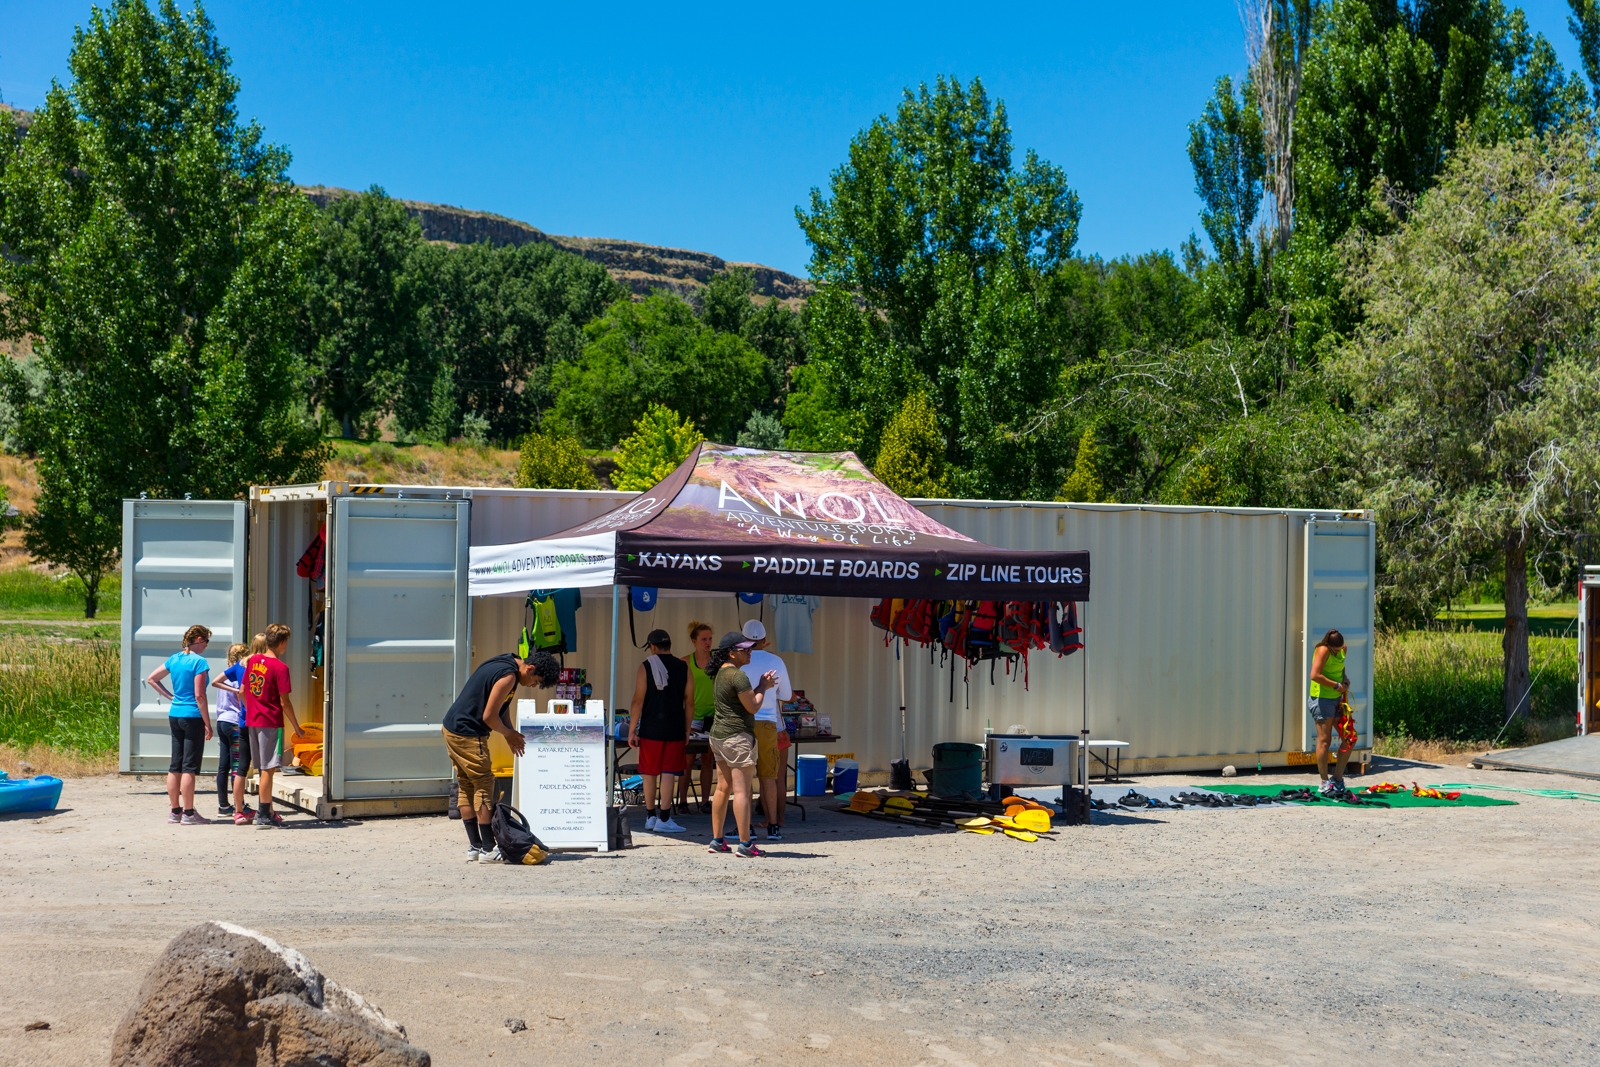
- If you need to rent your kayak, AWOL Adventure Sports has a rental booth located right inside the park.
- You will need 6 hours to go all the way to Shoshone Falls and back. Please make sure to call and reserve ahead if you’re planning to do so.
- There is a 200 yards portage at Pillar Falls. This portage is quite tricky and there is no other way around it.
Distance
8 miles R.T.
Level
Intermediate to difficult due to the portage in the middle. Not recommended for beginners or young children.
Time:
It takes us 6 hours, with plenty of time for exploring. If you’re ambitious, you might be able to do it in 5 hours.
Pet-friendly
No dogs are allowed
Ideal Time
The end of June and July seems to be the best time to go. The water level at the portage is low enough for you to be able to carry your kayak or paddleboard over, but still high enough to make Shoshone Falls impressive. We also recommend going early morning and on a calmer day if possible. Going early morning not only gives you more time to explore, but it will also help avoid the wind that tends to pick up in the evening.
Weather
Video
Getting There
The Drive
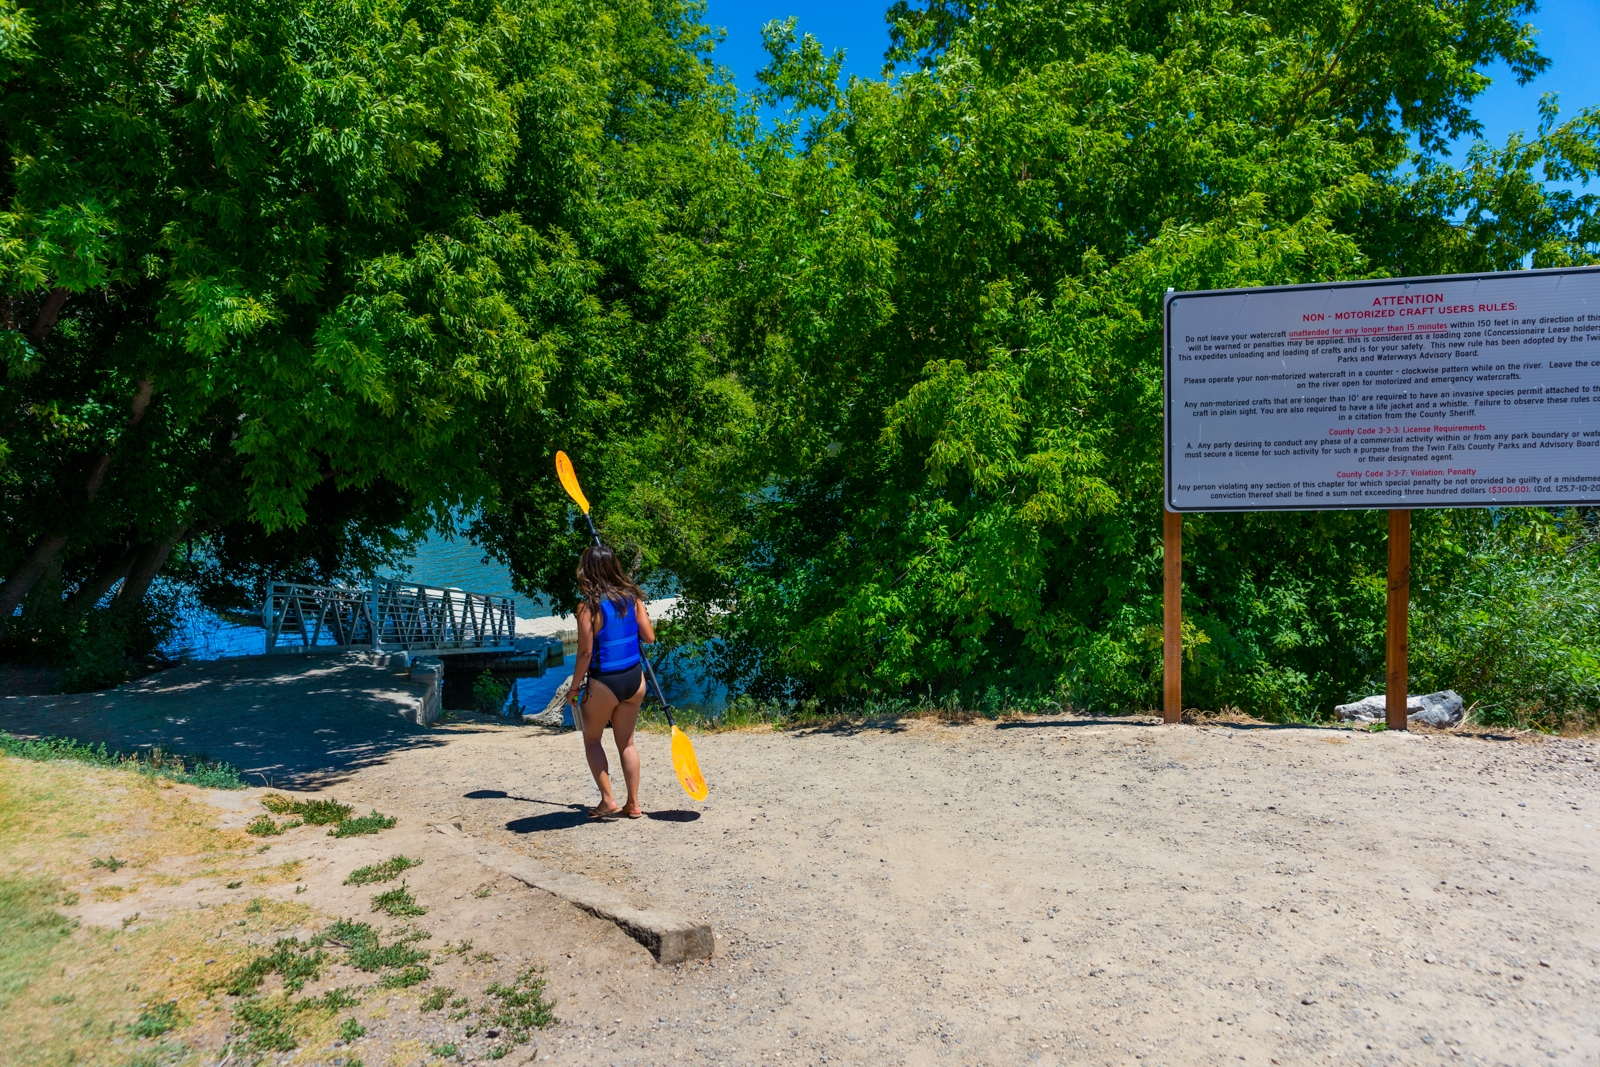
To kayak to the bottom of the Shoshone Falls in Twin Falls, Centennial Waterfront Park is the closest place where you can drop your kayak. You will be paddling upstream, along the Snake River. You can either bring your own kayaks, paddleboards, or rent. We couldn’t bring our kayaks to Idaho so we had to rent. Lucky for us, AWOL Adventure Sports has its rental booth set up, right in the park.
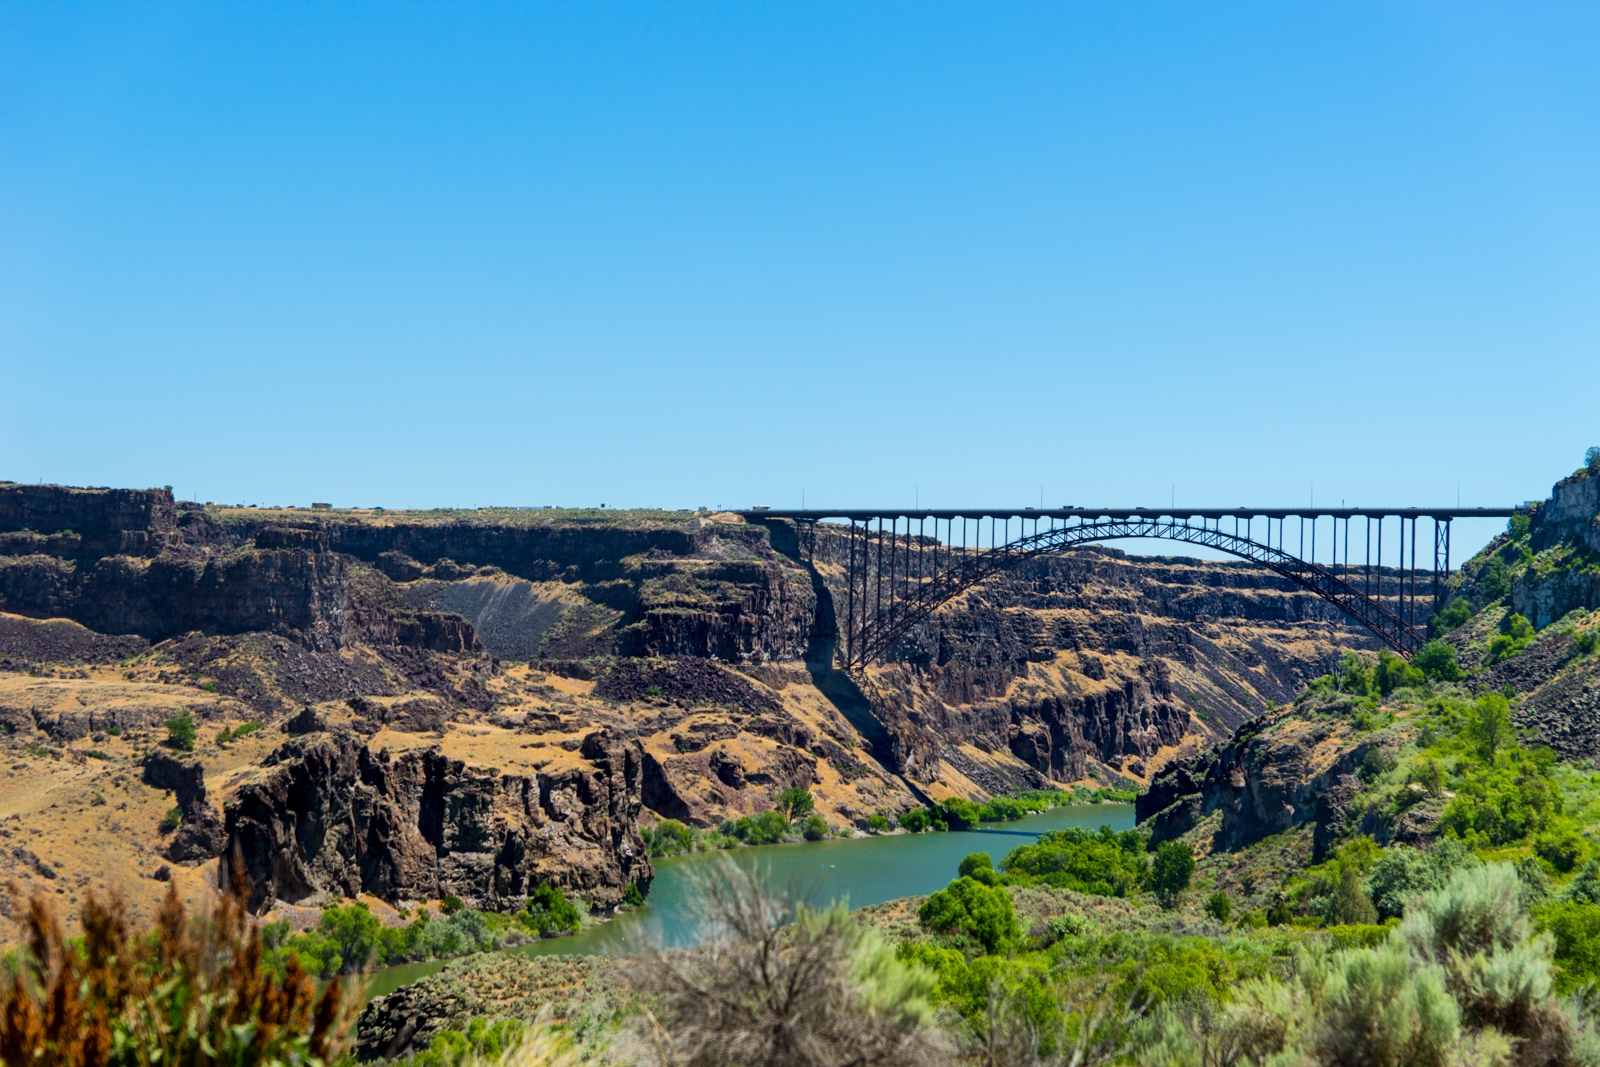
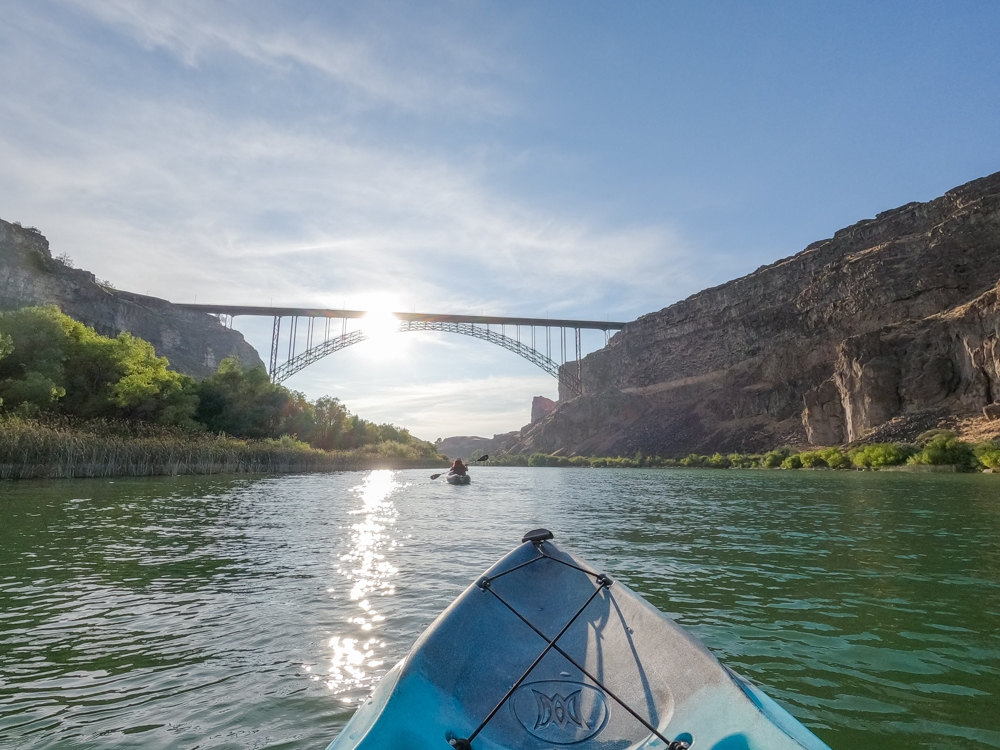
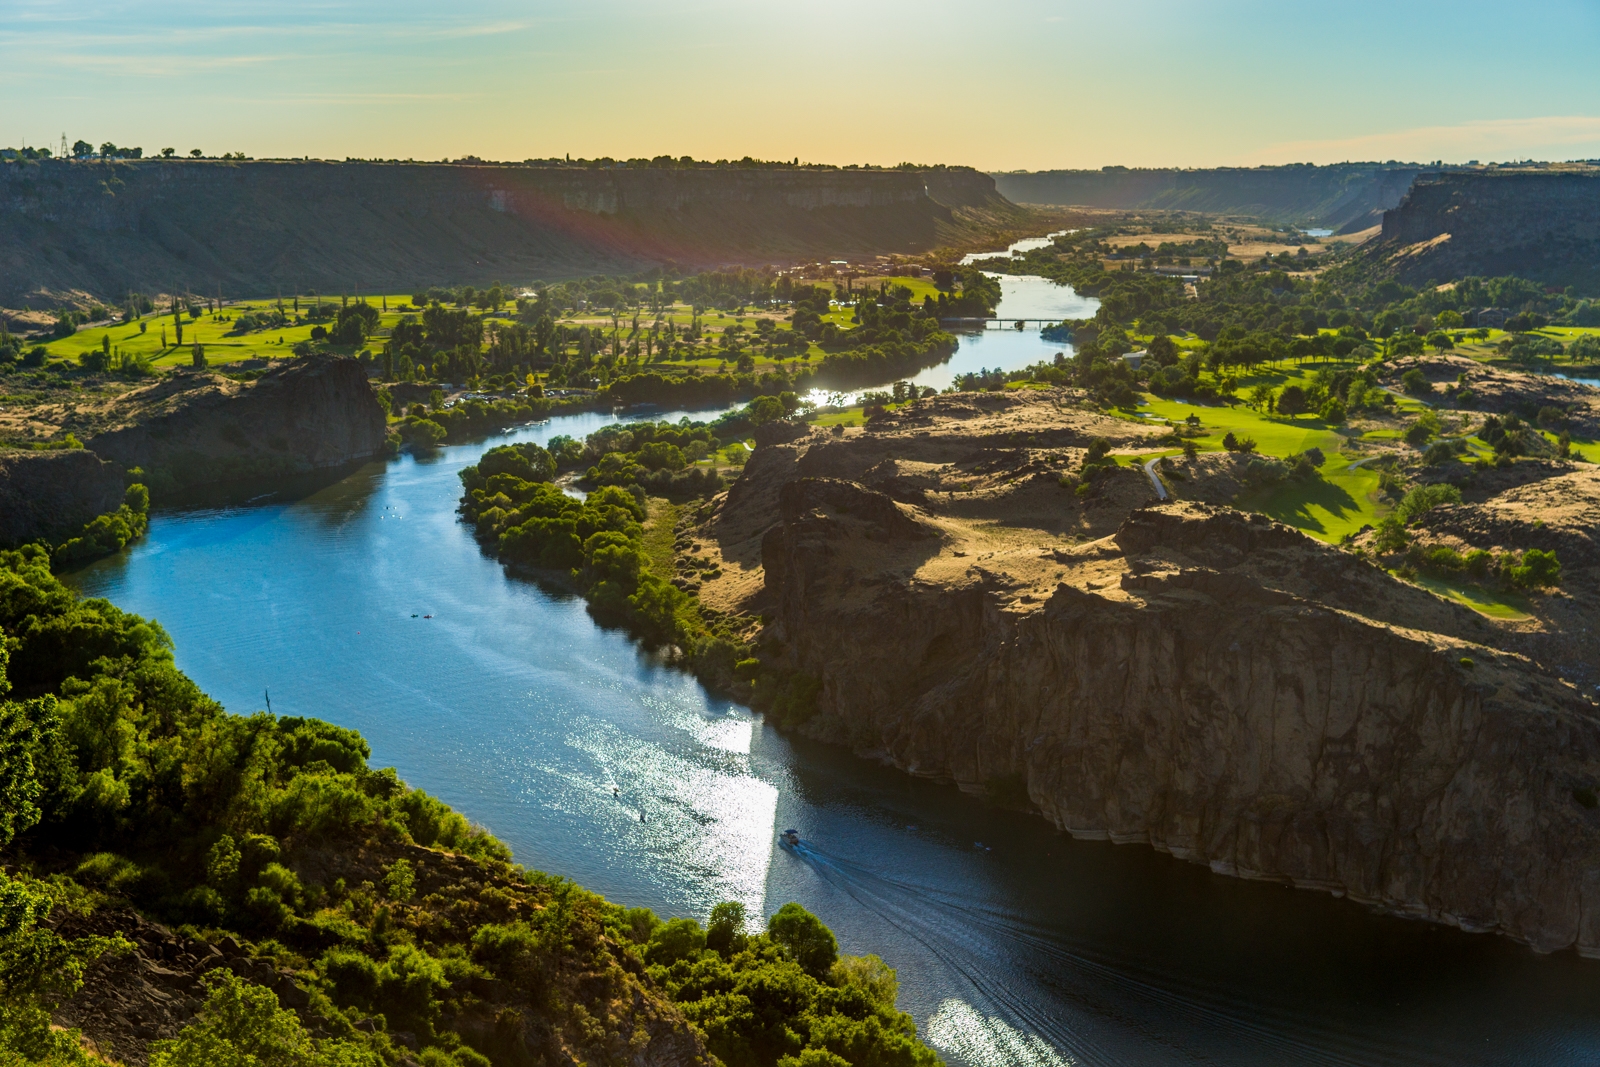
Once we turned onto Canyon Spring Road, we found ourselves driving down a somewhat steep road with several switchbacks on it. After the first curve, we were treated to a beautiful view of the Perrine Memorial Bridge, as it spanned 1,499 feet across and 486 feet above the Snake River. You will be paddling right under it! We then follow the road to access Centennial Waterfront Park. AWOL Adventure Sports’ booth is located at the back of the park.
The Rental Process
The rental process is quite simple. If you already reserved your kayak ahead of time, you can just walk up and told them your name. You can also rent it on the spot. However, if you want the 6 hours rental, you will need to reserve ahead of time. As we mentioned in the stats section, you will need at least 5-6 hours to complete the trip to Shoshone Falls and back. At the time we went, it was $40 per solo kayak for 6 hours, which is actually quite reasonable. However, please make sure to check their website for more updated pricing info.
After we got our paddles and life jackets, we headed toward the dock where we could pick up our kayaks. Since this was our second time here, we knew exactly where to go. AWOL had a really neat dock with rollers on it. This way, you can just get into your kayak and the attendant will roll you down the ramp, into the water. This is much easier than trying to get into a kayak in the water from a dock!
The Adventure
Kayak to Pillar Falls
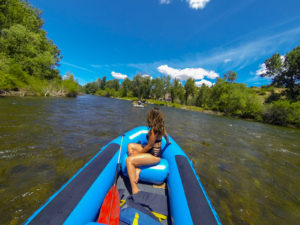
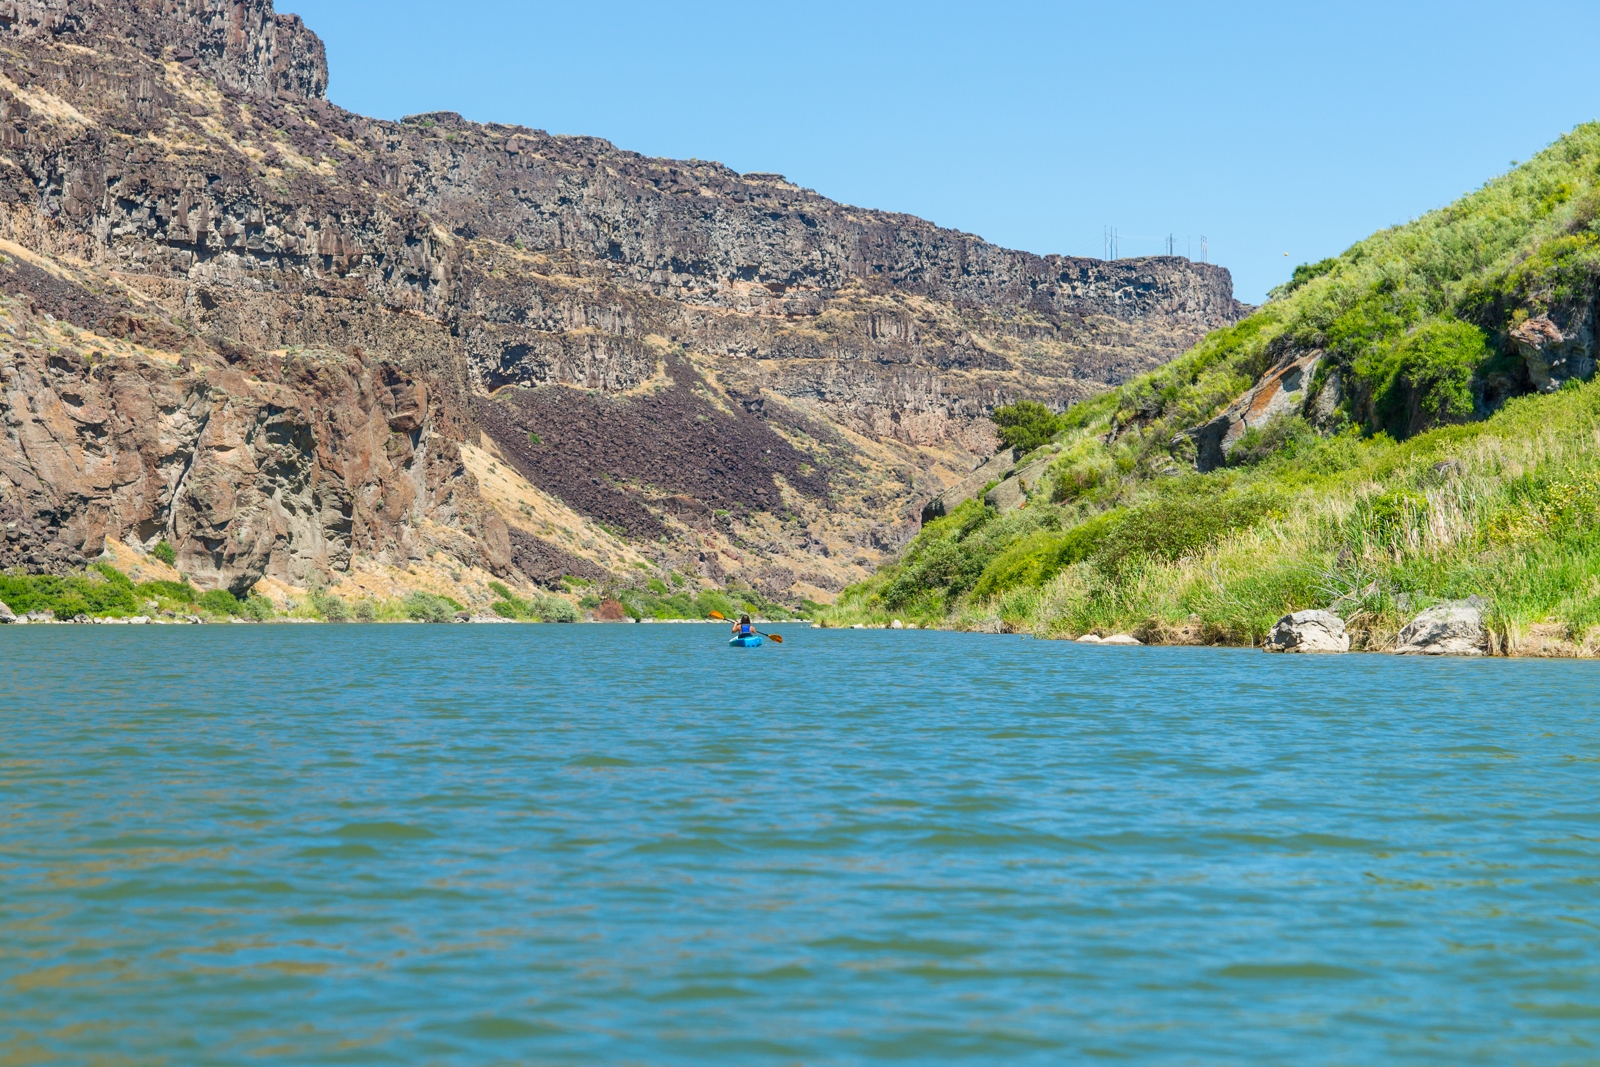
Once in the water, we got our bearings and headed toward the towering bridge. The current wasn’t very fast, but you will be heading upstream on the way to the falls. Our main challenge that day was the wind. It was blowing upstream, which help on the way there. However, it kind of canceled out the current on our way home. To get to the falls, you will need to paddle toward the Perrine Bridge. Keep an eye out for falling objects. According to Maddie, the girl who checked us in, people tend to throw things down this bridge.
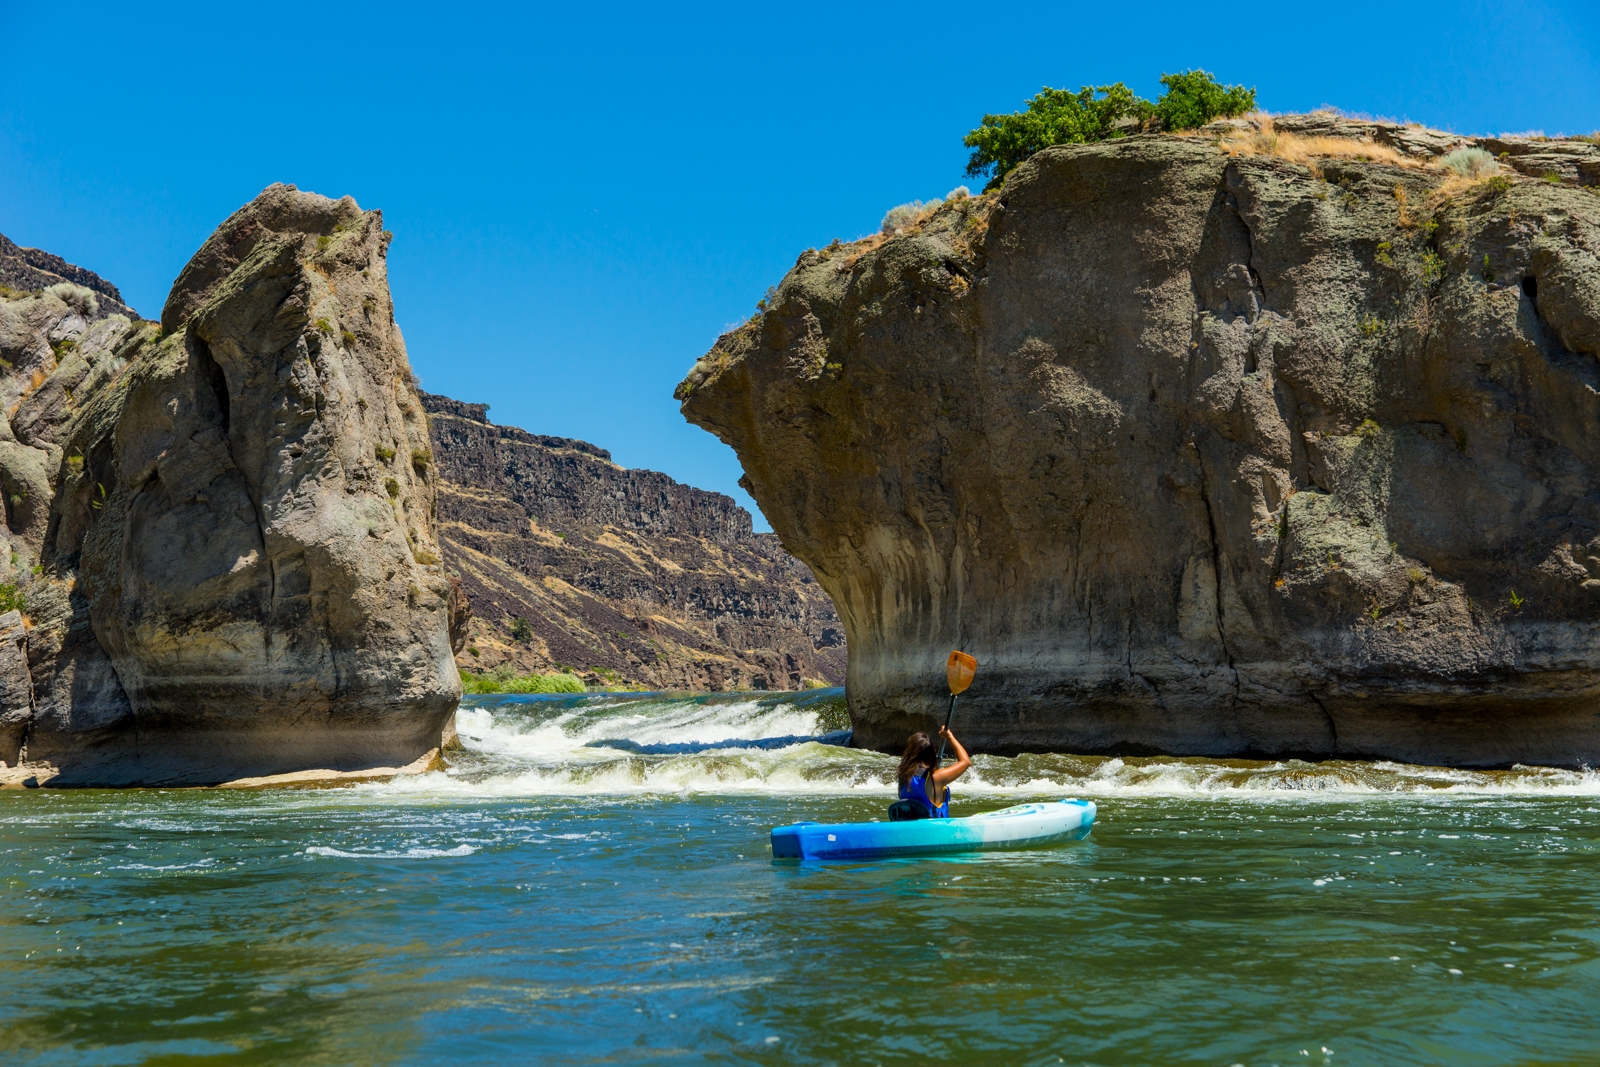
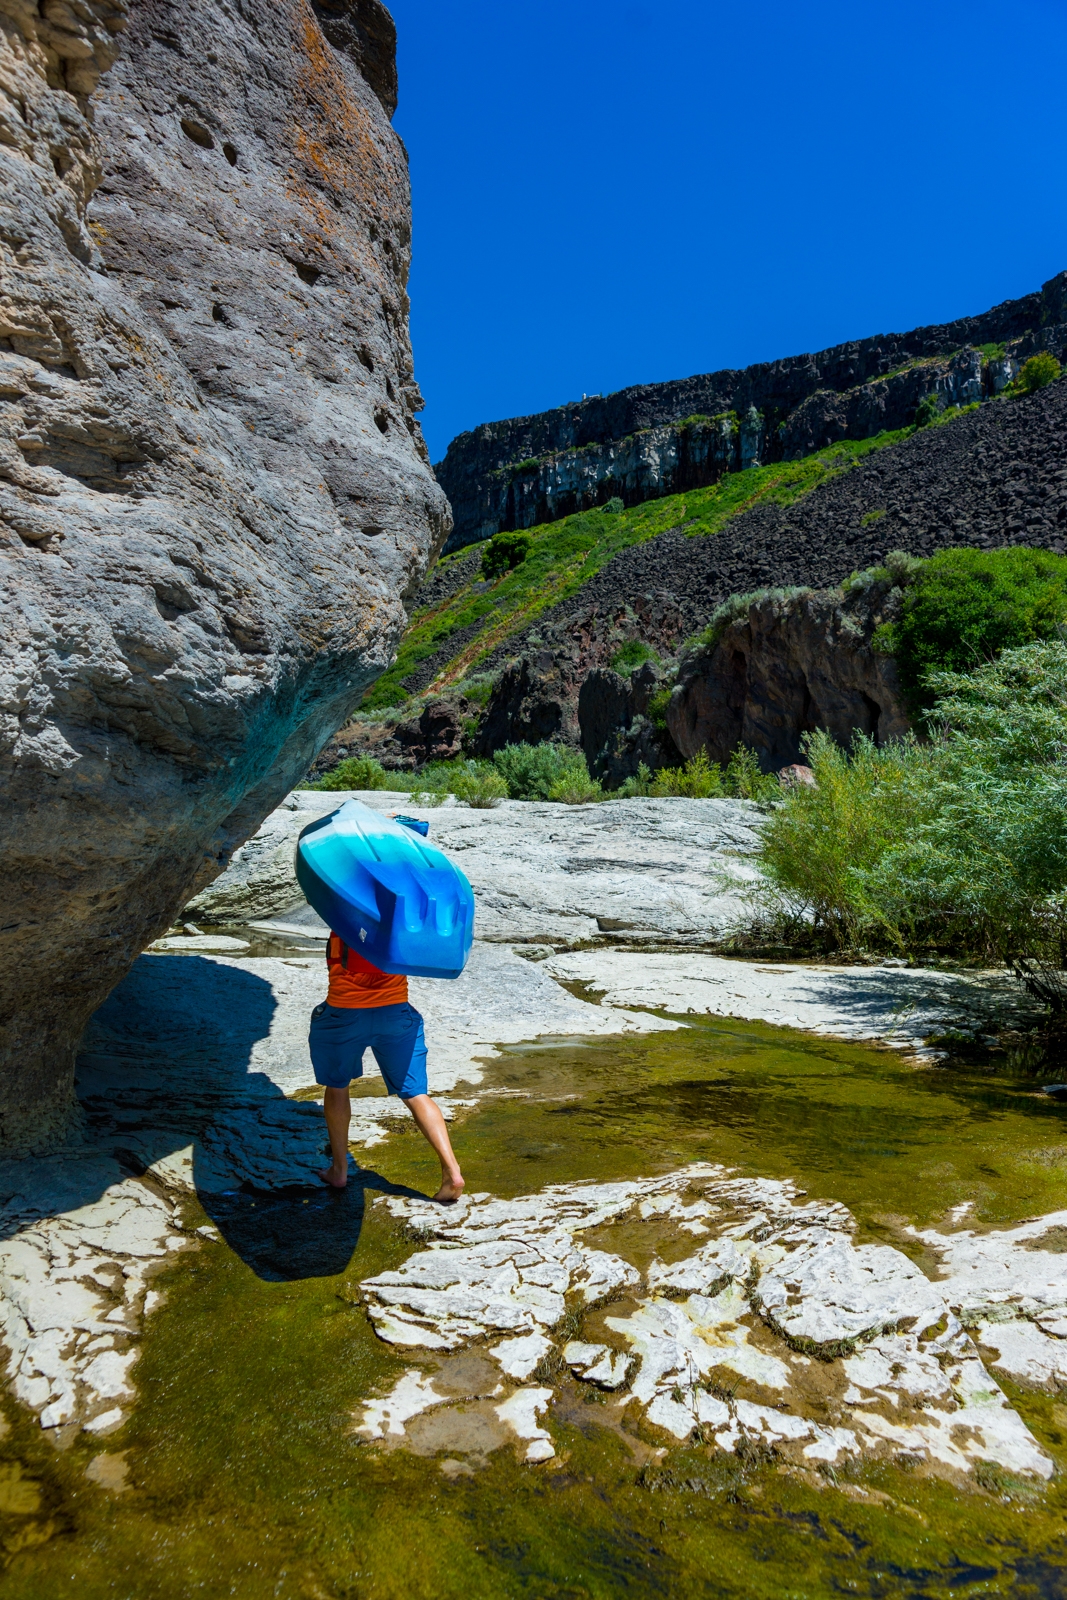
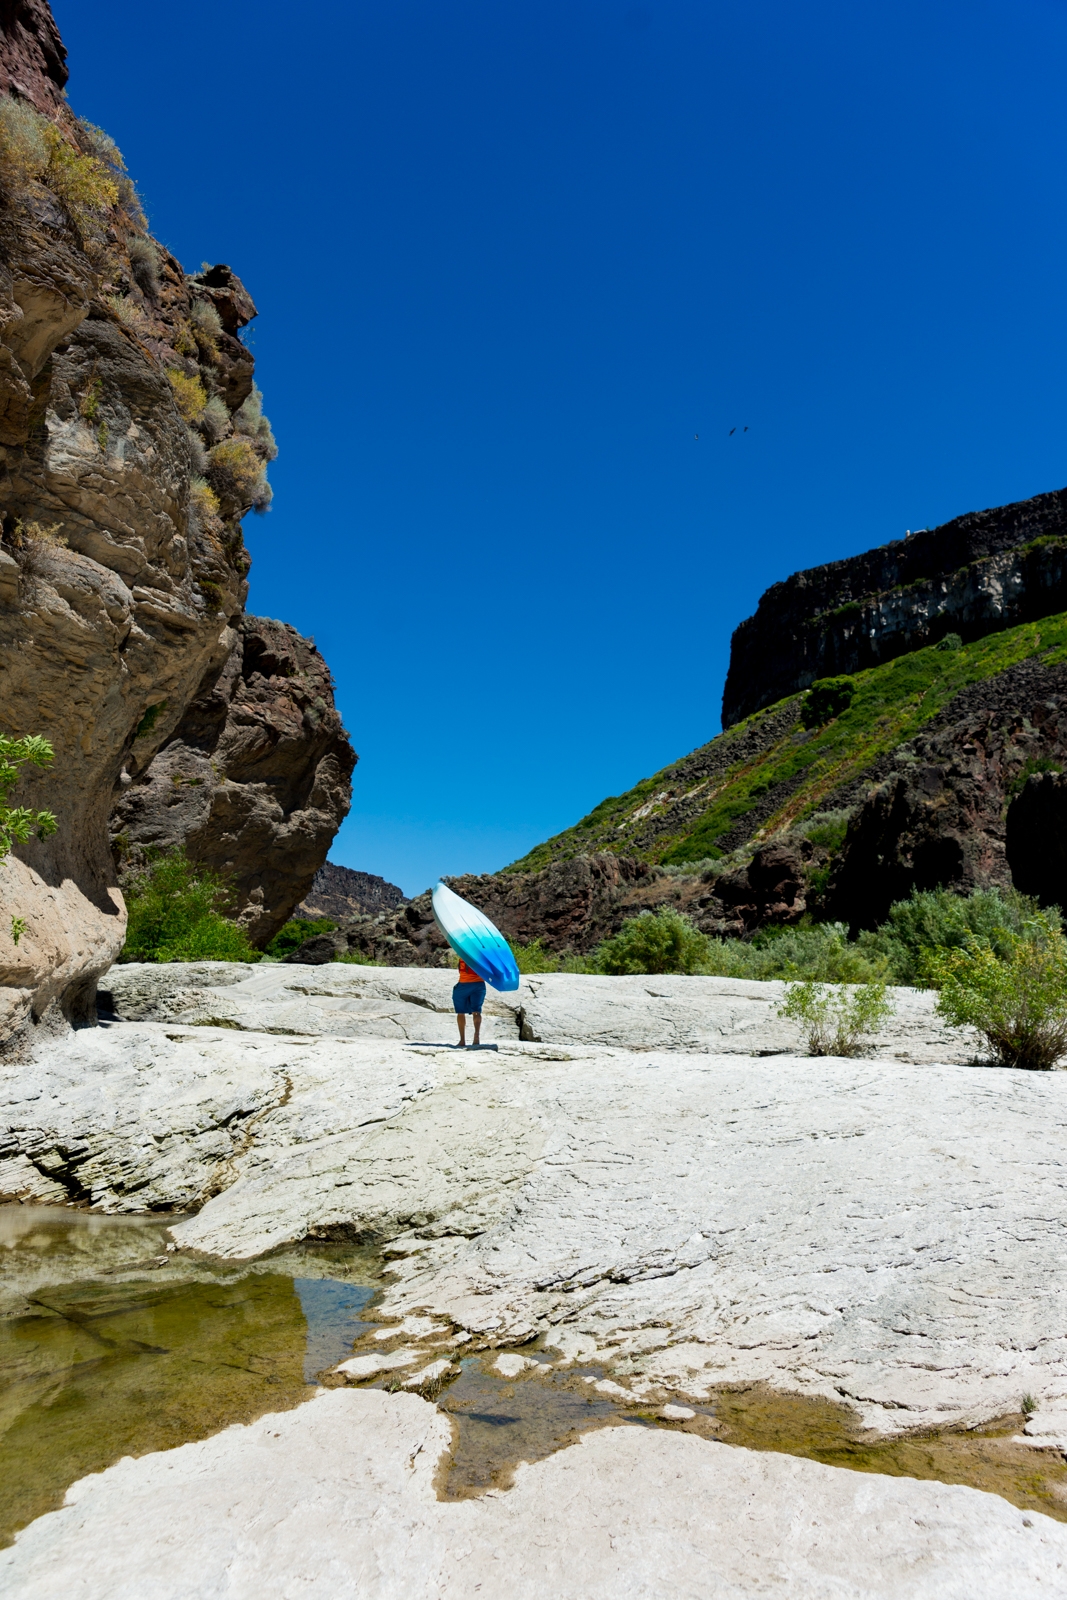
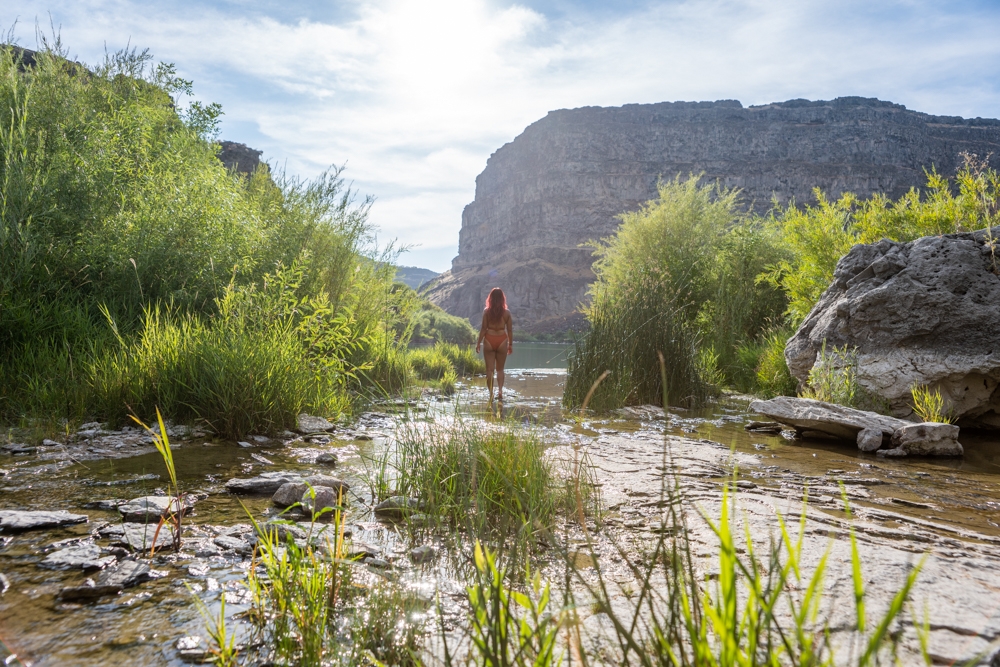
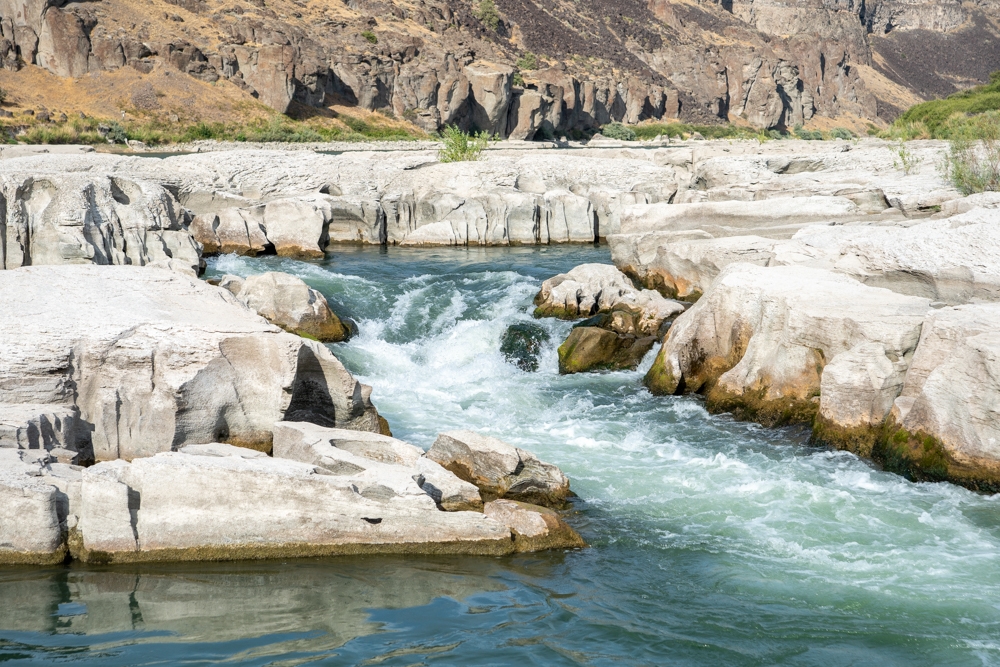
The first leg of your journey is easy. The water was calm, and smooth despite the wind. It was a very pleasant and beautiful trek with little waterfalls running down the side of the canyon walls along the way. There are also tons of small beaches along the way for a quick break if needed. Around 2 mile mark, you will encounter Pillar Falls. This is your first series of waterfalls. It is also where you need to pick up your kayak and carry it over to the other side of the falls. The easiest way is to approach it from the right-hand side.
Portage through Pillar Falls
The portage section is about 200 yards or so. You will need to navigate through small inclines, slippery and rocky sections as well as dense bushes. We definitely recommend wearing your water shoes. It were such a big help through mossy, slippery rocky areas. Depending on the water level, this area can be completely dry or full of water. When the water level is high, it is very difficult to carry the kayaks. During the winter or spring, the overflowing of water makes the passage to Shoshone Falls impossible.
Our rental kayaks weight about 45 lbs each, which make transporting it a bit cumbersome. Dustin, being a hero, ended up carrying both of them by himself. This took us about 30 minutes or so. While transporting our kayaks, we ran into a few people that used paddleboards or inflatable kayaks instead. It looked so much easier! We were definitely a little jealous. After getting the kayaks to the other side of Pillar Falls, we took a quick break before getting back in the water. The first time we were here in early June, the water level was higher, all the way up to the rock. The second time we came in mid August, the water level was quite low, so we had to carry the kayaks some extra distance before we can actually drop them in the water.
Kayak to the Bottom of Shoshone Falls
The second part of paddling is only 1.5 miles until you are at the base of the Shoshone Falls. The most difficult part of this adventure is the portage section. The actual kayaking part was very easy because the river was calm, especially after Pillar Falls. This is partially due to the fact that the motorized boats can’t access this part of the river. Also, since not many people could or want to do the portage, we had the whole place to ourselves both times we were there.
Shoshone Falls
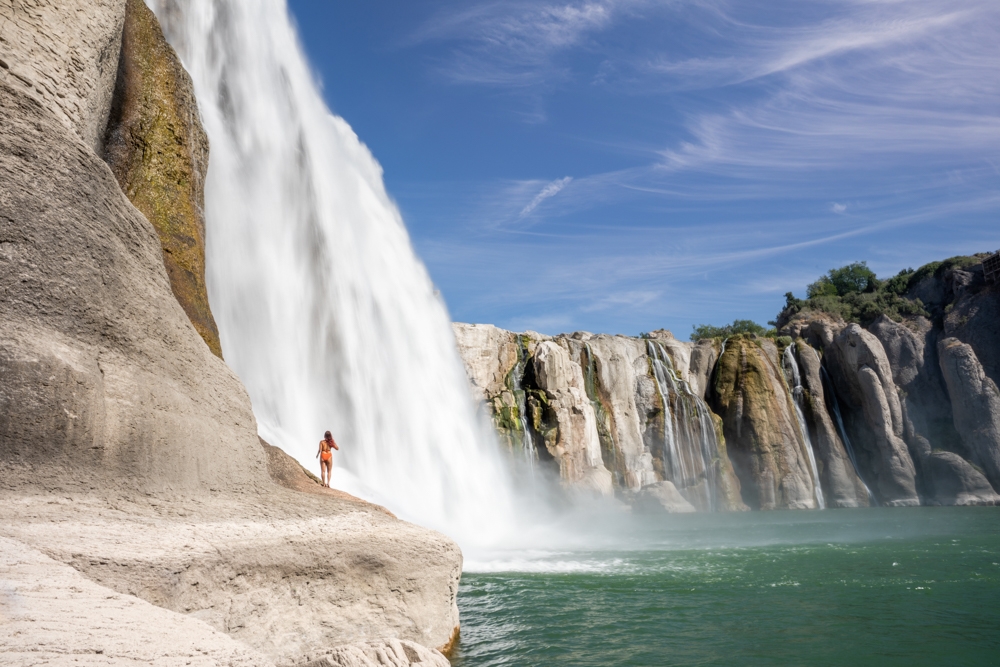
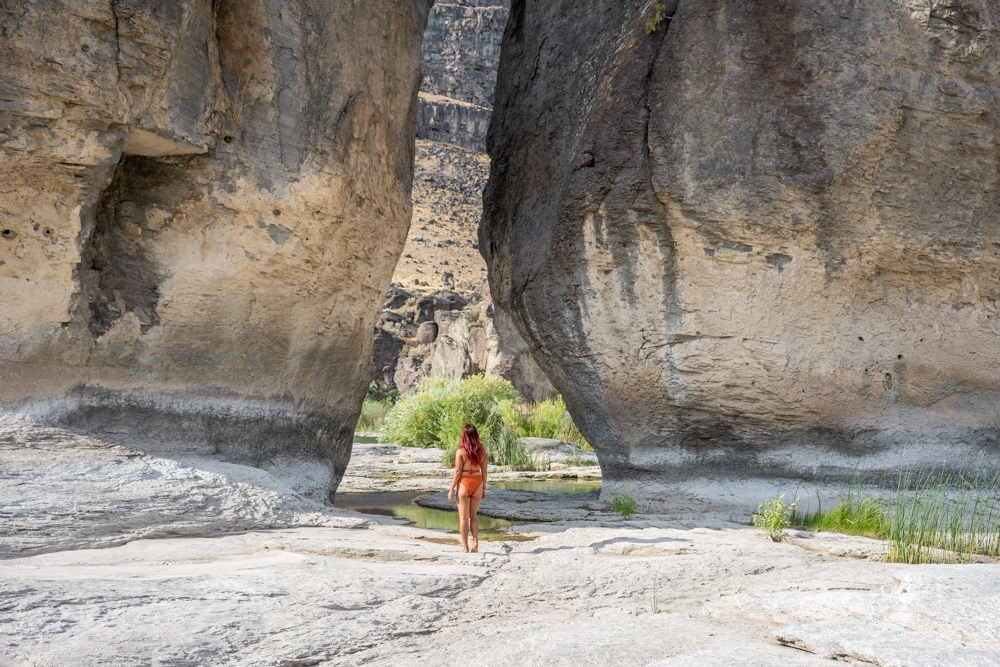
As soon as we went around the corner, we got our first peek at the massive Shoshone Falls. It gets better and better the closer you get to it. The absolute deluge of water that was flowing over the falls was awe-inspiring. It beckoned us to come closer. However, please be careful if you decide to paddle closer. The wind picked up once we got close. Between the wind and the current, we could have been sucked into the falls. It is also very misty at the base. If you bring a camera, keep an eye out for your lens. The water from the mist will leave you with some very stubborn water spots on your lens. Luckily, Dustin always packs an extra LensPen in the car that has a cleaning compound that got all of the spots out!
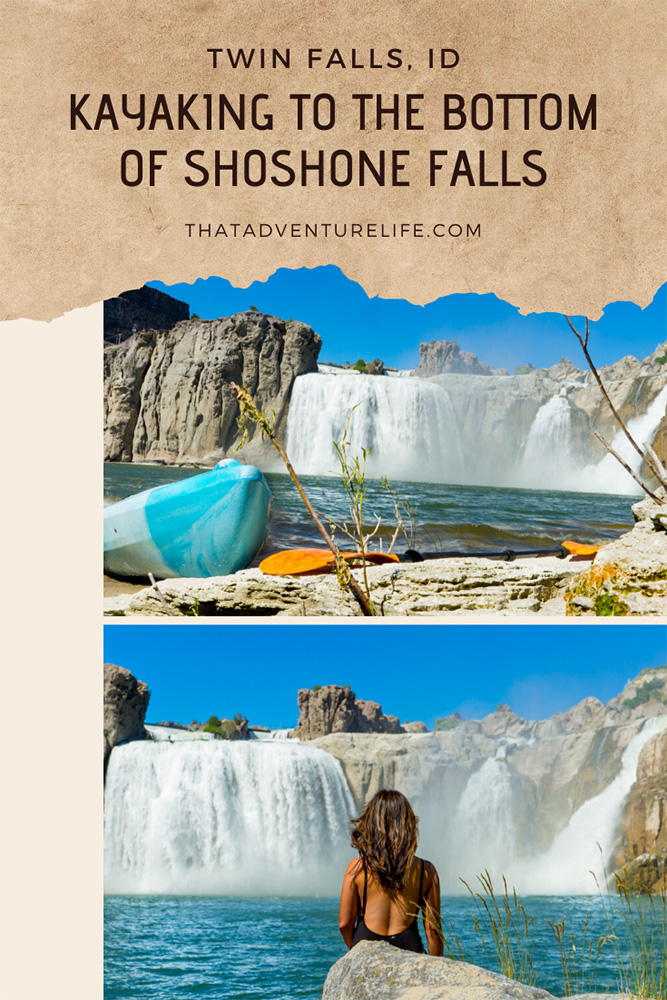
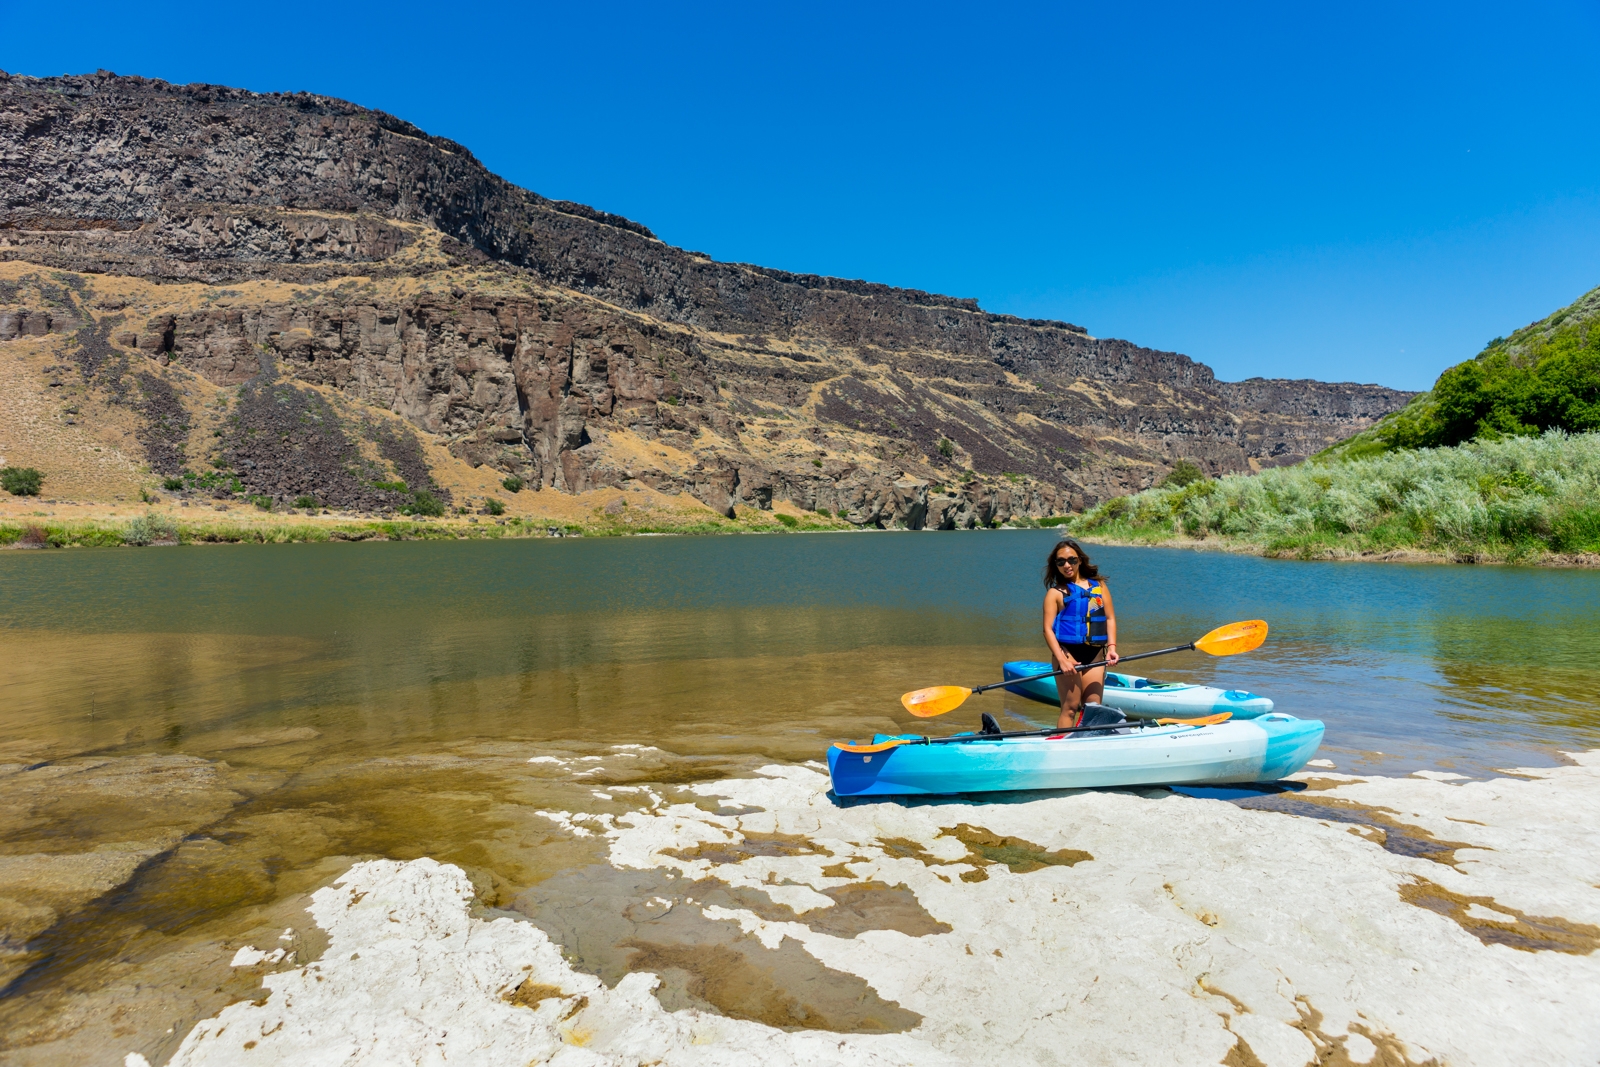
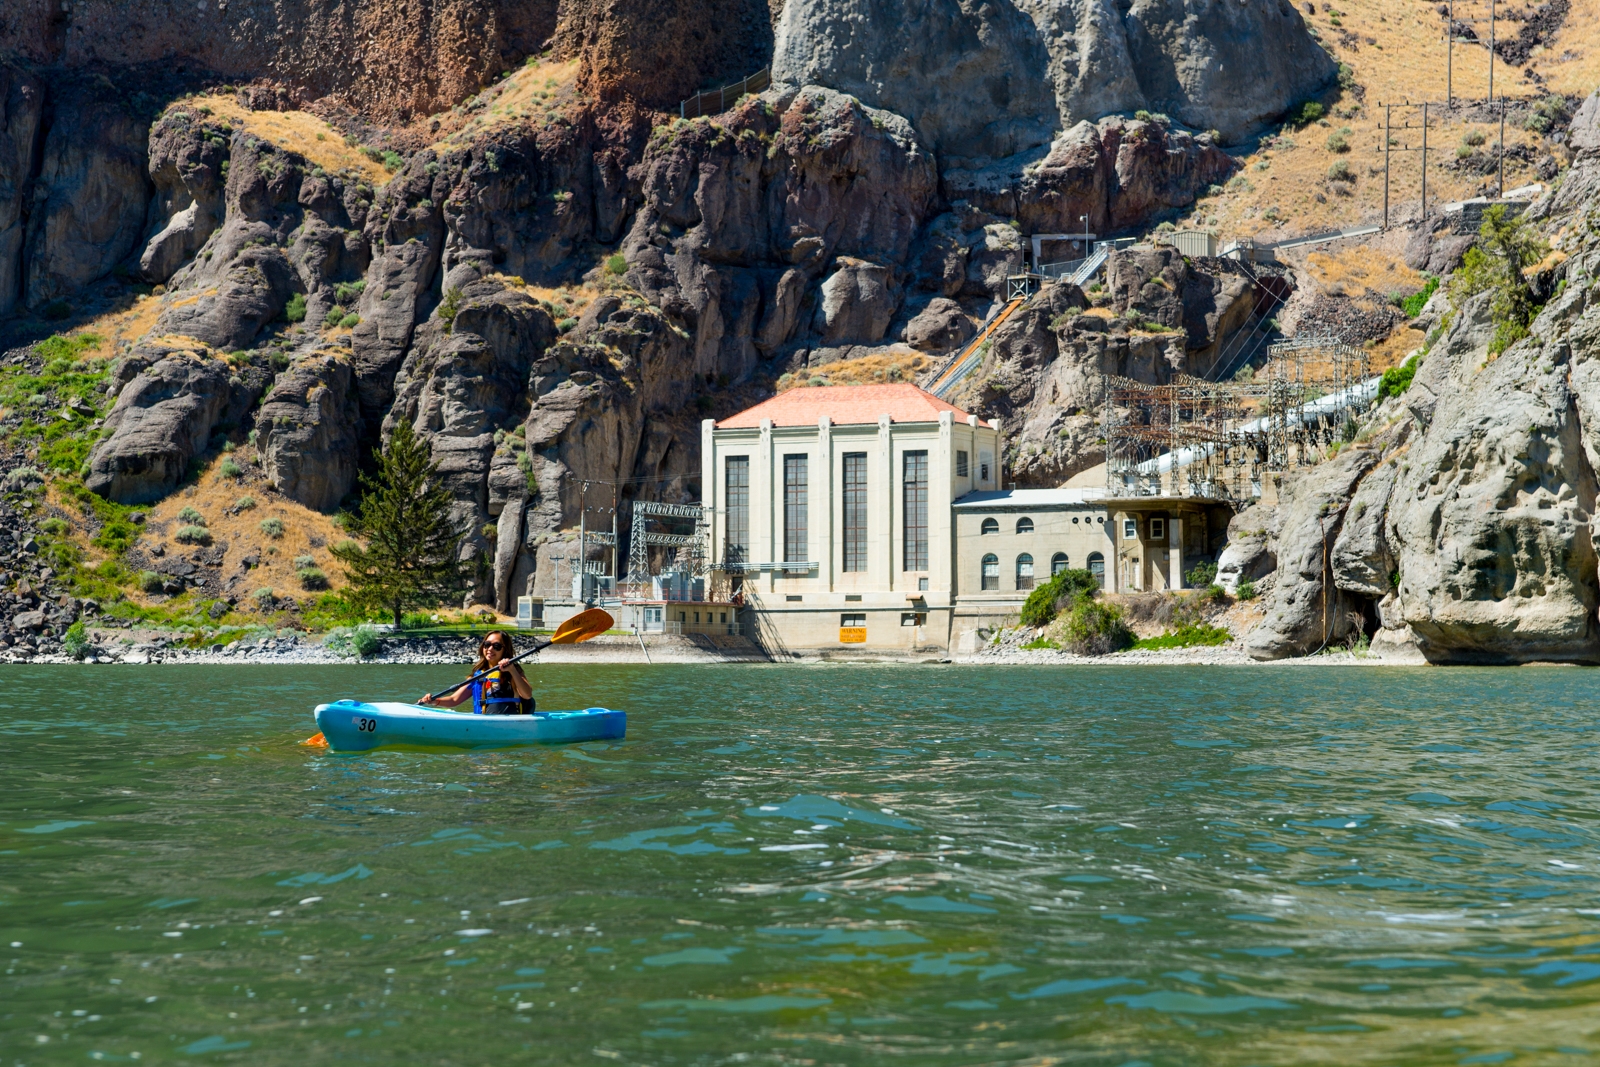
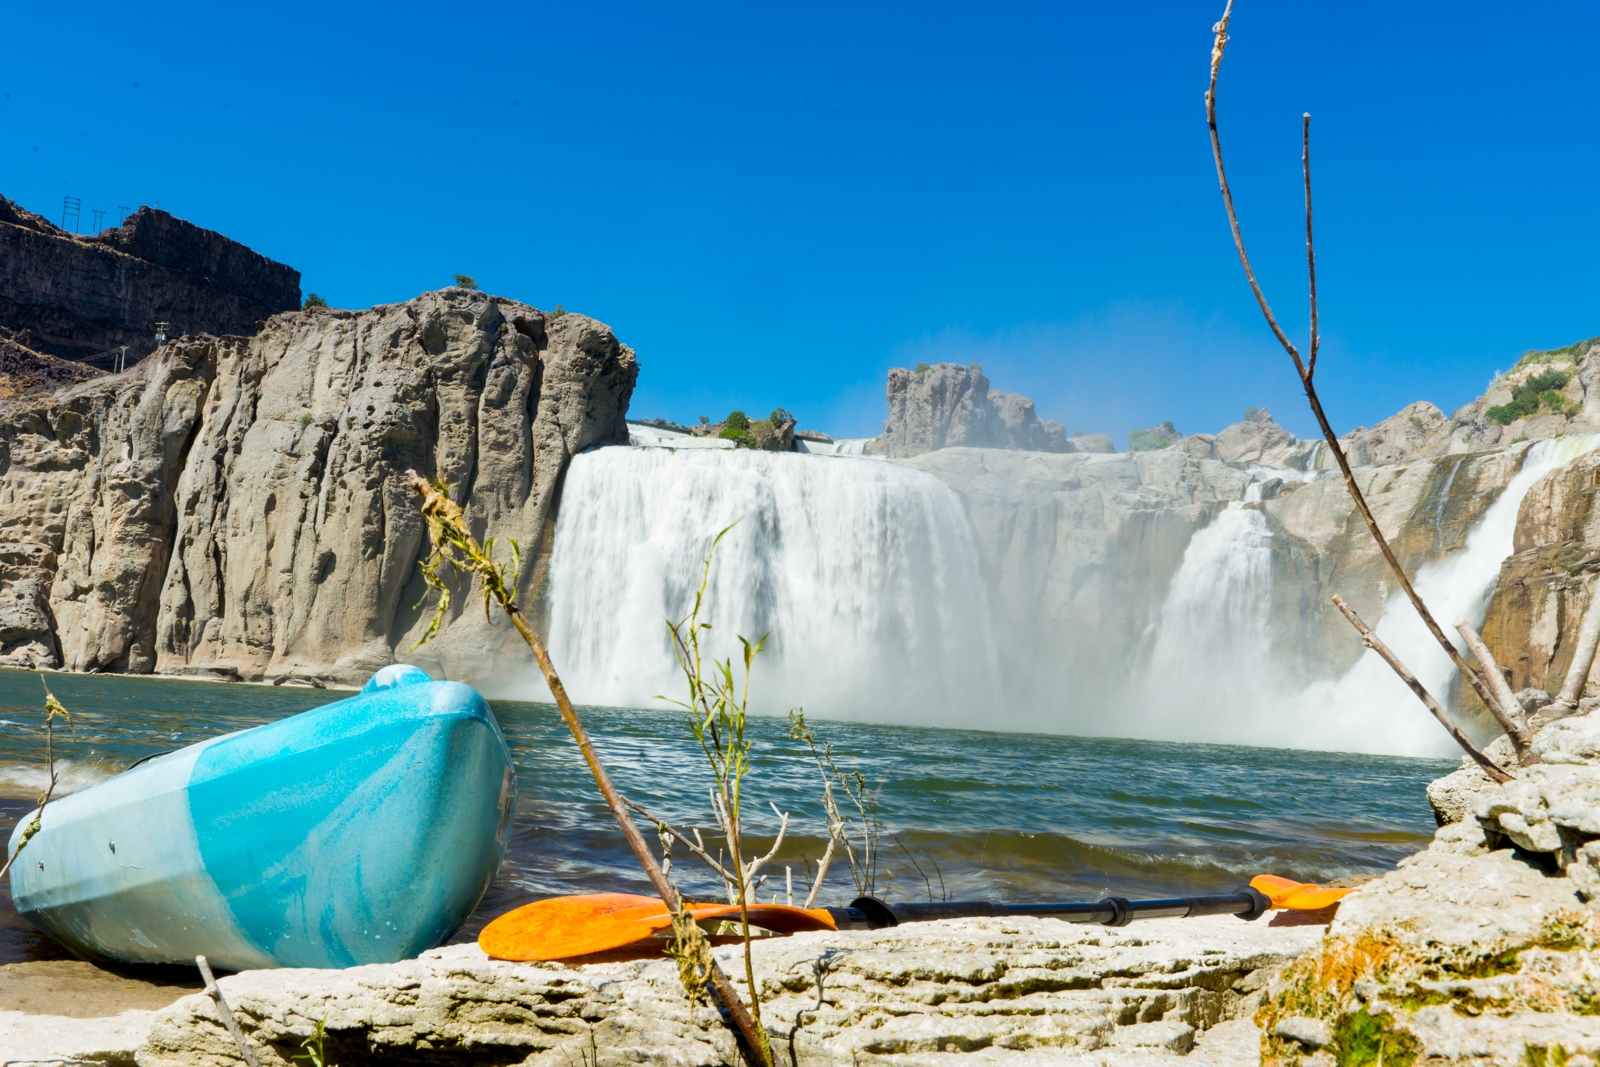
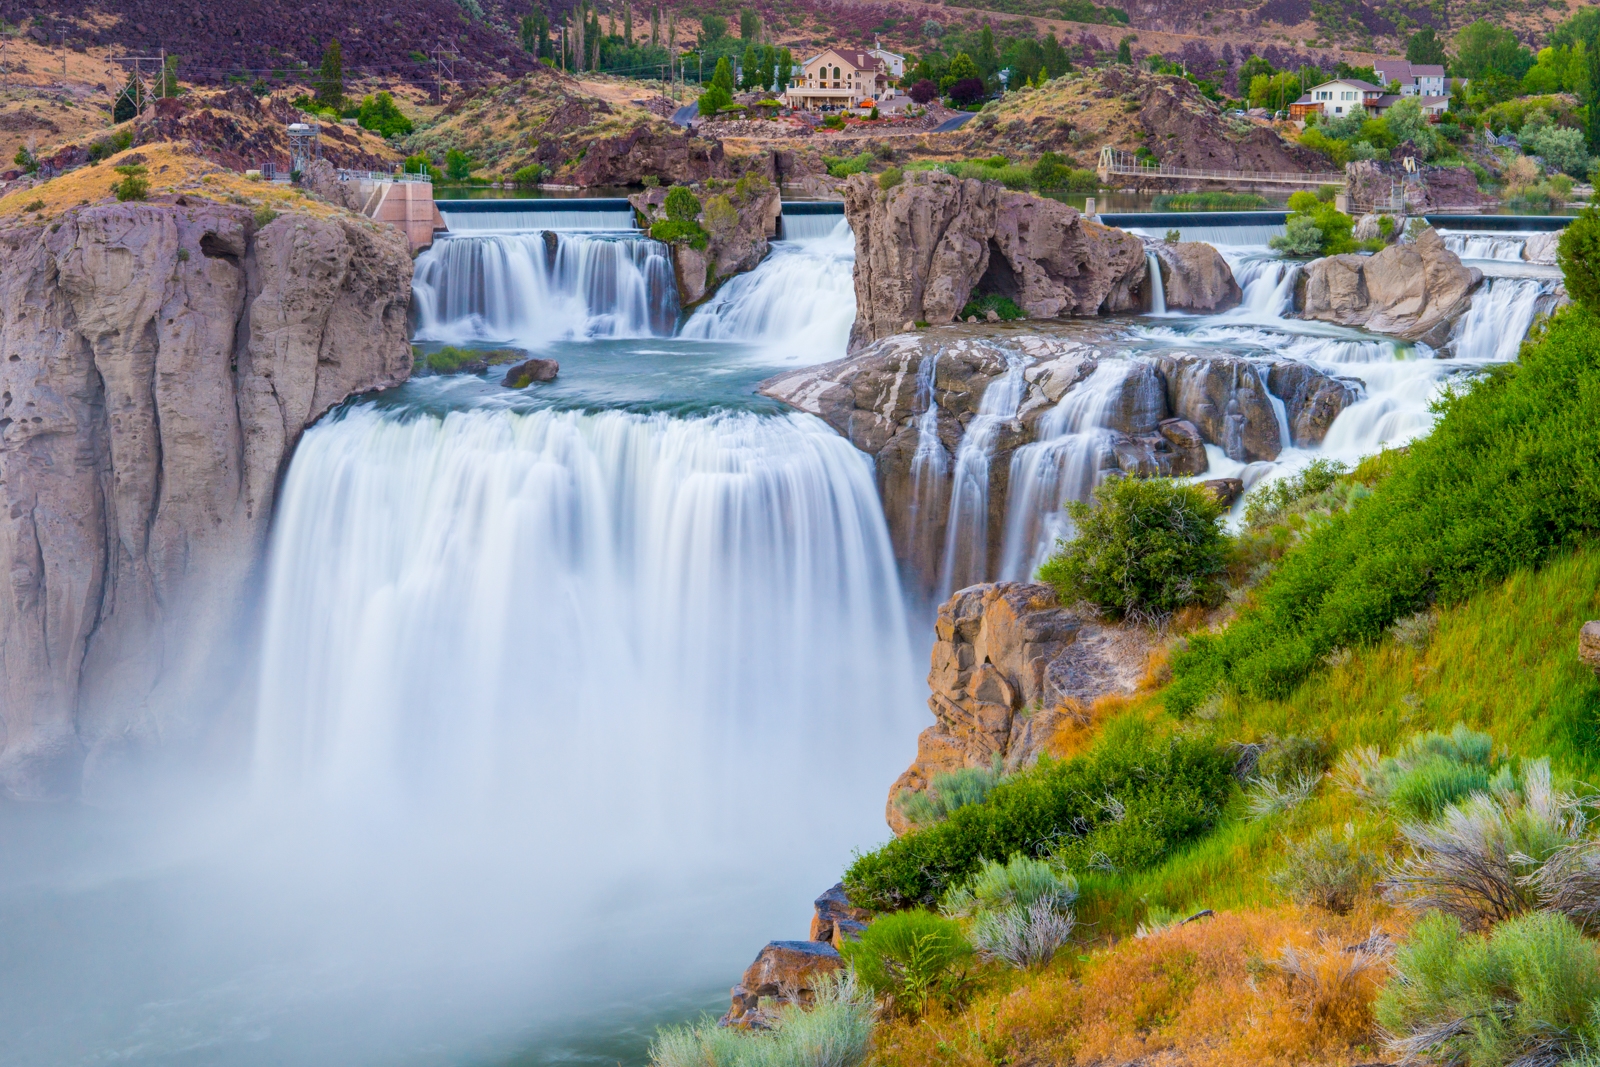
Everything was epic about the falls. The roar sounded like Poseidon himself was laughing with delight as the water plunged 212 feet over the edge. On the left side of Shoshone Falls, there is a hydroelectric plant. If you look up to the right of Shoshone Falls, you can see the viewing docks above. After some exploring, we found a nice little spot on the right-hand side to beach our kayaks and take in the magnificent view. Make sure to watch out for rocks when beaching your kayaks. It will scrape up the bottom of the kayaks. Please note that depending on the water level, the beaches can change.
The Surrounding Area
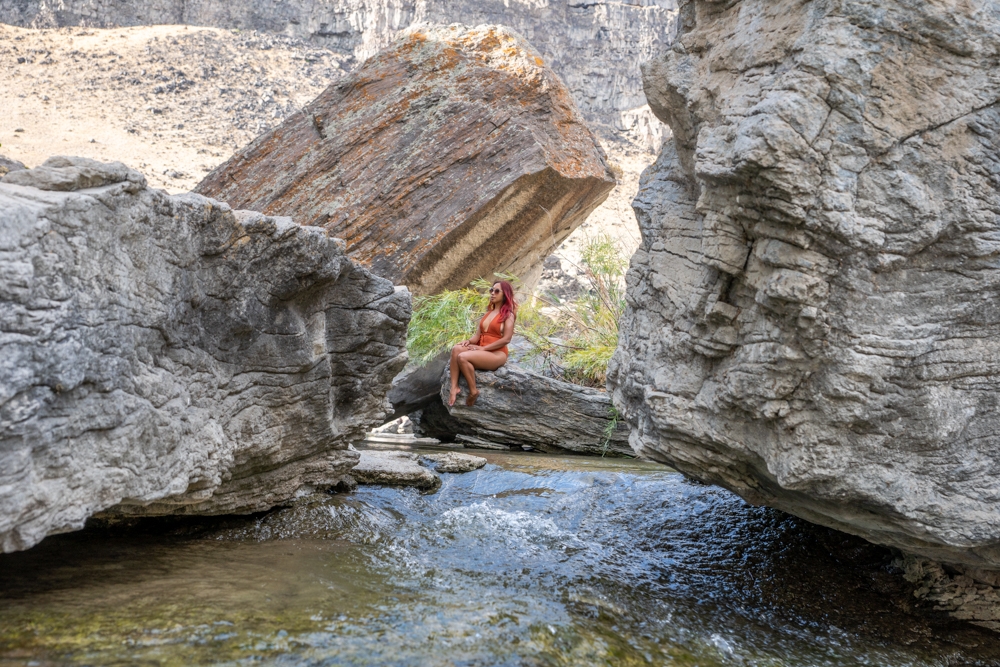
After taking our breaks, we noticed that there is a small trail next to the hydroelectric plant that seems to lead to the side of Shoshone Falls. The first time we visited, the water level was so high that the trail was buried under water. Fortunately this time around, the water level was low enough that we could get on it safely. This small trail can be challenging in some parts, so please be careful if you’re attempting to do this. If you make it, it will give you another spectacular view of this gorgeous Shoshone Falls. Again, please don’t get too close to the falls! It can be dangerous.
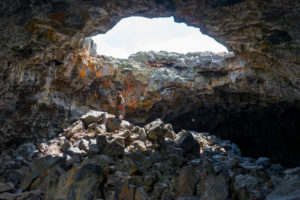
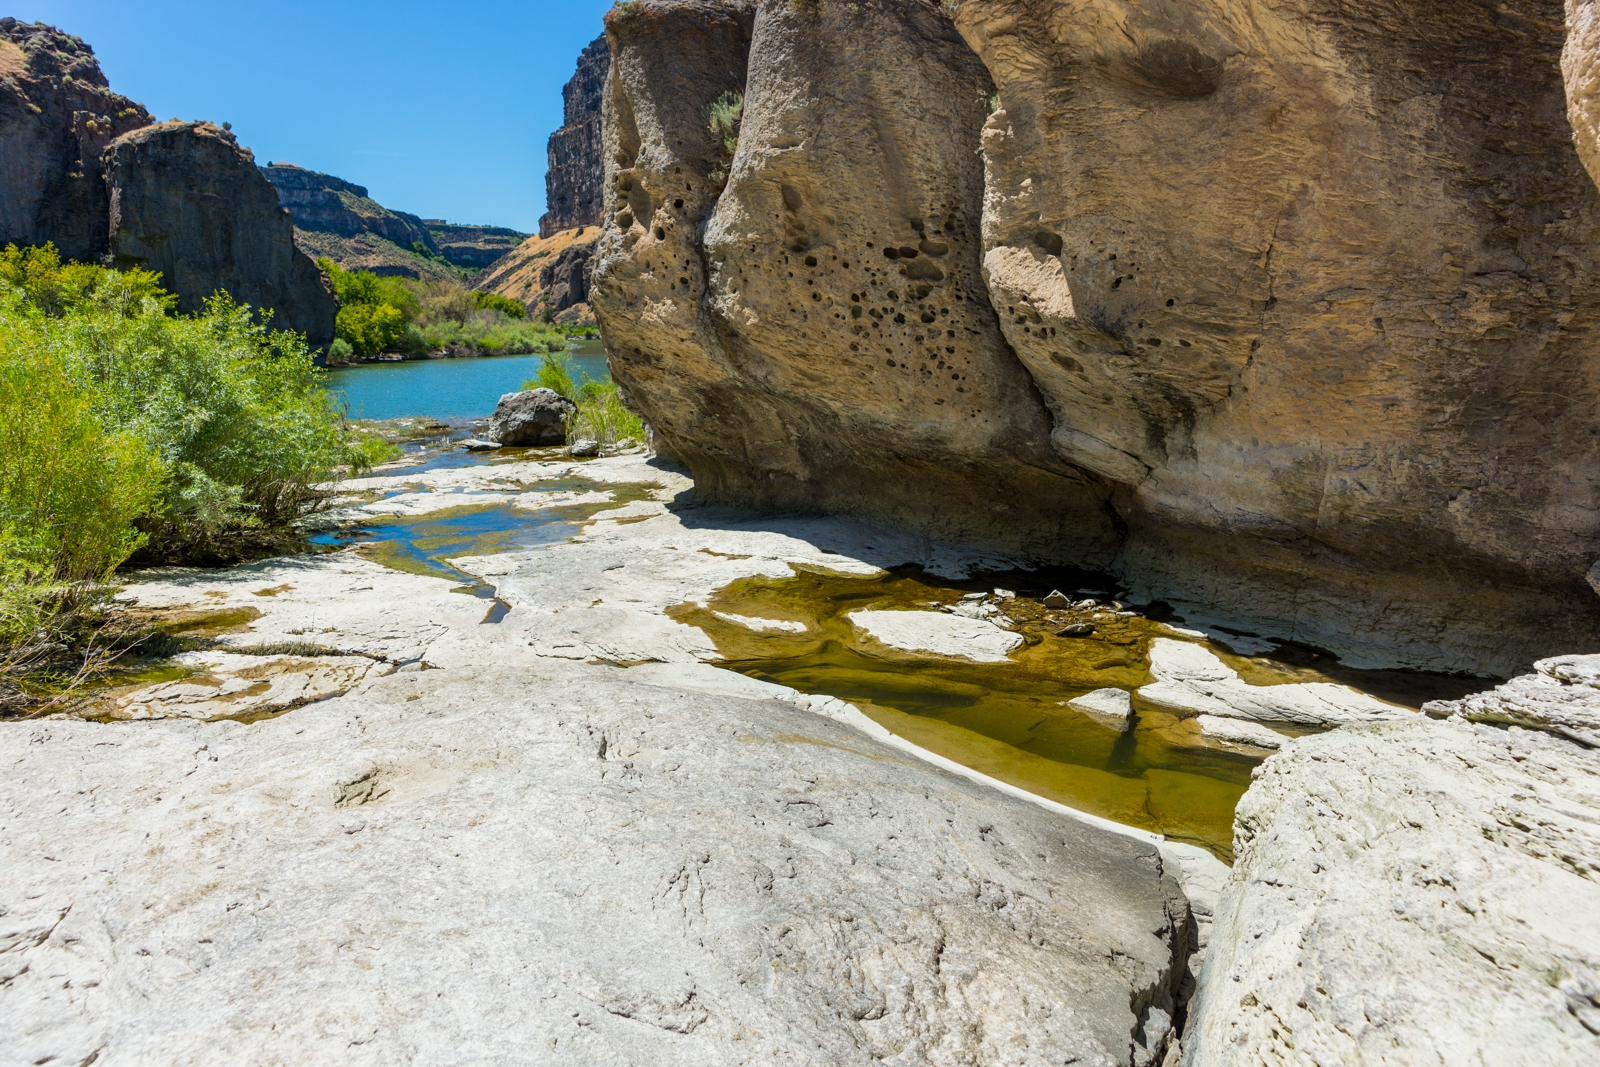
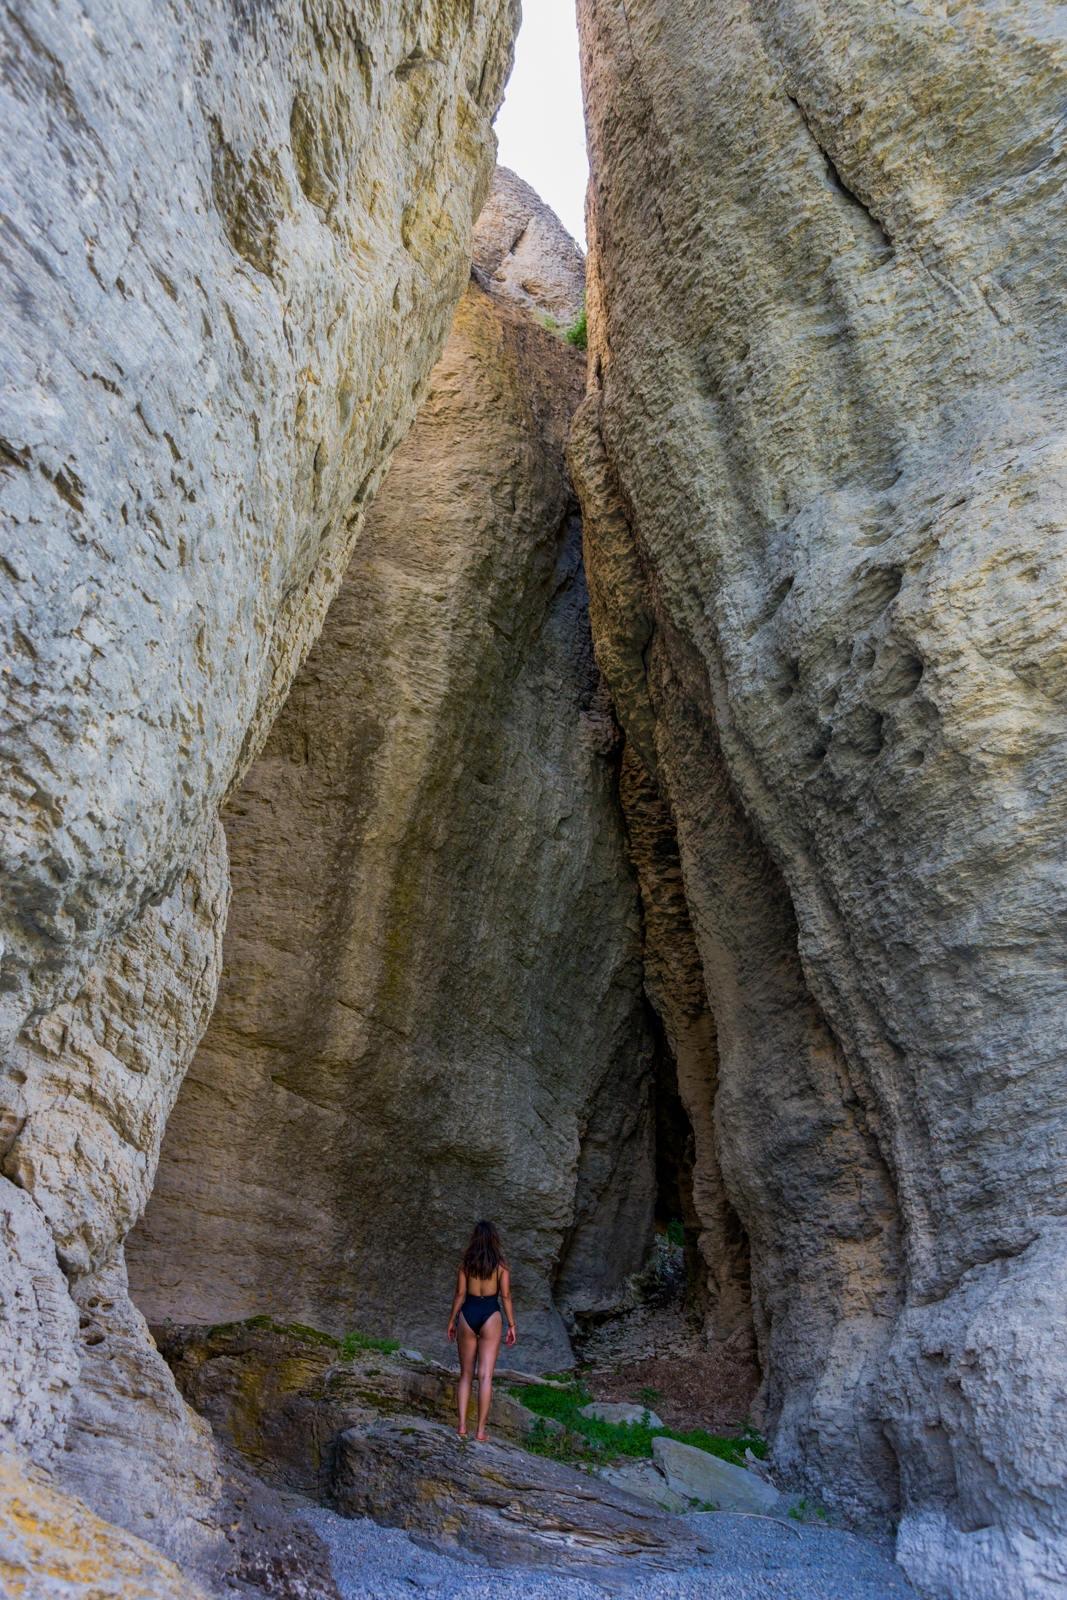
We could spend all day here, however, it was time to head back. As we were on our way out, I spotted a couple of openings to what looked like some super cool caves. We pulled our kayaks over and went exploring. The caves themselves were shallow, however, still such a neat spot to stop and take a quick look.
Pillar Falls
Once we got back to Pillar Falls the first time, it was late and the water level was so high that most of the area was underwater. Therefore, we didn’t have time to explore this place. Luckily, on our second time, the water level was low enough and we had time to spare. So, we decided to check out Pillar Falls, and I’m glad we did!
Pillar Falls is beautiful! It has tons of mini waterfalls, interesting rock formations, and little pools. There is a trail from the top that you can hike down. This area also has many little caves and interesting nooks and crannies that waiting to be explored. Please note that it is NOT safe to swim under Pillar Falls. There were a few deaths reported from swimming here.
The Way Back
Since we spent most of our time at Shoshone Falls, we didn’t have that much time at Pillar Falls. Soon enough, it was time to head back to return our kayaks. The way back was uneventful. Our first time back, the headwind picked up so it was harder paddling back. On our second time, it was nice and calm. Since it was toward the evening, there were a lot more people on the river, kayaking, paddling, and a few occasional motorboats. Make sure to watch out for the motorboats.
At one part of the river when you get close to Perinne bridge, on the right-hand side, there were tons of swallow nests on the side of the canyon wall. All the birds are out in the evening. We didn’t even notice them in the morning. Once you get to the dock, you can just paddle right onto the ramp where an employee from AWOL will be there to pull you up from the water. It made it super easy to exit your kayaks. That’s it! You made it! It was definitely an incredible experience that we were able to cross off our bucket list.
How to Get to the Top of Shoshone Falls
If you want to check out Shoshone Falls from the top, you can go straight to Shoshone Falls Park, about 7.5 miles away. It costs $3 to get into Shoshone Falls Park. The view from the top of the Shoshone Falls is also incredible. It was nice to see it from another perspective. You can definitely feel the power of the rushing water and see another perspective of these amazing falls.
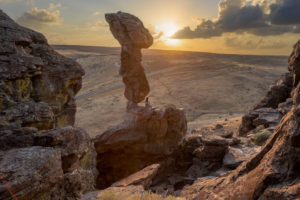
Along the way, don’t forget to stop by Twin Falls visitor center near Perrine Memorial Bridge. It is such a beautiful viewpoint where not only you can watch the base jumpers make the jump over the bridge, you can also see the expansive view of the Snake River We were sad that we didn’t have enough time to experience the base jump. I guess there’s always next time! If you’re spending more time around this area, don’t forget to check out Thousand Springs State Park or Balanced Rock. Also, the Crater of the Moon is a must-visit, especially the Cave Trail. Another fun activity that you can do in Southern Idaho is the Boise River float. Check out our adventure and directions here.
These are the gear that we personally use and find them helpful for this particular adventure. Don’t forget to check out our Recommended Gear section as well.
adventure gear
- Sunscreen:
Make sure to bring lots of sunscreens. There is no shade on the river. You will be very exposed to the sun. Some of the sunscreens we love are Alba Botanica Hawaiian Sunscreen, Stream2Sea SPF 30. - Water shoes!!
This is a MUST!! You will thank us as you cross over the running water at the portage. We didn’t pack our shoes with us, but we usually use ALEADER Women’s Mesh Slip-on Water Shoes for Vy’s shoes and ALEADER Men’s Quick Drying Aqua Water Shoes for Dustin’s shoes - Water
Lots of water! It gets toasty on the river since you are exposed to the sun. It is also a long journey. - Drybag
For your extra towels, sunscreen, camera, and phones, etc. We use Field and Stream Dry Bag. The Earth Pak Waterproof Dry Bag also works amazingly. - Lunch and snacks
It’s a long day on the river, make sure to bring enough food. - Towels
In case you want to play in the water. - Jacket
The wind picked up in the evening. It can get a little bit breezy. We love our packable Patagonia Puff Jackets! It can keep you warm, yet pack up super light. You can get Vy’s version here, and Dustin’s version here. If you want some lighter, we love the packable Patagonia Women’s Houdini® Jacket and Patagonia Men’s Houdini® Jacket - Life jacket
The rental company will supply them. However, if you are going to bring your own kayak or paddleboard, make sure to have these puppies on the watercraft with you. The water is deep and you are a long way from civilization. - Waterproof Phone Case
Not required but it is nice to have. Especially if you like to take photos with your phone or play music. It will get wet. Our phone cases were donated by my sister. She got the Mpow Waterproof Case.
camera gear
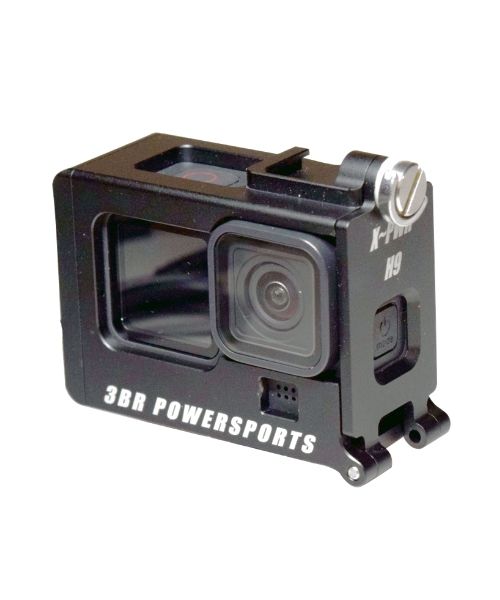


Related Posts
Save your pins:


5 Comments
Alicia Baker
As you paddle towards the falls, are you going upstream?
Vy
Yes, you are going upstream.
Janice Frame
If the water was knee high during the portage, would it be possible just to drag the kayaks behind you? Thanks!
Vy
I wouldn’t attempt to cross through the portage if the water is knee-high. The current can very very strong. Also, the ground is super rocky and slippery. That combination can be very dangerous.
Vy
Thank you so much Kristan! We are glad that you like it!