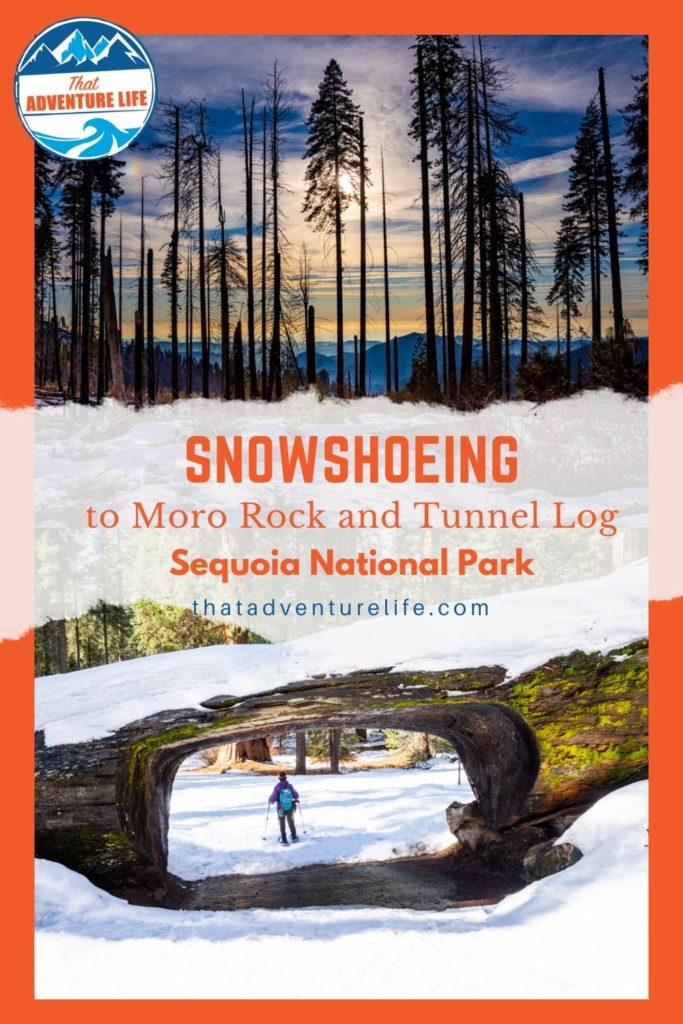
When we planned our trip to Sequoia in the winter, Moro Rock and Tunnel Log were on our list to visit again. The last time we were here in the summer, we were able to drive to these places. However, we didn’t realize that Crescent Meadow road closes during the wintertime. This road turns into a skiing and snowshoeing haven. At 4 – 6 miles round trip, the hike sounds a bit daunting, especially in the snow. Snowshoeing is the only way you can get to Moro Rock and Tunnel Log in the winter, however, it is worth it, and you get to see a few super cool other attractions along the way.
STATS:
Where:
Your starting point:
The beginning of Crescent Meadow Road, next to the Giant Forest Museum
Coords: 36°33’50.7″N 118°46’25.3″W
Fee:
Sequoia National Park charges a fee to enter. Fees are $35 per vehicle or $30 per motorcycle. If you are entering on foot or bike the fee is $20 per person. You can also either purchase a park-specific annual pass for $70 or get an America the Beautiful National Parks Pass for $80. For up to date fee info, click here.
Parking:
There is a big parking lot across from the Giant Forest Museum that you can park at.
Restrooms:
There are restrooms at the big parking lot and in front of Moro Rock trailhead.
Distance:
1.5 miles to Tunnel Log (each way)
0.7 miles from Tunnel Log to Moro Rock trailhead (each way)
1.7 miles from Moro Rock to Giant Forest Museum (each way)
The whole loop is about 4 miles total.
Elevation Gain:
130 ft
Level:
Easy to moderate depends on the snow level.
Estimated Completion Time:
3-4 hour
Ideal Weather:
You can hike this trail year-round. In the winter, the trail is best after a snowfall. However, always check for current trail and park conditions before going. Sometimes, this trail can get icy.
Ideal Time:
Morning time is best. Snowshoeing to Moro Rock and Tunnel Log can take a bit. It will give you enough daylight to explore and get back safely. Nothing worse than getting lost in the dark in the winter.
Pet-friendly:
Pet are NOT allowed on ALL trails in the Sequoia National Park.
Weather:
VIDEO:
GETTING THERE:
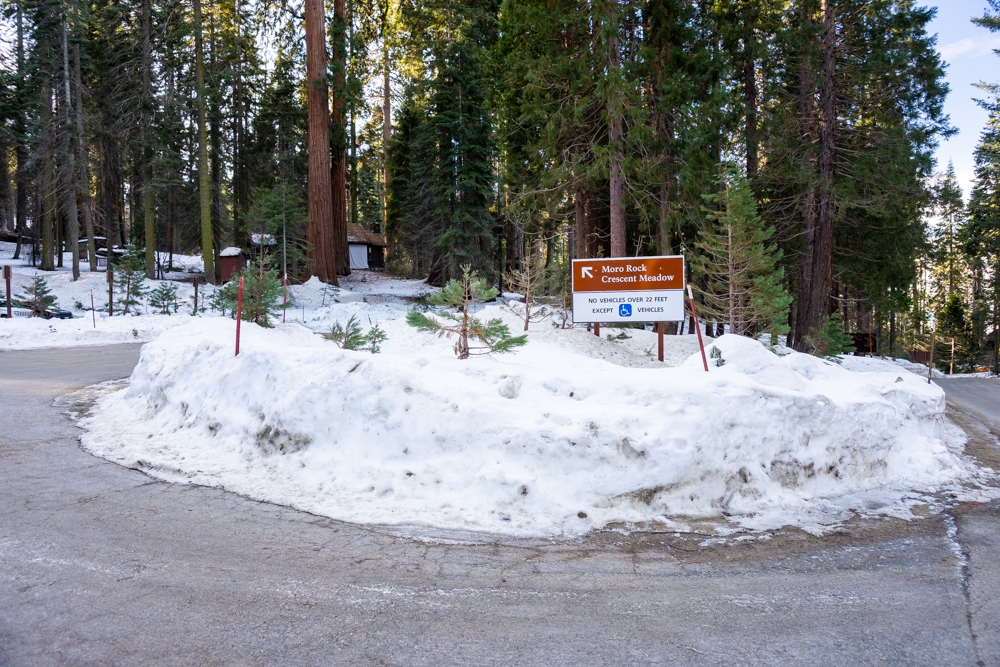
Snowshoeing to Moro Rock and Tunnel Log is pretty much following along Crescent Meadow Road, next to the Giant Forest Museum. To get here, follow the Generals Highway CA-198 to the museum and follow signs for the big parking lot across from it. After parking, head over to the museum, the start of Crescent Meadow Road will be on the right. In the winter, there might be a gate there, closing the road to all vehicles, however, you can hike in on foot.
THE ADVENTURE:
Hike to the Tunnel Log
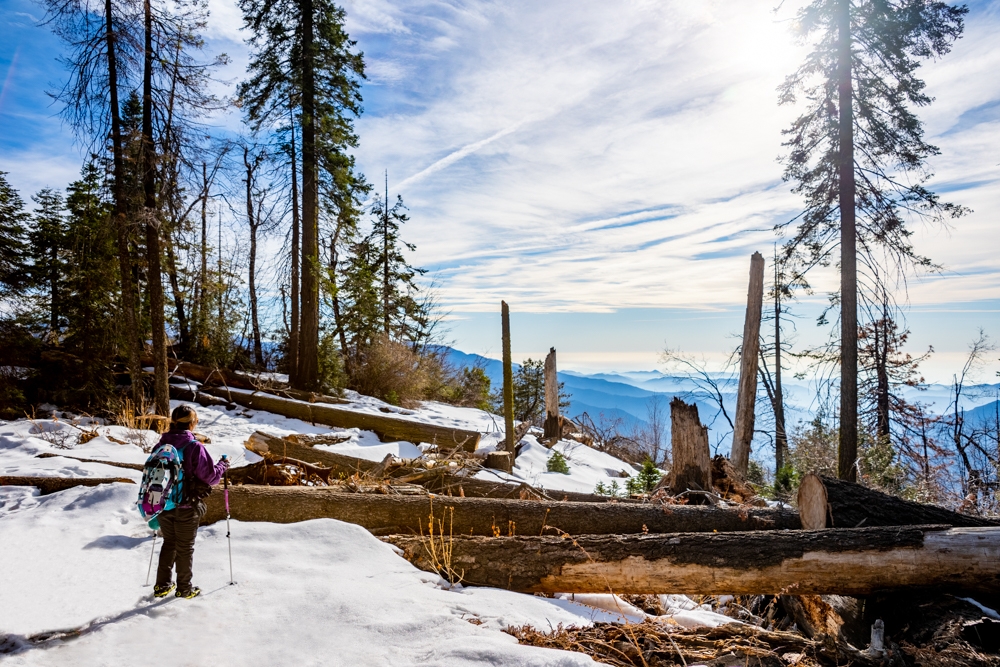
We pulled up to the Giant Forest Museum’s parking lot bright and early. There was a big snowfall a few days earlier so we weren’t sure what the trail condition was like. When we talked to the ranger, he told us that it should be good for snowshoeing to Moro Rock and Tunnel Log. Even so, we packed both our snowshoes and spikes, just in case. Before you attempt this hike or any hike in the park in the winter, always make sure to bring waterproof shoes, shoe traction devices, and if you can, trekking poles. These will help you avoid slips and falls on icy roads and trails (especially where there’s black ice).
As we walked toward Crescent Meadow Road, the road itself was plowed so there wasn’t any snow on the road. After a short walk, we came across a metal gate. At this point, the road turned icy with packed snow covering the majority of the paved road. We quickly put on our microspikes and pressed along. Microspikes or cleats are good for icy or packed snow. When the snow is fluffy and fresh, snowshoes will work better then.


At 0.8 miles, you’ll come across the first attraction of the hike, the Auto Log. It is a giant Sequoia tree that fell over and exposed its ginormous roots. This large sequoia fell way back in 1917. The park created a way for visitors to drive their cars up on top of the tree for a cool photo op, but unfortunately due to rot, you can’t drive on it anymore. It still makes a super cool backdrop for photos, and you can stand on top of it. It is fun to see how big the root network of a sequoia tree is compared to yourself.
After Auto Log, about 0.4 miles, you’ll come to your first split. If you go right, you’ll go to Moro Rock. If you go straight, you’ll go to Tunnel Log. There’s a second split soon after the first one. We followed the sign for Tunnel Log. This way, you’ll get to go past another cool attraction on this road, the Parker Group.


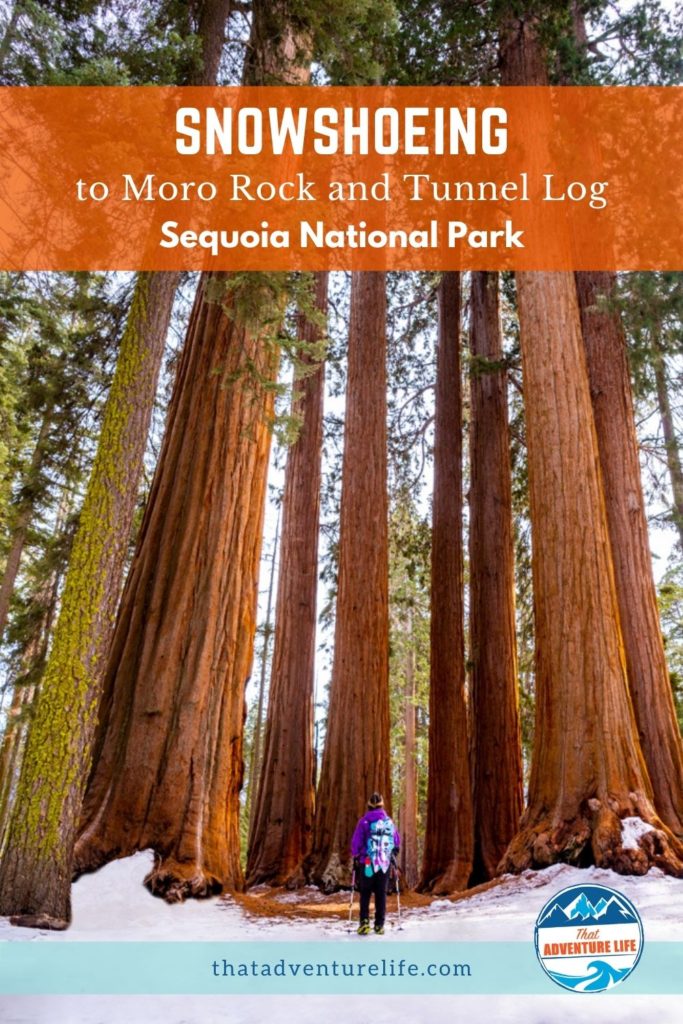
The Parker Group, about 0.1 miles down the first split, is a group of 6 or so giant sequoias, all standing next to each other. It is quite impressive to be able to stand among these giants, especially when they are in a group like this. If you want to see a few other amazing sequoia groups, check out our Congress Trail hike. This trail will take you to some of the best sequoia groups in Sequoia National Park. The snow got heavier here so we had to switch out to our snowshoes.
From the Parker Group, it is about 0.2 miles before you get to the Tunnel Log. This fallen Tunnel Log was created when an unnamed giant sequoia fell across Crescent Meadow Road in 1937. When it fell, the tree was 275ft high and 21 ft in diameter at the base and at least over 2,100 years old. The tunnel is 17ft wide and 8ft high. This is a popular attraction at the time, especially in the summer when many visitors drive their cars through the tunnel for that one photo. There is a bypass around for taller cars.


To Moro Rock
After spending some time exploring the area around Tunnel Log, we headed back the way we came from to go over to Moro Rock. At the second split (first, if you’re counting from Tunnel Log), make a left and follow signs for Moro Rock trailhead. After making a left, we went straight but you can go left and make a complete loop. If you go straight, the trail will take you to another cool spot here, the Hanging Rock, about 0.2 miles. It is a short hike from Hanging Rock trailhead to the actual rock formation. We didn’t have time to did the hike but let us know if you did.
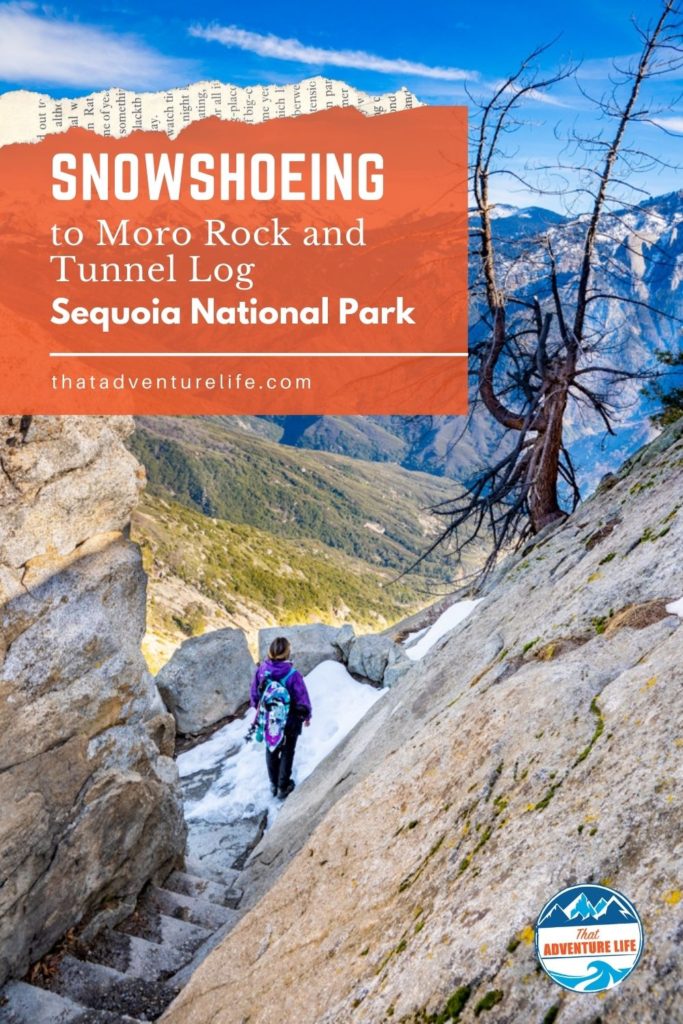
The hike from Hanging Rock trailhead to Moro Rock is about 0.2 miles. The snow was quite heavy on the main road, but we were too lazy to switch back to our snowshoes. Therefore, we found a small trail that runs alongside Crescent Meadow road and took that route instead. This little trail was kind of fun and it has a little more elevation than the main road. As we got closer to Moro Rock, we could see the giant monolith peaking out in between the trees. It was pretty cool to see. For our full report on the Moro Rock hike, click here.


After hiking up Moro Rock and spending some time there, we headed back toward the way we came from. It should be an easy way back. Just make sure you follow the signs for the museum. Since it was winter, the days are a lot shorter so we ended up catching the sunset on our way out. This also means that we got to see all sorts of wildlife. We saw a herd of deer on our way out. I have to say, the winter sunsets are gorgeous here, and we had so much fun snowshoeing to Moro Rock and Tunnel Log.


Of course, if you’re doing this hike, you have to hike up Moro Rock. Also, don’t forget to check out General Sherman and the Congress Trail. It is a beautiful trail, regardless of the season. If you love winter hikes and snowshoeing, Bryce Canyon and Zion National Park are also gorgeous during the winter. Navajo Loop to Queens Garden is one of the most beautiful hikes at Bryce Canyon, while Angel’s Landing at Zion is breathtaking, VERY challenging but worth every moment.
Happy Adventuring. Don’t forget to follow us on Instagram, subscribe to our Youtube channel, and sign up for our newsletter!
RECOMMENDED GEAR:
These are the gear that we personally use and find helpful for this particular adventure. Don’t forget to check out our Recommended Gear section as well.
The majority of these links are through our affiliate links so if you buy something, it is at no extra cost for you but it helps us support the site. That being said, don’t buy something just to support us, buy something if you think it will enhance your travels and adventures.
• Hiking shoes
If you’re hiking this trail in the winter, you will need waterproof hiking shoes. Vy’s shoes are Merrell Women’s Moab 2 Mid Waterproof Hiking Boot. Dustin’s shoes are TARGHEE III WATERPROOF.
• Snacks/Lunch
When doing winter hikes, always prepared. Bring a lot of snacks with you, just in case.
• Sunscreen
Bring sunscreen! The sun is more intense in the snow. We use eco-friendly, reef-safe sunscreen, All Good Organic Sunscreen Butter – Zinc Oxide – Coral Reef Safe, and All Good Sport Sunscreen Lotion – Coral Reef Safe (3 oz)(2-Pack) or Stream2Sea SPF 30 Reef Safe Sport Tinted Sunscreen.
• Water
Doesn’t matter when you go, always make sure to bring plenty of water. Especially if you go in the afternoon. Vy uses the Camelback L.U.X.E. Dustin uses the Clik Small pack (sadly Clik is no longer around). Patagonia Women’s Nine Trails Pack 18L is also a great backpack for a shorter hike like this.
• Jacket
Depends on when you’re going, you’ll need a jacket. For colder winter days, I use my snowboarding jacket. Dustin doesn’t get cold so he uses his packable Patagonia Puff Jacket. You can get the female version here. For warmer days, we love the packable Patagonia Women’s Houdini® Jacket and Patagonia Men’s Houdini® Jacket
• Headlights
Bring headlights with you to do this hike in the winter. The weather condition can change rapidly. We use Black Diamond Cosmo.
• Snowshoes and/or microspikes and trekking poles
If you attempting this hike in the winter, you will need snowshoes to get there and/or microspikes, depending on the trail condition. If it has fresh snow, you will need your snowshoes. Microspikes are best when the trail is more packed down or icy. We ended up using both the last time we were there.
• Layered clothing
This is for hiking in the winter. You will need warm clothes. We recommend layering. Dustin uses Patagonia Men’s Capilene® Thermal Weight Zip-Neck Hoody and Patagonia Men’s Capilene® Thermal Weight Zip-Neck Hoody. Vy uses Patagonia Women’s Capilene® Thermal Weight Crew and Patagonia Women’s Capilene® Thermal Weight Bottoms as base layers.
• Gloves/Hats/Sunglasses
You should bring waterproof gloves, beanies and sunglasses. Waterproof gloves and beanies will keep you warm.
• Tire chains
When visiting the park in the winter, you need to carry tire chains with you in the car, at all time. Tire chains can be required on any park road at any time from fall through spring. Road conditions and chain requirements can change rapidly. This includes 4WDs.
CAMERA GEAR:
• Camera:
Sony a7 III
Gopro Hero 7 Black
• Lenses:
Sony 24 -70mm f/2.8 Carl Zeiss Vario Sonnar T Zoom Lens
• Accessories:
GoPro The Handler Floating Hand Grip – Official GoPro Mount
Aluminum GoPro protection frame
SandMarc Extended GoPro Pole
Hybrid Pro Filters – DSLR / Mirrorless
Cinema CPL Filter – HERO 9