
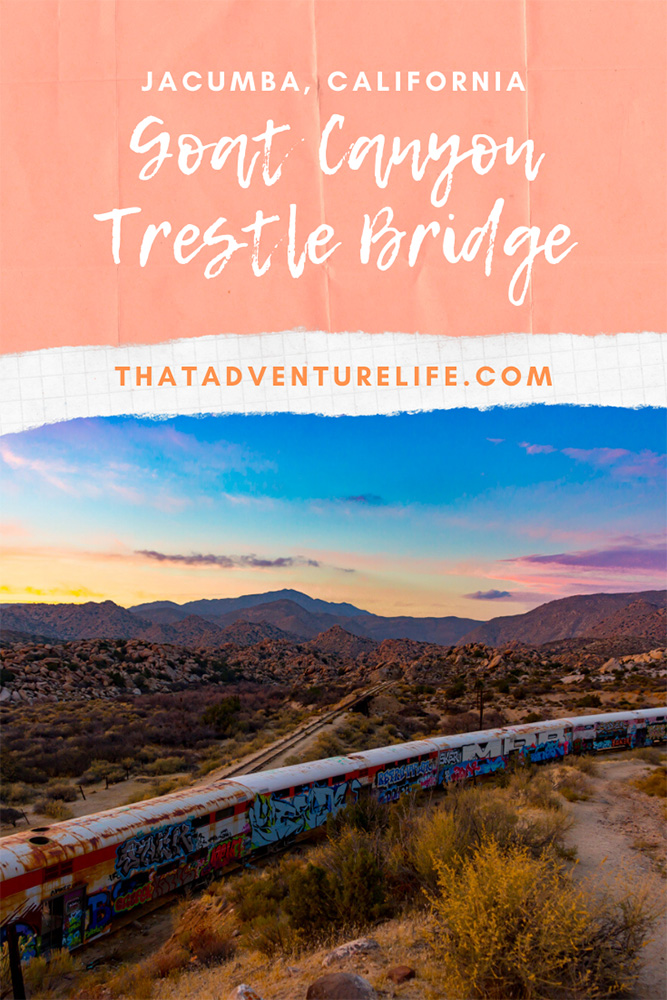
This trail is a true hidden gem. The Goat Canyon Trestle Bridge hike is easily one of the most interesting hiking trails that we have ever been on. Besides the fact that you park at the nudist colony, the trail runs through a few abandoned trains and ends up with you standing on the tallest wooden trestle bridge in the WORLD! I think it is a combination of all 3 that made us fall in love with this hike.
There are several routes to the bridge, but I think this way was the most scenic and straightforward. It was quite a popular trail when we went. We’ve come across a few hikers and bikers along the way. Even so, since it is such a long trek, most of the time we were all by ourselves. You can read more facts and history of this amazing bridge here.
Please note: The accessibility of the Goat Canyon Trestle Bridge hike is in question. They are starting to prepare to reopen the tracks. Please call the DeAnza Springs Resort at (619)766-4301 to check on the status of the trail before you make the trip.
STATS:
Where:
Goat Canyon Trestle Bridge hike trailhead starts at the DeAnza Springs Resort – 1951 Carrizo Gorge Rd. Jacumba, California 91934
*Note: This is a nudist resort.
Parking:
$5 per person if you park at the resort which we highly recommend (DeAnza Springs Resort opens at 8 am)
Distance:
16.40 miles R.T.
Elevation Gain:
1,868 ft
Level:
intermediate because of bridge crossings
Estimated Completion Time:
4.5 hours
Ideal Weather:
Go in the cooler months. Besides the tunnels, the entire hike is completely exposed. It would not be a fun hike on a hot day! Also, beware of snakes!
GETTING THERE:
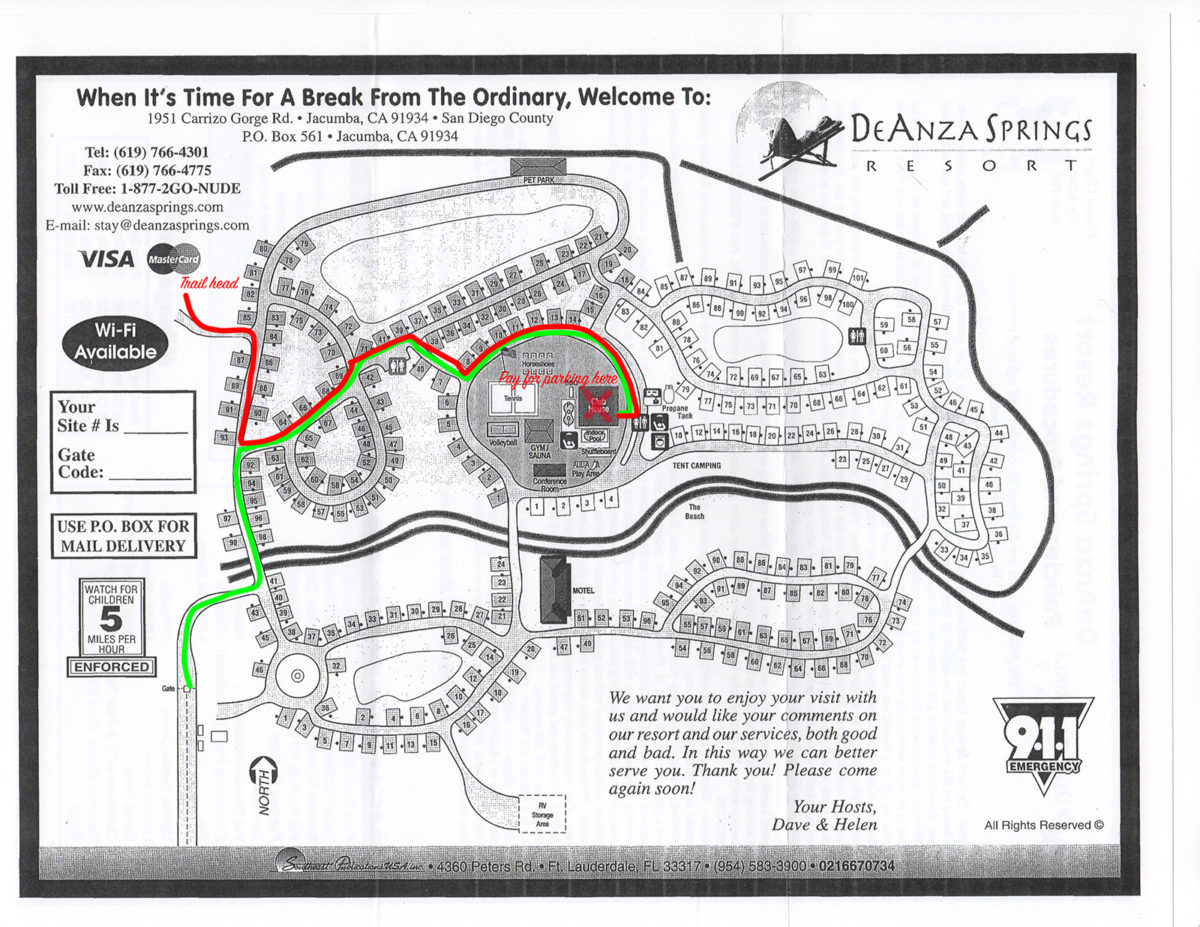
Goat Canyon Trestle Bridge hike trailhead is located at the DeAnza Springs Resort in Jacumba. Follow your GPS directions to the resort. Once you exit off Carrizo Gorge Road, the paved road will soon end and turn into a dirt road. Follow down the dirt road for about 1.8 miles. This will bring you to the gates of the DeAnza Springs Resort. If there is no one at the guard station, you can press the button on the speaker and let them know that you’re there to do the hike. Once the gate opens, head over to the clubhouse to check-in.
We had never been to any kind of nudist resort before, so we had no idea what to expect. However, everyone there was very friendly and respectful. When we arrived at the guest house, we were greeted by a very helpful lady at the front desk. They do charge you $5 per person for parking at the resort. The lady took down all our information including our emergency contacts, license plate, and driver licenses. The reason for this is to make sure you make it back safely. If your car is still there the next day, unless specified, she will call it in and send out a search party. I seriously doubt it will be needed, but it’s good to have that added peace of mind.
If you don’t want to pay for parking, there is a very small dirt parking lot right outside the resort. However, park there at your own risk and make sure you hide all of your valuables.
After you pay your fee and get checked in, drive over to the trailhead parking. Make sure you drive the speed limit and respect the community. The parking is a dirt lot right behind space #85. There is a lady that lives at that space with dogs so please make sure that you don’t cut right through her yard. It is a little bit difficult to distinguished the property line so drive slow and look for that faint turn outline for the parking lot. The satellite map is included below.

Once you park, the trailhead will be on your left-hand side if you’re facing out to the canyon, away from the resort. We forgot to take a picture of the sign (I know, shame on us). It is the one that labeled “Carrizo Creek Trail”. I believe the right-hand trail will also take you there, but that is more difficult and with less of the awesome features.
THE TRAIL:
(Please note: many of the distances are estimated. The GPS wasn’t too fond of all of the tunnels.)
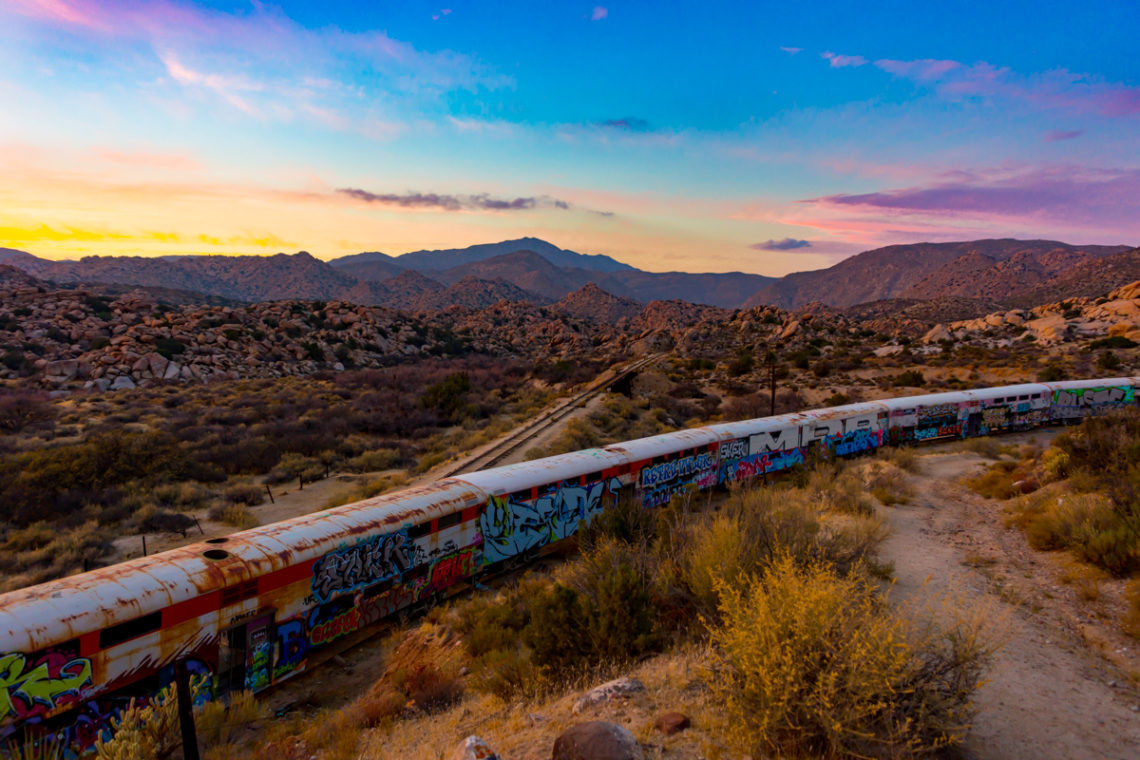
Once you go through the trailhead, in about 0.1 miles, the trail curves off to the right and heads up a hill. The good news is that this is one of the steepest hills on the trail, and it’s not bad at all! The elevation changes on this trail are so subtle that most of the time you feel like you are walking on flat ground. This part is short and kind of boring with mostly dirt and shrubberies. Once you reach the peak of the first hill, you will be treated to one of many awesome things about this hike, 5 abandoned train cars! If you look at the satellite map from above, you can see the train cars toward the top left corner, on the trail.

One thing that we loved is that all of the doors on the trains are open! We had to take a small break to wander through and around all of the cars. Both Dustin and I find abandoned places fascinating so we were both super excited. I loved the creepy zombie apocalypse vibe that they had. Definitely a unique photo op! Obviously, we stayed and took tons of photos.
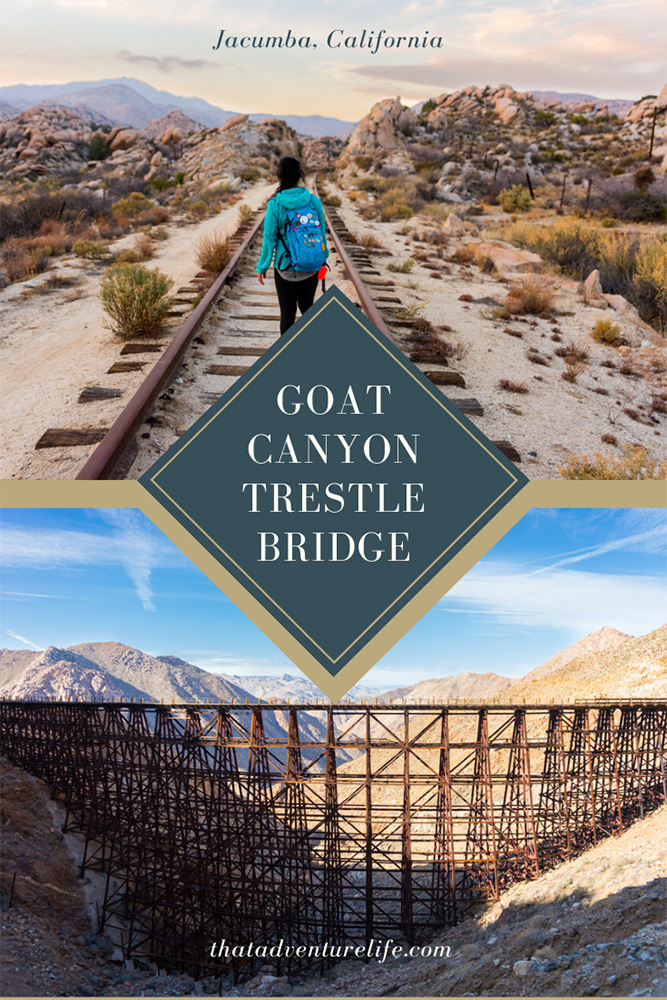
Once you are done with the train, hop out the opposite side and head across the wash to the second set of tracks. These tracks will take you all the way to the Goat Canyon Trestle Bridge. As long as you stay with the tracks you will be fine. At the time of the writing of this article, they were not live tracks. About 0 .1 of a mile after you get to the tracks, you will cross your first trestle bridge. This one is pretty small, but it gives you a chance to see the challenges that crossing the larger bridges can present. Watch out for loose or missing boards. I stepped in the middle of the boards as much as possible to distribute the weight. Just use common sense on the bridges and you will be fine! Take a second to look around at the gorgeous desert landscape.
There are so many photo ops on this trail so be sure to bring plenty of camera batteries and memory cards. At 0.9 of a mile, you will encounter your first tunnel. This will give you a small sample or the much longer tunnels ahead. You will end up crossing a total of 7 large bridges, 2 small bridges as well as going through 10 tunnels each way over the course of the hike. Be careful when you cross the bridges, as you can see from the photos above and below, these bridges are old and have been out in the extreme elements for a long time. Many wooden boards are broken and some of the metal grates are loose. MAKE SURE YOU WATCH YOUR FOOTING!!
The longest tunnel is 0.5 miles long and VERY DARK. A good flashlight is a must! The tunnels are uneven and full of railroad ties, loose rocks, and various other objects that will trip you up if you can’t see where you’re going. It also helps if you have a fear of the dark as I do. It is also quite cold inside the tunnels, especially the longer ones. We saw a few underprepared hikers stumbling their way through the tunnels using only cell phone lights. I would definitely not recommend it. There are also side trails that go around a few tunnels. We did not take any of them so I have no clue what conditions they are in.
The second bridge is 1.8 miles into the hike. Watch your steps and keep on going. The third bridge at 2 miles is the first decent size bridge that you will cross.
After you pass over 1 more bridge and 3 tunnels you will be treated to 3 more train cars. These were sitting right around the 3.2-mile mark. Once again, all of the doors were open. They were just begging to be explored. We couldn’t help but stop in for a couple of quick photo ops! I am not sure why, but abandoned things have always had a special place in our hearts.
If you look over the edge around the 3.6-mile mark, you should be able to see a train car that jumped the tracks. The train was being driven by an apprentice and the boxcar was full of beer. Perhaps the young apprentice had been sampling the cargo! The car would never see the rails again but don’t worry, some of the beer was salvaged. There were a couple of landslides on the way, piling rocks on the trail. Do keep an eye out for loose falling rocks.
At the 3.9 miles, you should come upon what looks like an area where they were storing construction supplies. You’ll also see an opening for another tunnel up on the hill, behind the piles of metal. Don’t go that way. It is a dead-end. Instead, go toward the tunnel that has a big metal gate at the beginning. Get your headlamp or flashlight out. This is the longest of all tunnels. Don’t be fooled by the fact that you can see the light at the end. It is over half a mile away. You will be in the dark for a while.
One of the tunnels’ roofs had collapsed at the end. After a while, I kind of lost track of which one. However, don’t worry, it is not difficult to get over the rubble on foot. There were a few more tunnels and small bridges to cross before you get to the main bridge.
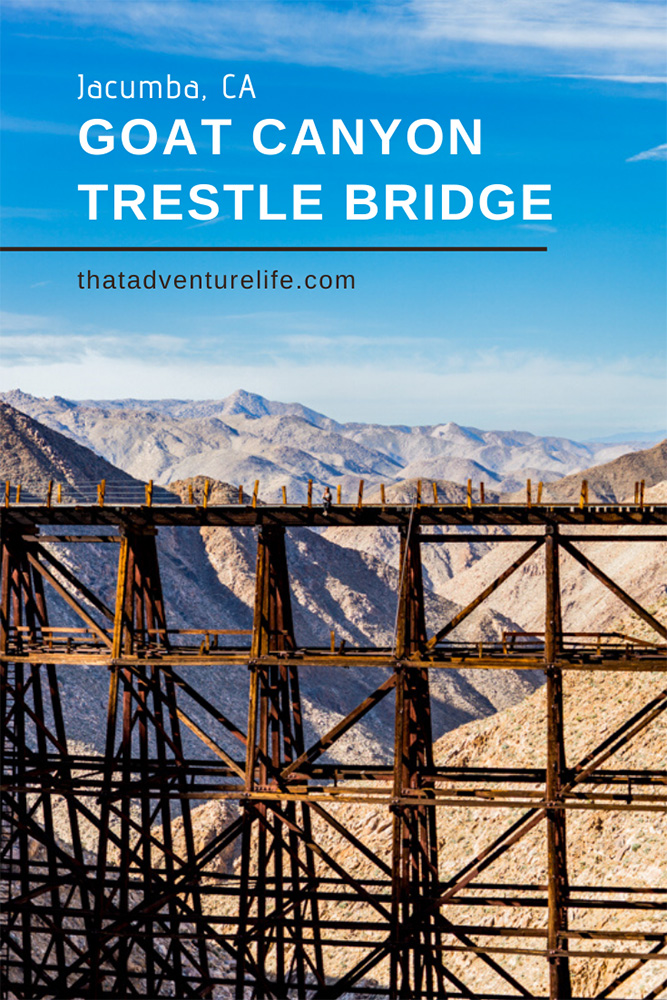
After you exit the last tunnel, the gorgeous Goat Canyon Trestle Bridge will fill your view. If you dare to go all the way across the massive trestle bridge, there is a little trail on the right that takes you to an awesome viewpoint of the bridge in its entirety. That will help you really appreciate just how big this thing really is! The viewpoint is also where we decided to have a nice little lunch. After lunch, we took a couple more shots and the big farewell to the gigantic structure as we dove back into the darkness of the tunnel directly before it.
Goat Canyon Trestle Bridge hike may be easy, but it is definitely a long one. 8.5 miles back seemed like an eternity. Both of us were quite ready to sit down and rest in the car after all those miles. One of the perks of being such a long hike, the sky softened significantly in the evening to provided us with gorgeous lighting and a beautiful sunset. It was definitely a fitting goodbye to this awesome hike. We can’t wait to go back if the trail is still available. Some pictures on our way back are below.
Happy Adventuring. Don’t forget to follow us on Instagram, subscribe to our Youtube channel, and sign up for our newsletter!
RECOMMEND GEAR:
Don’t forget to check out our Recommended Gear section as well.
• Sunscreen:
There is no shade along the trail. We use eco-friendly, reef-safe sunscreen. Alba Botanica Hawaiian Sunscreen.
• Comfortable hiking shoes
Although the hike is simple, it is very long. Comfortable shoes will help ease the pain. Vy’s shoes are North Face HedgeHog GTX. Dustin’s shoes are Coleman Tasman Hiking Shoe.
• Water
Lots of water! Again, there’s no shade and it will get very toasty, especially in the summer. It is also a VERY long hike. Vy uses the Camelback L.U.X.E. Dustin uses the Clik Small pack (sadly Clik is no longer around).
• Lunch and snacks
Did we mention it’s a 16-mile hike???
• Headlight or flashlight.
This is a must for the tunnels. There are quite a few of them. Bring at least 2 in case one dies. We both used the Black Diamond Cosmo headlight.
• Cash
For parking
• Light Jacket
It gets very windy in the canyon and the temperature tends to drop significantly toward the evening/night. It’s always good to come prepared.
CAMERA GEAR:
• Camera:
Sony a99
• Lenses:
Sony 24 -70mm f/2.8 Carl Zeiss Vario Sonnar T Zoom Lens
Sigma 10-20mm f/3.5 EX


2 Comments
Bloggers and Travelers
Very nice article. Thank you for writing such a beautiful blog post. The information given here are very useful to all. Your photos are lovely, and each of these places sound unique and stunning in their own way. Once again thank you very much.
Thanks for joining the group https://www.facebook.com/groups/windiaw and we hope you have nice time and share your beautiful photos with others.
Please feel free to invite your Friends and Contacts, Keep up the good work and enjoy 🙂
Vy
Thank you for the super nice comment. We’re glad you enjoyed our blog! There are more to come! 😀