

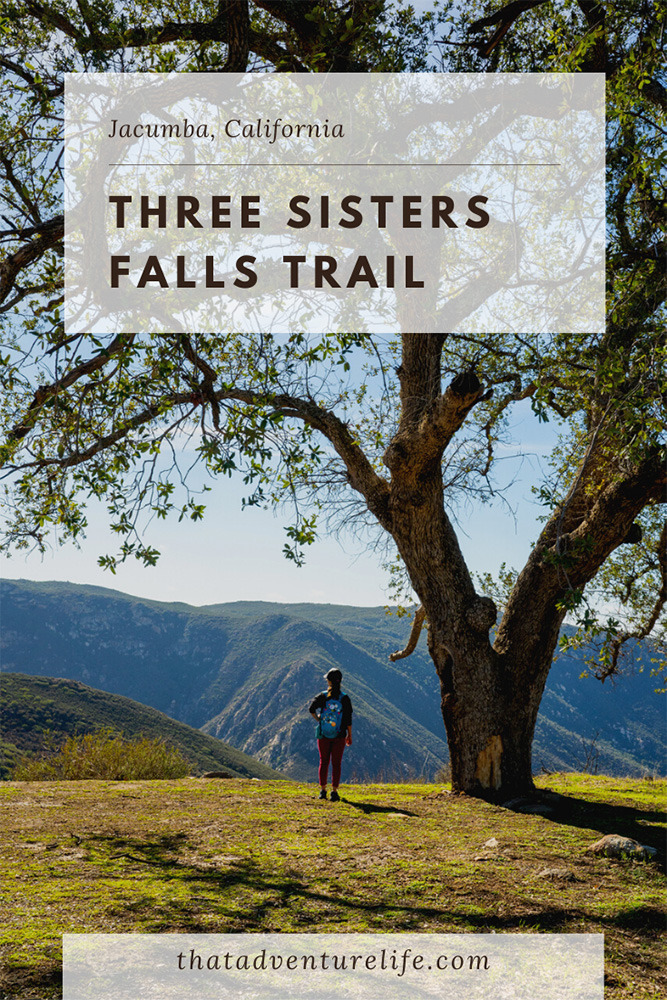
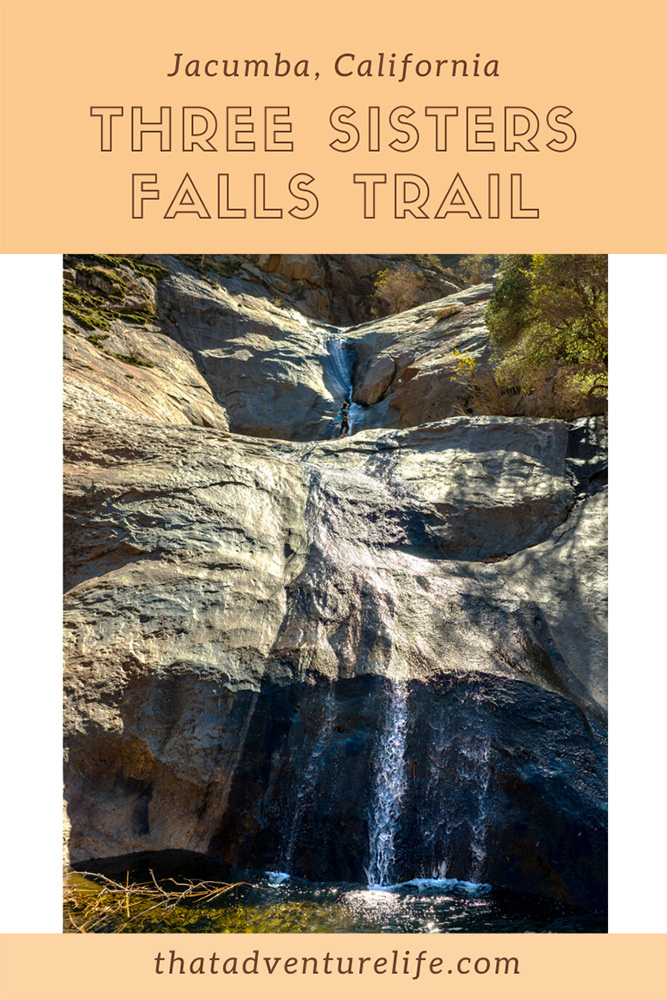
Three Sisters Falls hike is one of the popular hikes in San Diego, 30 minutes from Julian, which features one of the best Southern California waterfalls when it is flowing. There are three main falls, making up the three sisters, cascading over the rocks. This hike used to be categorized as strenuous because of the rope climbs. However, the hike has recently gone under some new development with a safer, more direct route to the falls. We missed the old route as it was definitely more fun, especially for the more adventurous crowd but it is a lot safer now. Below is the info for this new route.
STATS:
Where:
3 Sisters Falls Trailhead – 2 Boulder Creek Rd, Santa Ysabel, CA 92070
Coordinates: 32°59’04.5″N 116°40’38.3″W
Parking:
There is a dirt lot right in front of the trailhead. This trail can get very crowded. Make sure you get there early.
Distance:
4.5 miles R.T.
Elevation Gain:
1,033ft

Level:
Intermediate
Fee & Passes:
As a rule of thumb for Southern California National Forest, you’ll need Adventure Pass in places that have standard amenity fee sites, such as those that provide designated developed parking, picnic tables, toilet facilities, security, interpretive signs, and trash receptacles. At the moment, Three Sister Falls isn’t considered one of them. Therefore, you won’t need the Adventure Pass. Don’t forget, if you have the “America the Beautiful” pass, you can use it in place of the Adventure Pass at any National Forest.
Estimated Completion Time:
Around 2.5 hours
Ideal Weather:
Cooler months in spring or winter. There is no shade on the trail. It can get extremely hot in the summer months. If you want a decent flow for the waterfall, go after a few good rainy days.
Ideal Time:
Morning time will be less crowded and cooler.
Dog-friendly:
Dogs are allowed but definitely NOT recommended.
Restroom:
There are Port-a-Potties at the parking lot.
GETTING THERE:
Three Sister Falls is about 30 minutes from Julian. Google GPS will take you straight to the trailhead. From the 79 highway, you’ll turn onto Pine Hills Road. It is between Julian and Wynola. The next right turn onto Eagle Peak Rd. is easy to miss so keep your eyes peeled. It is just a slight fork off of the main road. There will be several forks in the road. You will want to make a left when you get to Boulder Creek Road. Once you turn on to Boulder Creek Road, you are 8.4 miles from the trailhead.

The last 5 miles to the trailhead, the road turns into washboard road. You can make it in a car, but if you have something with off-roading capabilities it might make the ride a little more comfortable. The road is very bumpy and there is a lot of gravel. You’ll be entering the Inaja Indian Reservation at around 4.2 miles. Please be respectful and don’t stop unless it’s an absolute emergency. The trailhead is at the end of the dirt road.
THE ADVENTURE:
Three Sisters Falls has a bit of an ominous past. Every year, around 30-50 underprepared hikers have to be rescued via helicopter from the canyon. Unfortunately, some adventurers have not survived their trips. This has resulted in the U.S Forest Service
As I mentioned above, this trail can easily trick unsuspecting hikers. From the parking lot, you’ll pass a metal gate and follow the dirt road down the hill. About 0.6 miles, you’ll reach a wooden post pointing toward the falls. This is when you make a left and begin your descent into the canyon. At this point, you will already get your first glimpse of the falls. Being able to see them so easily tricks you into thinking that is going to be a super quick and easy hike. We have seen a lot of people with very little to no water on the trail. DO NOT make this mistake! It is not only a bad idea, but it could be fatal. We can not stress enough to bring more water than you need. The other thing that is very important is shoes with a lot of traction. There are some pretty steep hills.
The terrain changes make this hike pretty cool. Right around the 1-mile mark, you will make a right turn and head into a semi-forest section with a lot of trees. It almost has a sleepy hollow kind of vibe. In warmer months, this is most likely going to be the only shade that you will find on this trail.
After the foresty area, you’ll go through some rocky, slippery areas. At the 1.4 miles mark, you will find yourself at the sign pointing toward the new route for this trail. The last time we went a couple of weeks ago, we were unaware that there had been major changes made to this trail. This used to be the point where you would go up to the edge, take a deep breath, grab the rope and slowly do a semi rappel down the first of 2 pretty sketchy ropes. After the 2 ropes and some rock scrambling, you would find yourself at the bottom of the canyon where the trail would zig-zag back and forth over the stream that was being fed by the 3 Sisters Falls. It ended with a climb up the lower fall to a nice spot to have lunch and possibly a dip. It was a blast! Sadly, due to all the rescues, they made the decision to make the trail a lot safer.
On a positive note, the newer and safer trail is now more accessible to a wider range of hikers. It took the trail from a hard hike to an intermediate hike. After passing the split from the old trail, you will trace the canyon’s walls for another 3/4 of a mile until you reach the falls. There is some simple rock climb over a few rock piles. Once reaching the falls, watch your step. It is a giant slabby and slippery boulder. This is where your good traction shoes are required. The best thing is to find indentions in the rock to help overcome the slippery 30 or so feet to the top of the falls.
When you cross over to the other side of the falls, there is a way for you to climb up to the upper tiers. It is very tricky and dangerous. We wouldn’t recommend it unless you have very good hiking shoes with amazing traction and know what you’re doing.

After you leave the waterfall, you will get your workout in. Since the way down is all downhill, now you have to go back up. Holy leg day Batman! It wasn’t the hardest climb that we have done, but it is definitely enough to get you breathing a little bit heavy.
On our last hike, we got treated to some amazing piloting skills when the Sheriff’s Department did a flyover in their chopper as we made our way back up that 1000 ft hill. Hopefully, they were just practicing and not looking for someone. That pilot had to have guts of steel to be swinging that helicopter through the canyon-like that!
Overall, as much as we miss the old, more adventurous trail, we still think that this one deserves a go at least once! Have you done both versions of this trail? What do you think of the new route? Let us know in the comments below.
Happy Adventuring. Don’t forget to follow us on Instagram, subscribe to our Youtube channel, and sign up for our newsletter!
RECOMMEND GEAR:
These are the gear that we personally use and find helpful for this particular adventure. Don’t forget to check out our Recommended Gear section as well.
The majority of these links are through our affiliate links so if you buy something, it is at no extra cost for you but it helps us support the site. That being said, don’t buy something just to support us, buy something if you think it will enhance your travels and adventures.
• Sunscreen:
We use eco-friendly, reef-safe sunscreen. Alba Botanica Hawaiian Sunscreen or Sun Bum Sunscreen
• Good traction hiking shoes:
This is a must! The slabby areas near the waterfalls
• Water
We can’t stress enough! Bring more water than you think you need for this trail. It gets very warm. Vy uses the Camelback L.U.X.E. Dustin uses the Clik Small pack (sadly Clik is no longer around).
• Lunch and snacks
This hike is in the middle of nowhere so it is good to bring lunch and plenty of snacks. The waterfalls area is a great place to take a break for some lunch.
CAMERA GEAR:
• Camera:
Sony a7 III
Gopro Hero 7 Black
• Lenses:
Sony 24 -70mm f/2.8 Carl Zeiss Vario Sonnar T Zoom Lens
• Accessories:
GoPro The Handler Floating Hand Grip – Official GoPro Mount
Aluminum GoPro protection frame
SandMarc Extended GoPro Pole
Hybrid Pro Filters – DSLR / Mirrorless
Cinema CPL Filter – HERO 9


2 Comments
Ana
I love your organization and details provided for this hike. Wondering if an adventure pass is required to park, I’ve seen some people say yes and others say no and didn’t see your info on this. Also, what month did you go in the posted pics, I’m just wondering if there are any water right now in December. Thanks!
Vy
Hi Ana, as a rule of thumb for Southern California National Forest, you’ll need Adventure Pass in places that have standard amenity fee sites, such as those that provide designated developed parking, picnic tables, toilet facilities, security, interpretive signs, and trash receptacles. I don’t believe Three Sister Falls is considered one of them as of now. So I don’t think you’ll need the Adventure Pass. Don’t forget, if you have the “America the Beautiful” pass, you can use it in place of the Adventure Pass.
As for the months, I recommend going after a few good rain days. The fall will be dry now since we just passed through the Summer with very minimal rain. If I remember correctly, that picture was in February. I think we had some good rains before that. I hope it helps! Good luck and enjoy your adventure. 😀